15 Easy Pie Cups
There is just something about a little pie that makes people smile before they even take a bite. Maybe it is because everybody at the table gets their very own, with their name on it, in a way — no waiting for a slice, no arguing over who got the bigger piece. In my house, when I set down a tray of mini pies, the whole room goes quiet for a second, and then everybody reaches for their favorite flavor at the same time.
I also love pie cups because they take away all the hard parts of making a big pie. There is no slicing and lifting a wobbly piece that falls apart on the way to the plate, no soggy bottom crust, and no serving mess at all — you just hand each person a cup and a fork. A plain muffin tin does all the work of shaping them, and store-bought pie crust means you can have a tray of these in the oven in about fifteen minutes.
This list has my 15 favorite easy pie cups, from warm cinnamon apple and classic pecan to cool, no-bake chocolate cream and banana cream cups that set right in the fridge. Some are baked in pie crust, some sit in a buttery graham cracker crust, and every single one is simple enough for a weeknight but pretty enough for a holiday table. Make one flavor, or make three and let everybody pick — that is the real fun of pie cups.
Mini Apple Pie Cups
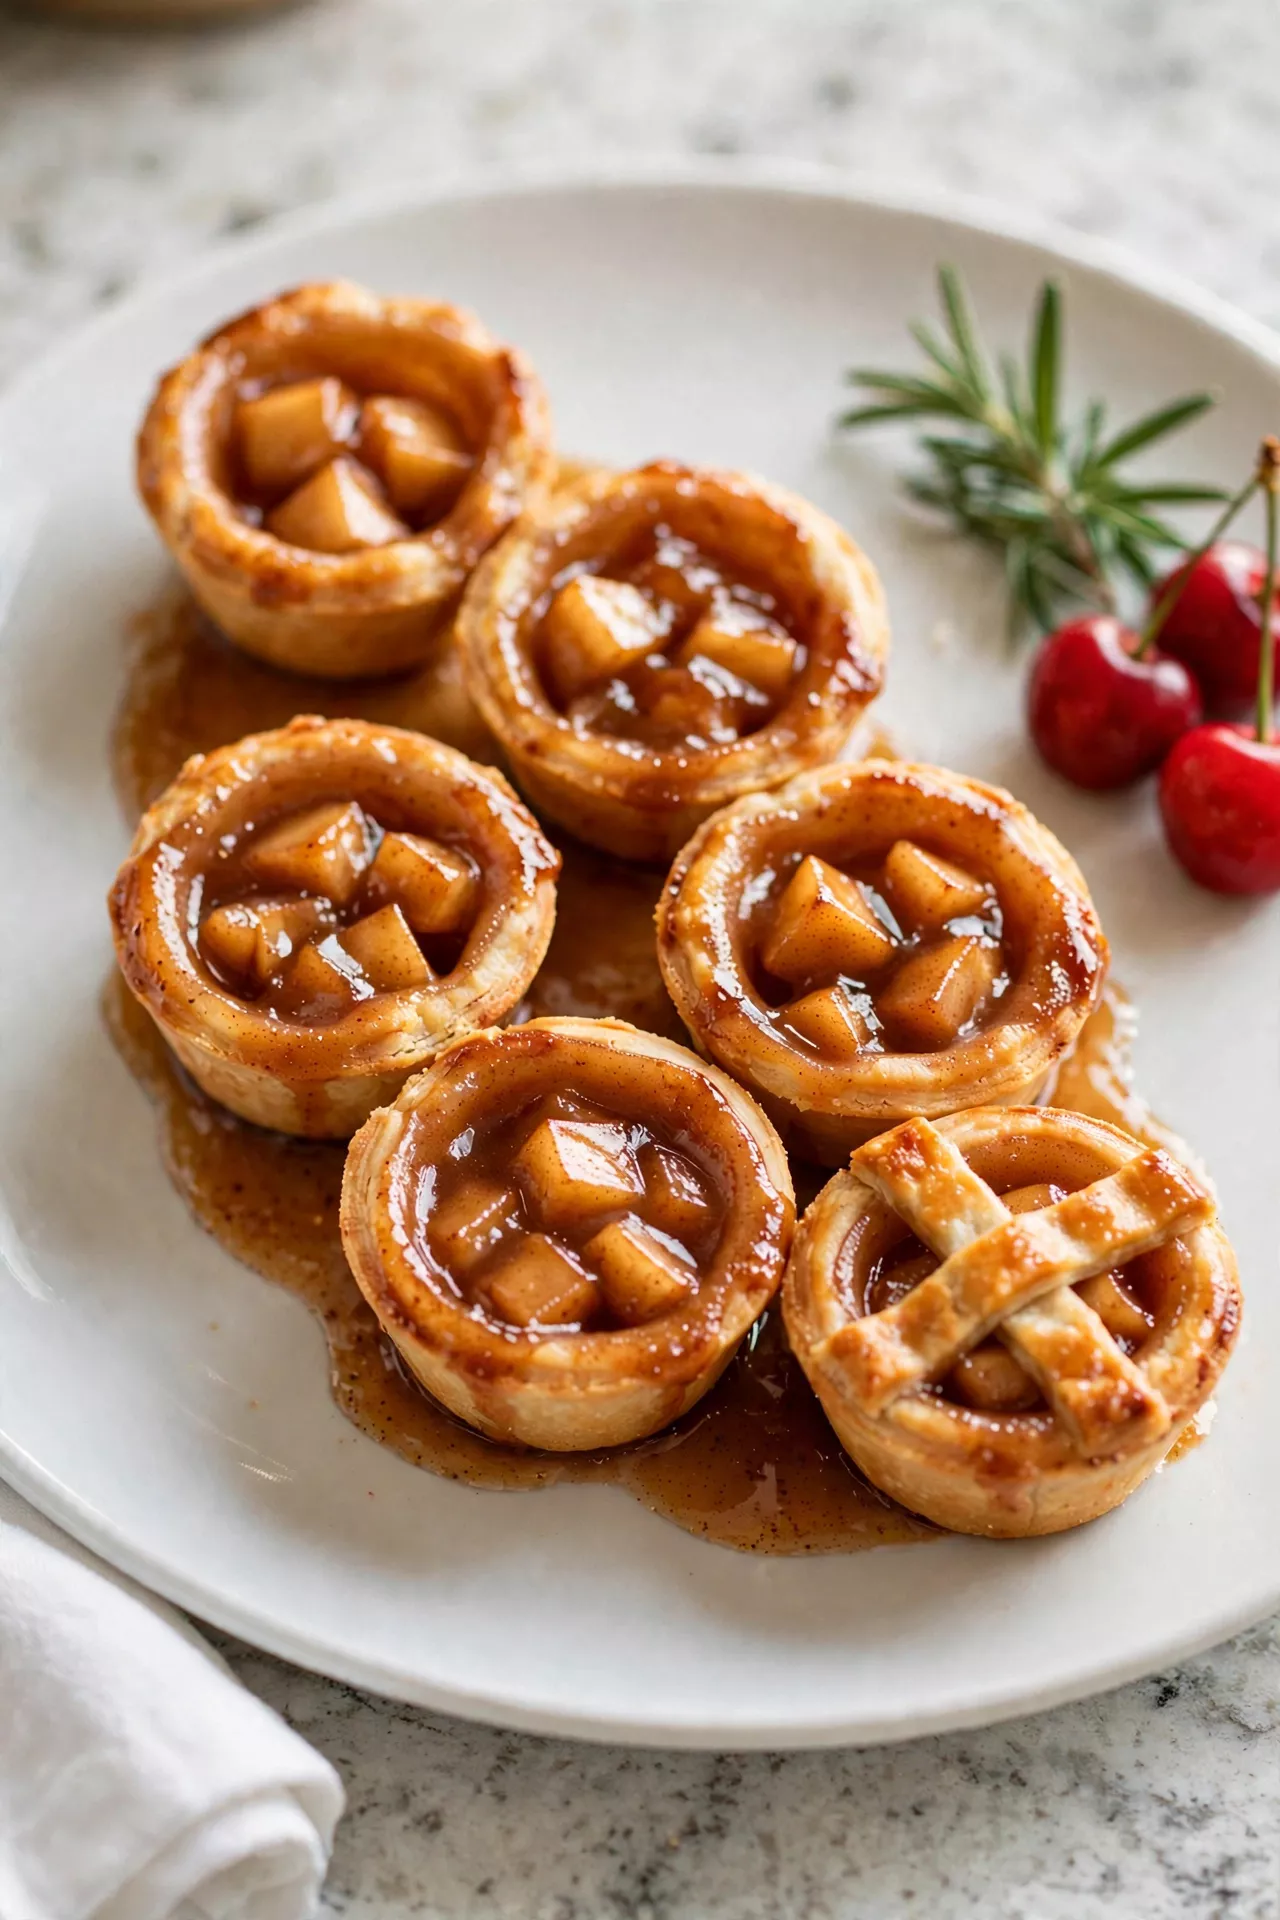
These little apple pies taste just like the big classic, only cuter — tender cinnamon apples tucked into a flaky crust with a sweet crumb topping. They bake up bubbly and golden, and they are wonderful warm with a small scoop of vanilla ice cream. This is the pie cup my family asks for first every fall.
Prep Time: 20 minutes | Cook Time: 20 minutes | Servings: 12
Ingredients
- 2 refrigerated pie crusts (one 14.1-ounce package)
- 3 cups finely diced apples (about 3 medium apples, peeled)
- 1/3 cup granulated sugar
- 2 tablespoons all-purpose flour
- 1 teaspoon ground cinnamon
- 1/4 teaspoon ground nutmeg
- 1 teaspoon lemon juice
- 1 tablespoon cold butter, cut into tiny pieces
- For the crumb top: 1/4 cup flour, 1/4 cup brown sugar, 2 tablespoons cold butter
Instructions
- Preheat the oven to 375°F (190°C) and lightly grease a 12-cup muffin tin. Let the pie crusts sit at room temperature for about 10 minutes so they unroll without cracking.
- Cut the crust rounds by unrolling the pie crusts and cutting out 12 circles with a 4-inch round cutter or the rim of a wide glass. Gently press each circle into a muffin cup, letting the edges come up the sides.
- Mix the apple filling by tossing the diced apples with the lemon juice, then stirring in the sugar, flour, cinnamon, and nutmeg until every piece is coated. Small apple pieces are the secret here — they cook soft in the short baking time.
- Fill the cups with the apple mixture, dividing it evenly and mounding it slightly in the center. Dot the tops with the tiny pieces of cold butter.
- Make the crumb topping by rubbing the flour, brown sugar, and cold butter together with your fingers until it looks like coarse crumbs. Sprinkle a spoonful over each cup.
- Bake for 18 to 22 minutes, until the crust edges are golden, the filling is bubbling, and the crumb top is lightly browned. If the tops brown too fast, lay a piece of foil loosely over the pan for the last few minutes.
- Cool in the pan for at least 10 minutes so the filling can set. Warm cups will crumble if you rush them, so give them this little rest.
- Serve warm by running a small knife around each cup and lifting it out gently. They are lovely plain, and even better with vanilla ice cream or a drizzle of caramel sauce.
Mini Cherry Pie Cups
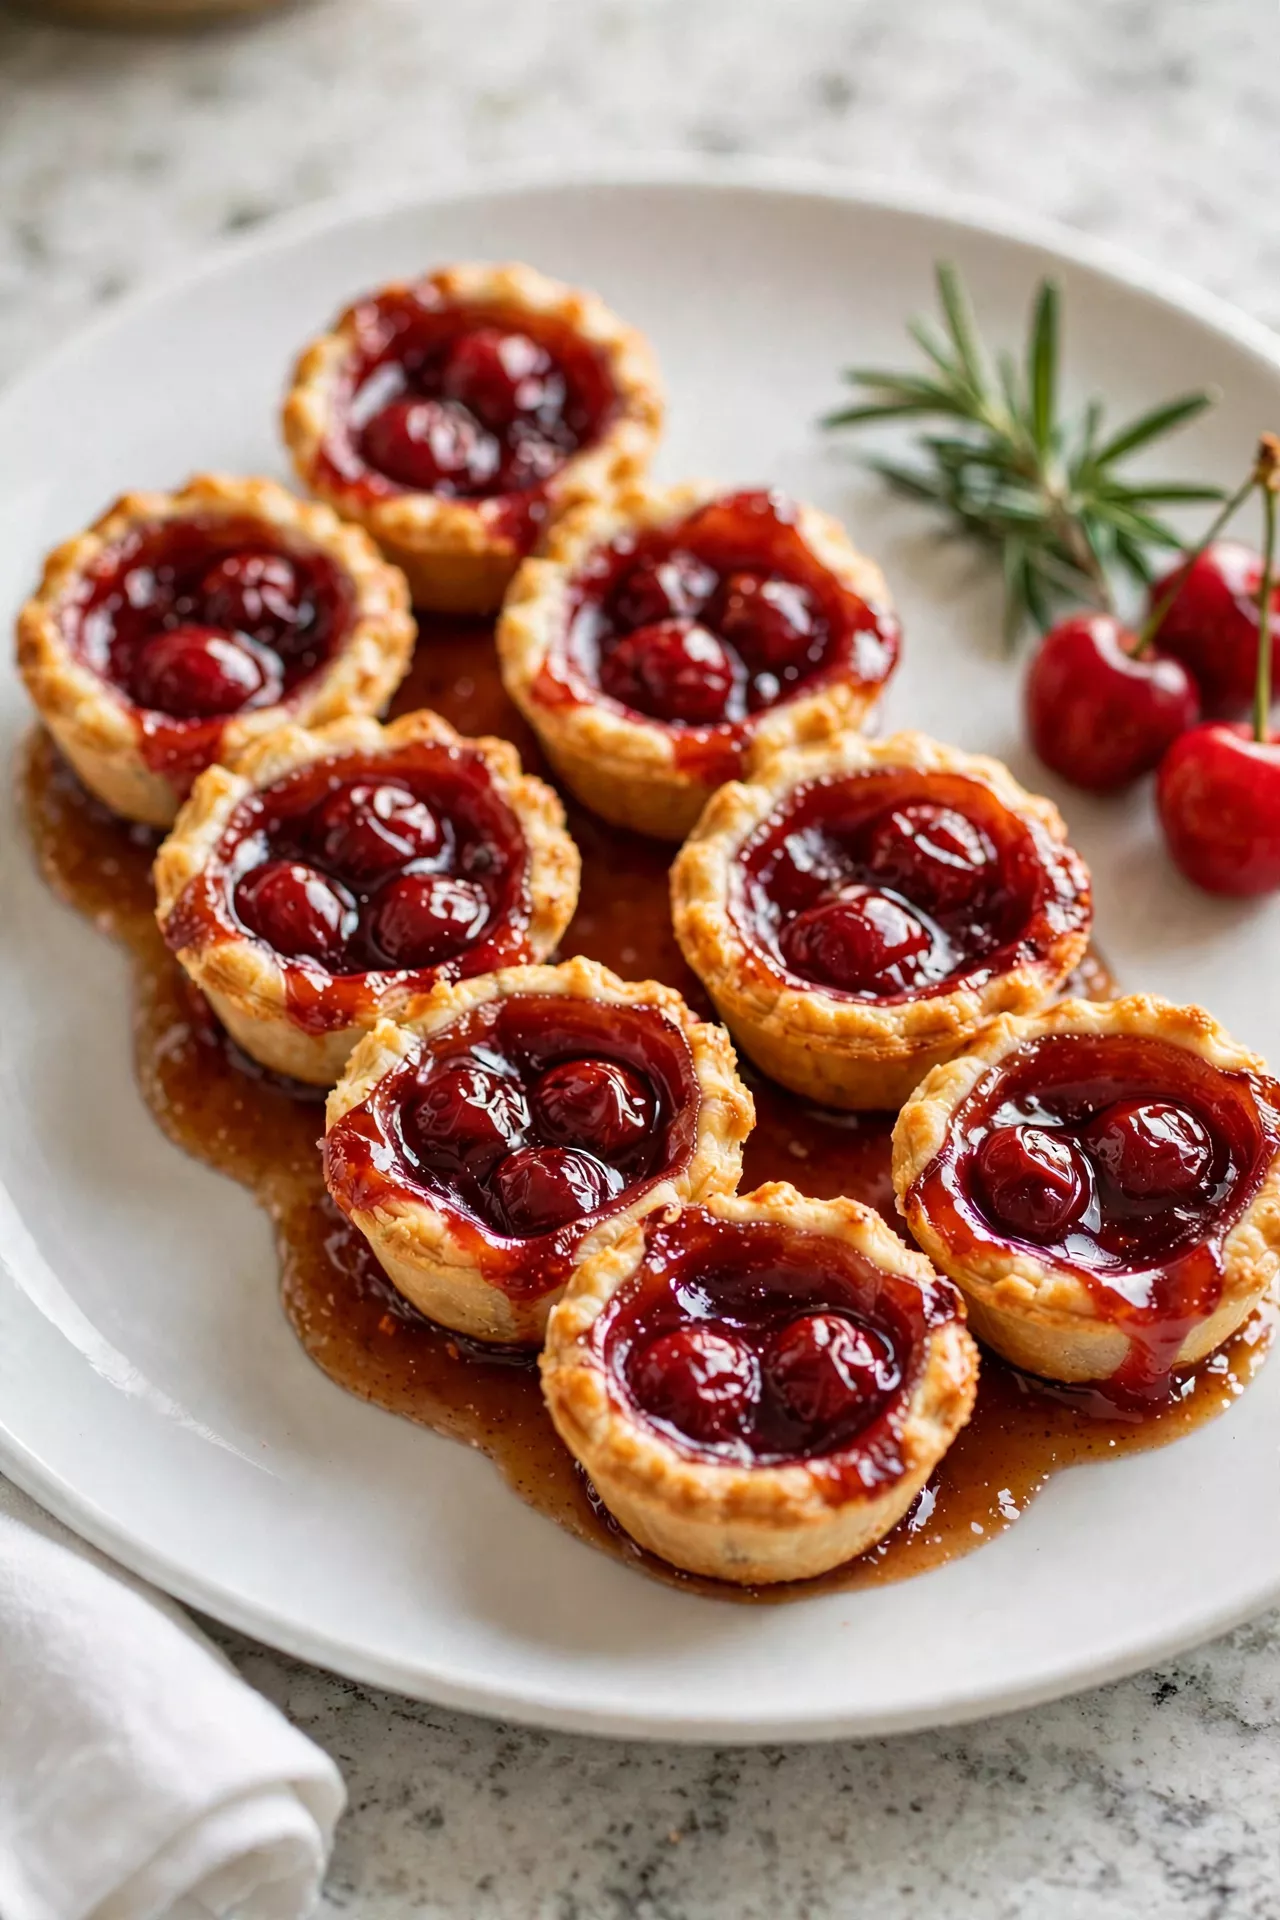
Bright, sweet, and a little bit tart, these cherry pie cups are the fastest fruit pie on this whole list because the filling comes right from a can. A tiny touch of almond extract makes the cherries taste like they came from a bakery. Finish them with a shiny egg wash and a sprinkle of coarse sugar and they look like little jewels.
Prep Time: 15 minutes | Cook Time: 18 minutes | Servings: 12
Ingredients
- 2 refrigerated pie crusts (one 14.1-ounce package)
- 1 (21-ounce) can cherry pie filling
- 1/4 teaspoon almond extract
- 1 large egg, beaten with 1 teaspoon water (for egg wash)
- 1 tablespoon coarse sugar, for sprinkling
Instructions
- Preheat the oven to 375°F (190°C) and lightly grease a 12-cup muffin tin. Let the crusts rest at room temperature for 10 minutes before unrolling.
- Cut and press the crusts by cutting 12 circles, about 4 inches wide, and pressing one into each muffin cup. Save the crust scraps — you will use them for the little tops.
- Season the filling by stirring the almond extract into the can of cherry pie filling right in a small bowl. This one tiny step makes canned filling taste homemade.
- Fill each cup with about 2 tablespoons of cherry filling, stopping just below the rim. Overfilled cups bubble over and stick, so leave a little room.
- Cut little tops from the crust scraps — small stars, hearts, or thin strips for a mini lattice — and lay one on top of each cup. Press the edges lightly to the crust below.
- Brush with egg wash over the tops and sprinkle with coarse sugar. This gives the finished cups a pretty golden shine and a gentle crunch.
- Bake for 16 to 19 minutes, until the crust is deep golden and the cherry filling is bubbling at the edges.
- Cool before serving for 10 to 15 minutes in the pan, then lift out carefully. Serve at room temperature or slightly warm.
Mini Blueberry Pie Cups
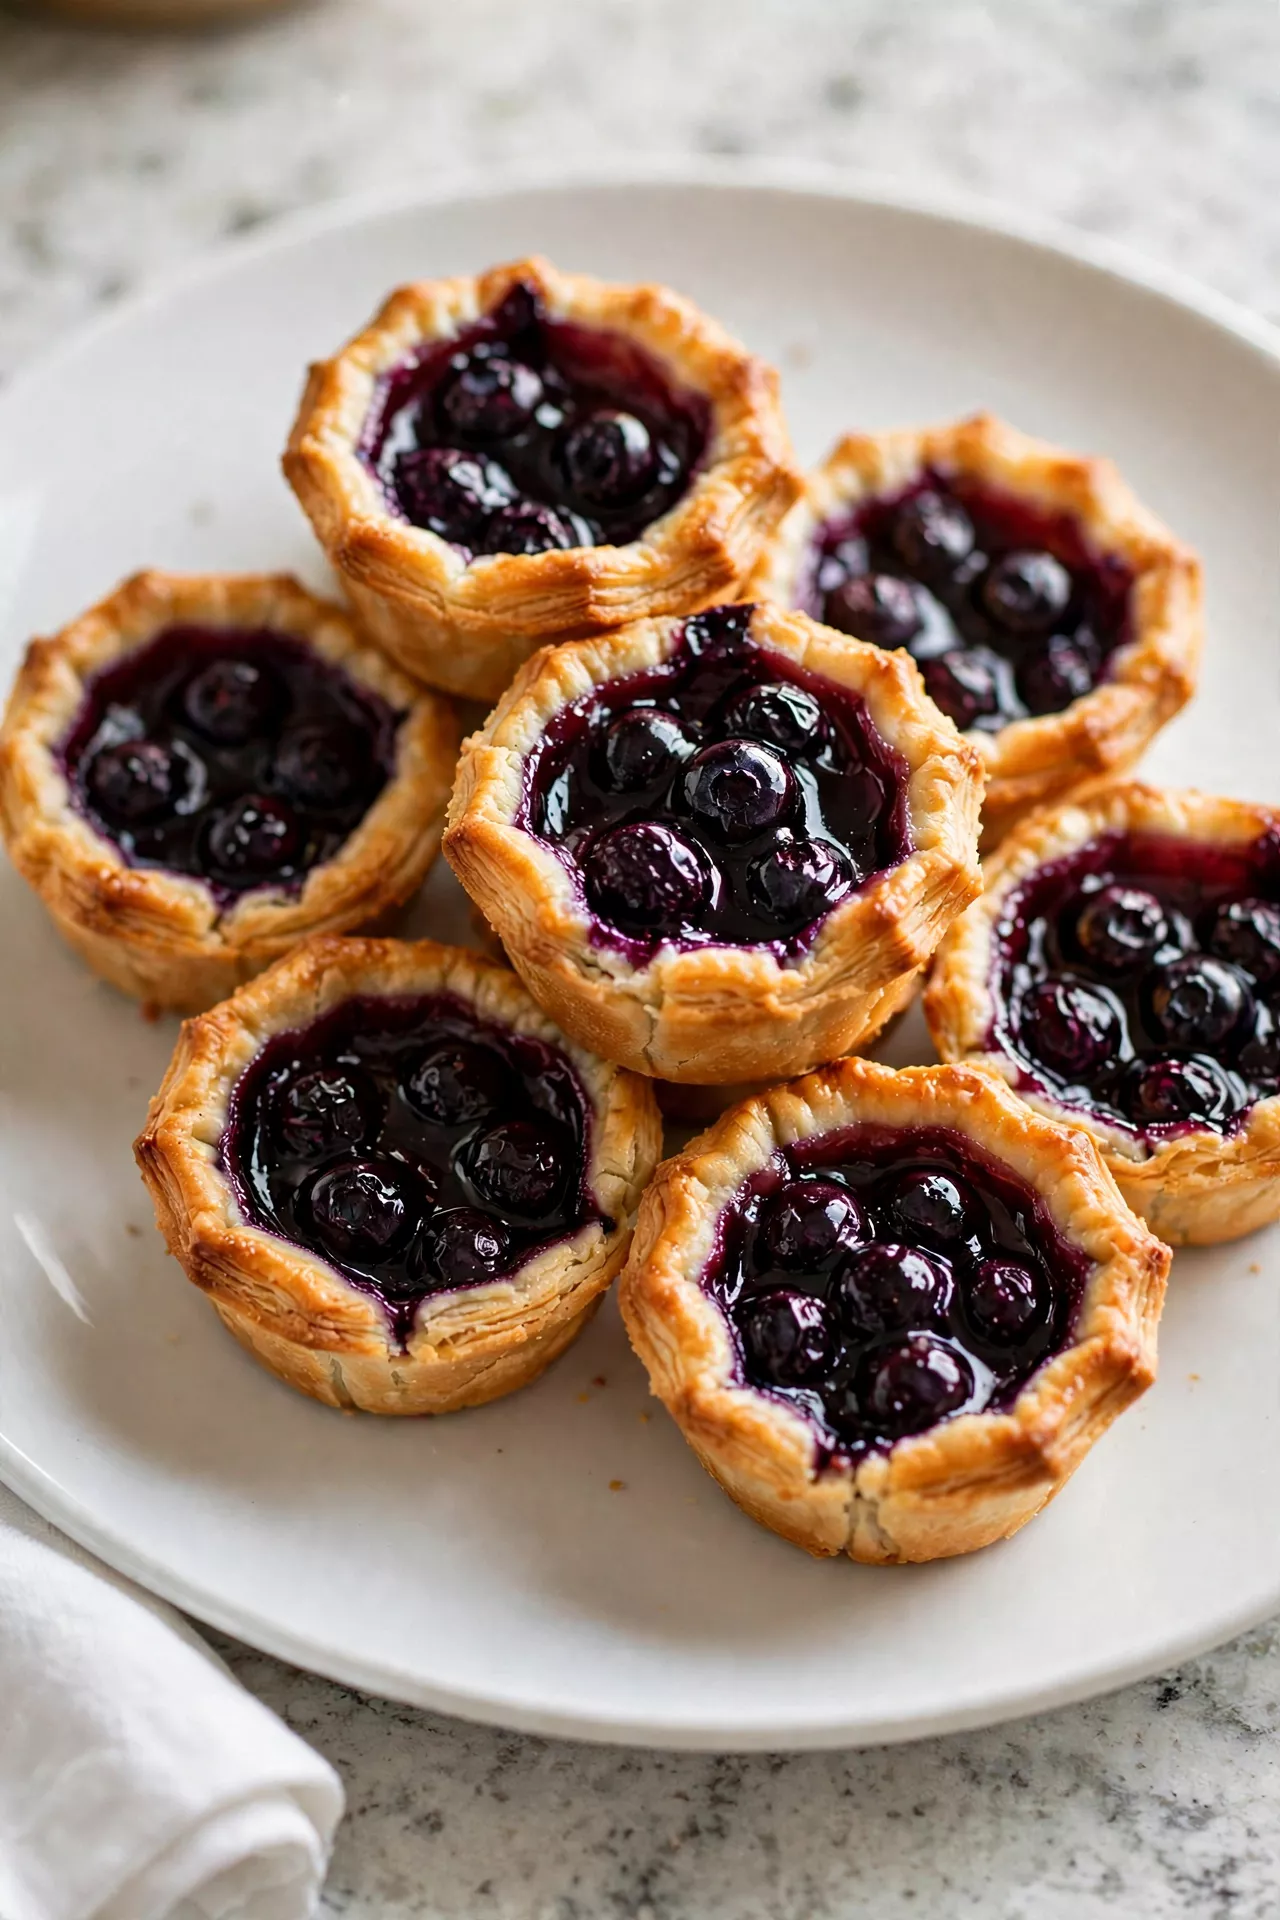
These blueberry cups bake up jammy and sweet with a pretty deep-purple filling that bubbles up around the edges. Fresh blueberries, a little lemon, and a golden crust make them taste like summer in two bites. They are beautiful on a dessert tray and hold together neatly, so they travel well to picnics and potlucks.
Prep Time: 20 minutes | Cook Time: 22 minutes | Servings: 12
Ingredients
- 2 refrigerated pie crusts (one 14.1-ounce package)
- 2 1/2 cups fresh blueberries
- 1/3 cup granulated sugar
- 2 tablespoons cornstarch
- 1 teaspoon lemon zest
- 1 tablespoon lemon juice
- 1 tablespoon butter, cut into tiny pieces
- 1 large egg, beaten with 1 teaspoon water (for egg wash)
Instructions
- Preheat the oven to 375°F (190°C) and lightly grease a 12-cup muffin tin. Set the crusts out for 10 minutes so they soften enough to cut cleanly.
- Press in the crusts by cutting 12 circles about 4 inches wide and easing one into each muffin cup, pressing gently against the bottom and sides.
- Mix the blueberry filling by stirring the blueberries with the sugar, cornstarch, lemon zest, and lemon juice until the berries are evenly coated and glossy. The cornstarch will thicken the juices as they bake so the cups are not runny.
- Fill the cups almost to the top with the berry mixture, and dot each one with a few tiny pieces of butter.
- Add simple tops by cutting thin strips from the crust scraps and laying two or three across each cup in a loose crisscross, or leave the cups open-faced if you like. Brush any crust tops with egg wash.
- Bake for 20 to 24 minutes, until the crust is golden and the blueberry filling is thick and bubbling in the center of the cups.
- Cool completely in the pan for at least 20 minutes. Blueberry filling stays loose while hot and sets up as it cools, so this rest matters.
- Lift out and serve at room temperature. A spoonful of whipped cream on top is never a bad idea.
Mini Pecan Pie Cups
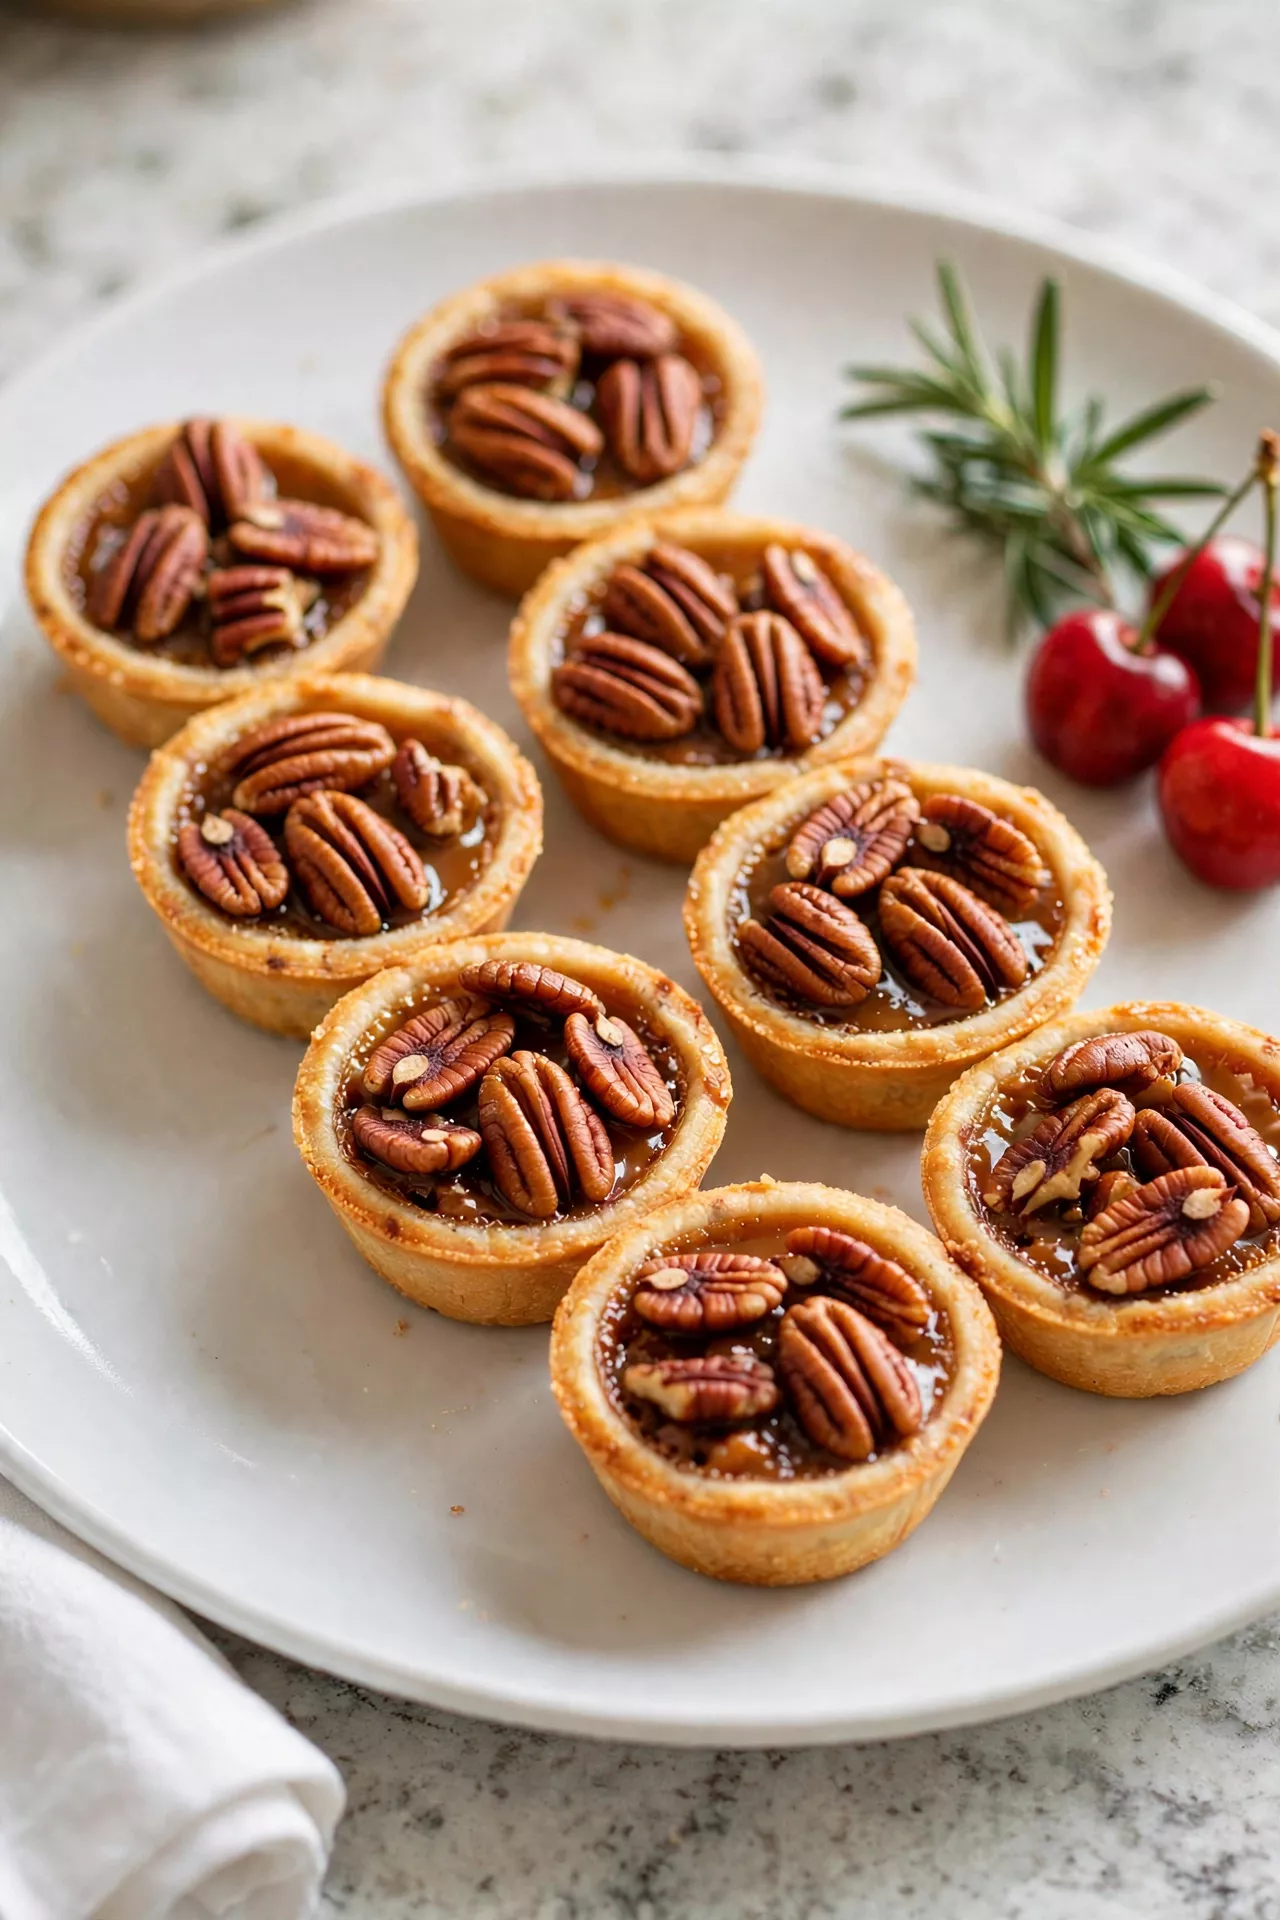
All the rich, gooey, brown-sugar flavor of a classic pecan pie, packed into a two-bite cup with a buttery crust. The filling sets up soft and caramel-like around crunchy pecans, and the small size keeps them sweet without being too much. These disappear fast at Thanksgiving, so I always make a double batch.
Prep Time: 15 minutes | Cook Time: 25 minutes | Servings: 12
Ingredients
- 1 refrigerated pie crust (half of a 14.1-ounce package), or 2 for thicker crusts
- 1 cup chopped pecans, plus 12 pecan halves for the tops
- 2 large eggs
- 1/2 cup packed brown sugar
- 1/2 cup light corn syrup
- 2 tablespoons unsalted butter, melted
- 1 teaspoon vanilla extract
- 1/4 teaspoon salt
Instructions
- Preheat the oven to 350°F (175°C) and lightly grease a 12-cup muffin tin. Let the pie crust soften at room temperature for 10 minutes.
- Cut and press the crust into 12 circles about 4 inches wide, pressing one into each muffin cup. Pecan pie filling is rich and a little runny, so press the crust firmly with no tears.
- Add the pecans first by spooning about 2 teaspoons of chopped pecans into the bottom of each crust. Putting the nuts in first helps them stay in every bite instead of floating.
- Whisk the filling by beating the eggs, brown sugar, corn syrup, melted butter, vanilla, and salt together until smooth and well blended.
- Pour the filling over the pecans, filling each cup about three-quarters full. The filling puffs a little as it bakes, so do not fill to the very top.
- Top each cup with a single pecan half, pressed gently into the filling. It looks pretty and tells everyone exactly what flavor they are getting.
- Bake for 23 to 27 minutes, until the edges of the filling are set and the centers jiggle just slightly when you nudge the pan. They will firm up as they cool.
- Cool in the pan for at least 20 minutes, then lift out and cool completely. Serve at room temperature — the filling turns perfectly gooey-chewy as it rests.
Mini Lemon Meringue Pie Cups
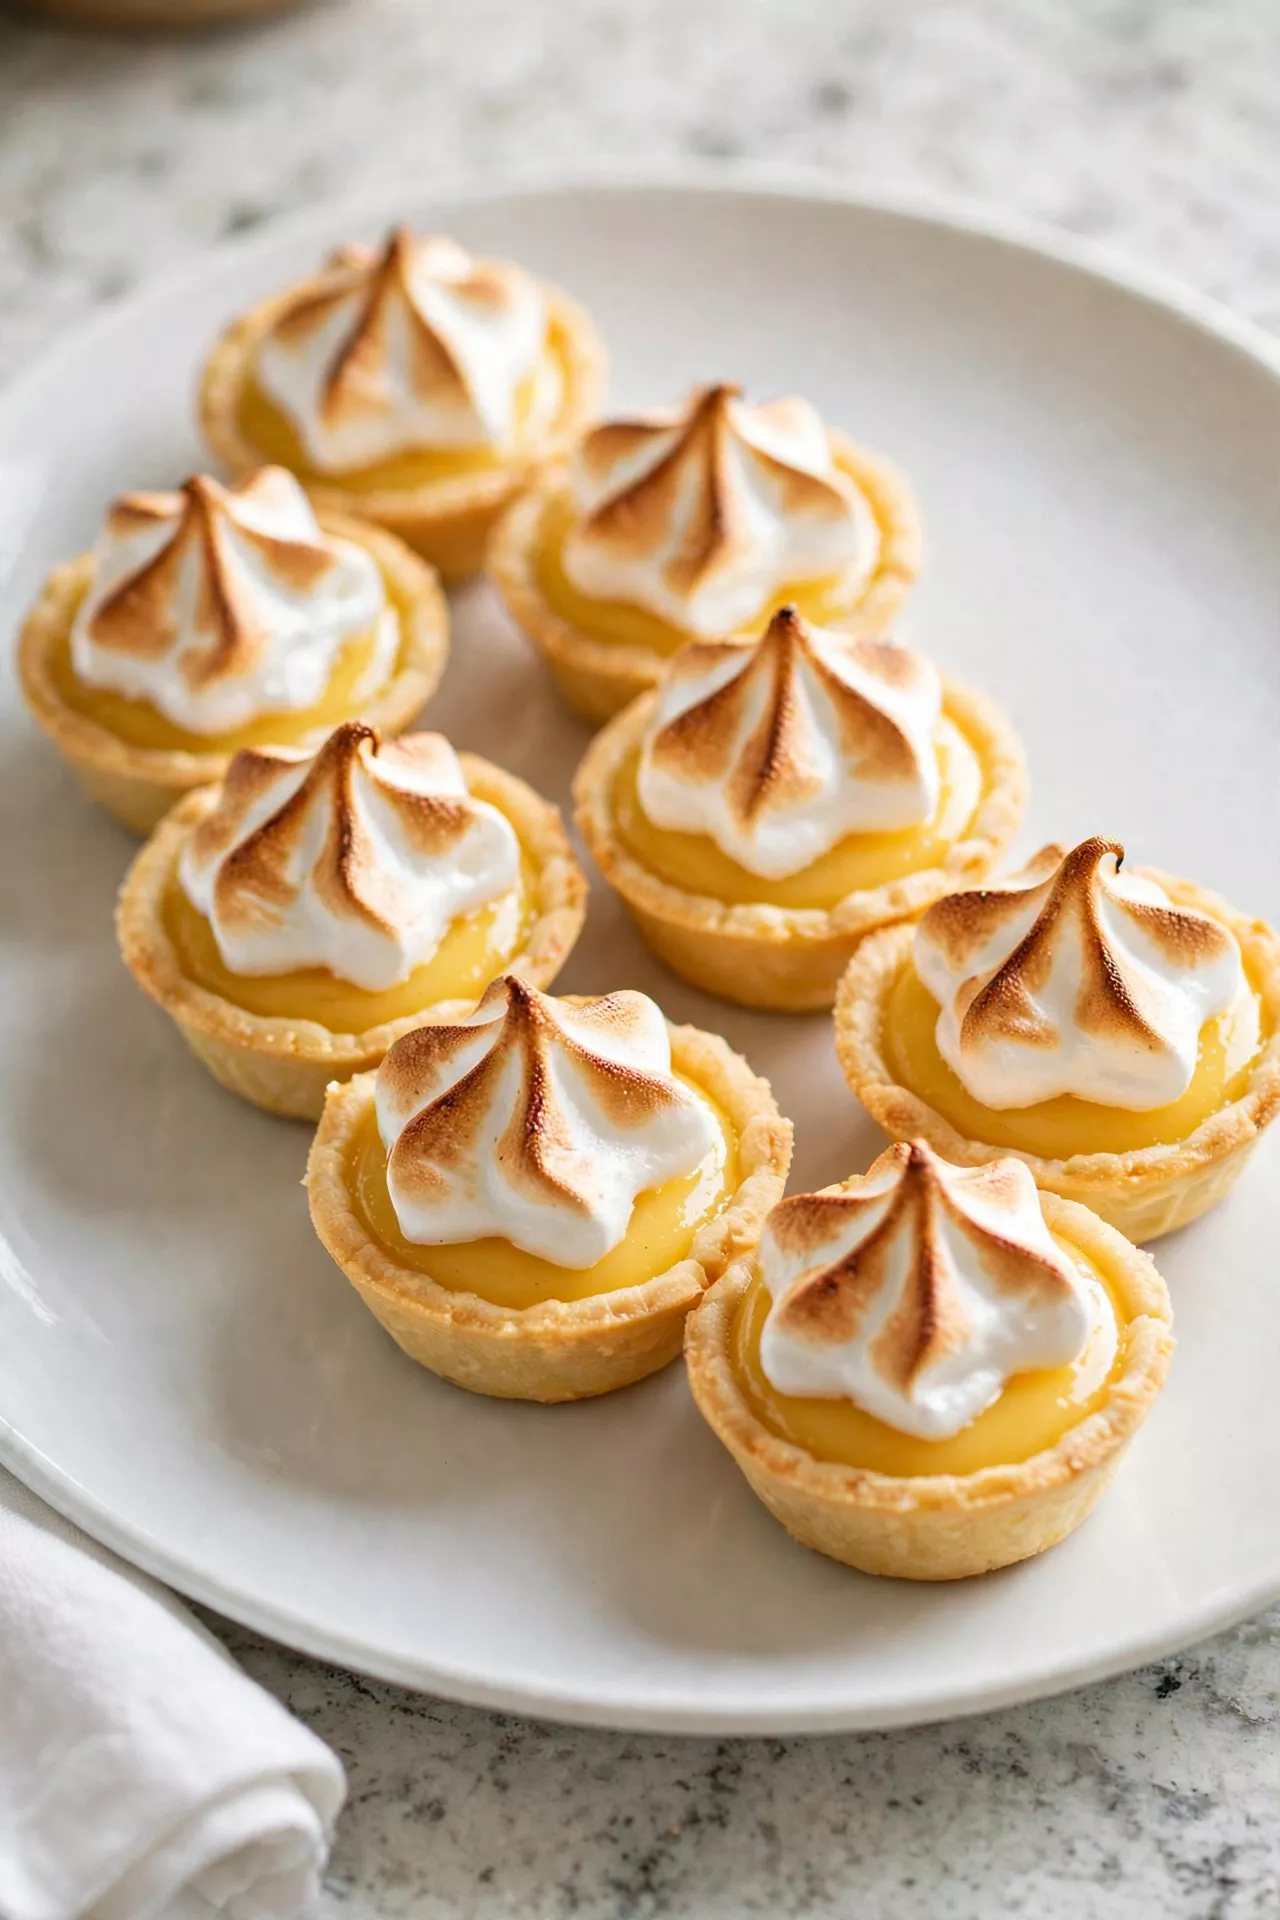
These sunny little cups have a buttery graham crust, a bright and tangy lemon filling, and a cloud of sweet meringue on top, toasted to a soft gold. They taste like a bite of spring and look so fancy that nobody will guess how easy they were. The lemon filling is the simple condensed-milk kind, so there is no standing over a stove stirring curd.
Prep Time: 25 minutes | Cook Time: 12 minutes | Servings: 12
Ingredients
- 1 1/2 cups graham cracker crumbs
- 5 tablespoons unsalted butter, melted
- 2 tablespoons granulated sugar (for the crust)
- 1 (14-ounce) can sweetened condensed milk
- 1/2 cup fresh lemon juice (about 3 lemons)
- 2 teaspoons lemon zest
- 3 large egg yolks
- 3 large egg whites, at room temperature
- 1/4 teaspoon cream of tartar
- 1/4 cup granulated sugar (for the meringue)
Instructions
- Preheat the oven to 350°F (175°C) and line a 12-cup muffin tin with paper liners. Liners make these soft-set cups much easier to lift out.
- Make the graham crust by stirring the crumbs, melted butter, and 2 tablespoons sugar together until it looks like wet sand. Spoon about 2 tablespoons into each liner and press down firmly with the bottom of a small glass.
- Bake the crusts for 5 minutes, just until set and fragrant. Leave the oven on — the filled cups go right back in.
- Whisk the lemon filling by beating the sweetened condensed milk, lemon juice, lemon zest, and egg yolks until smooth and slightly thick. It will look pale yellow and creamy.
- Fill the cups with the lemon mixture, almost to the top of the crust, and bake for 8 to 10 minutes, until the edges are set but the centers still have a tiny jiggle. Cool the cups completely, then chill for at least 1 hour.
- Make the meringue by beating the egg whites with the cream of tartar until soft peaks form, then adding the 1/4 cup sugar a spoonful at a time and beating until the meringue is glossy with stiff peaks.
- Pile the meringue onto each chilled cup in a pretty swirl, making sure it touches the crust edges all the way around so it does not shrink away.
- Toast the tops by putting the pan under the broiler for 1 to 2 minutes — watch it the whole time — until the meringue peaks are golden. You can also use a kitchen torch.
- Serve chilled the same day for the fluffiest meringue. Store leftovers in the fridge and eat within 2 days.
Mini Chocolate Cream Pie Cups
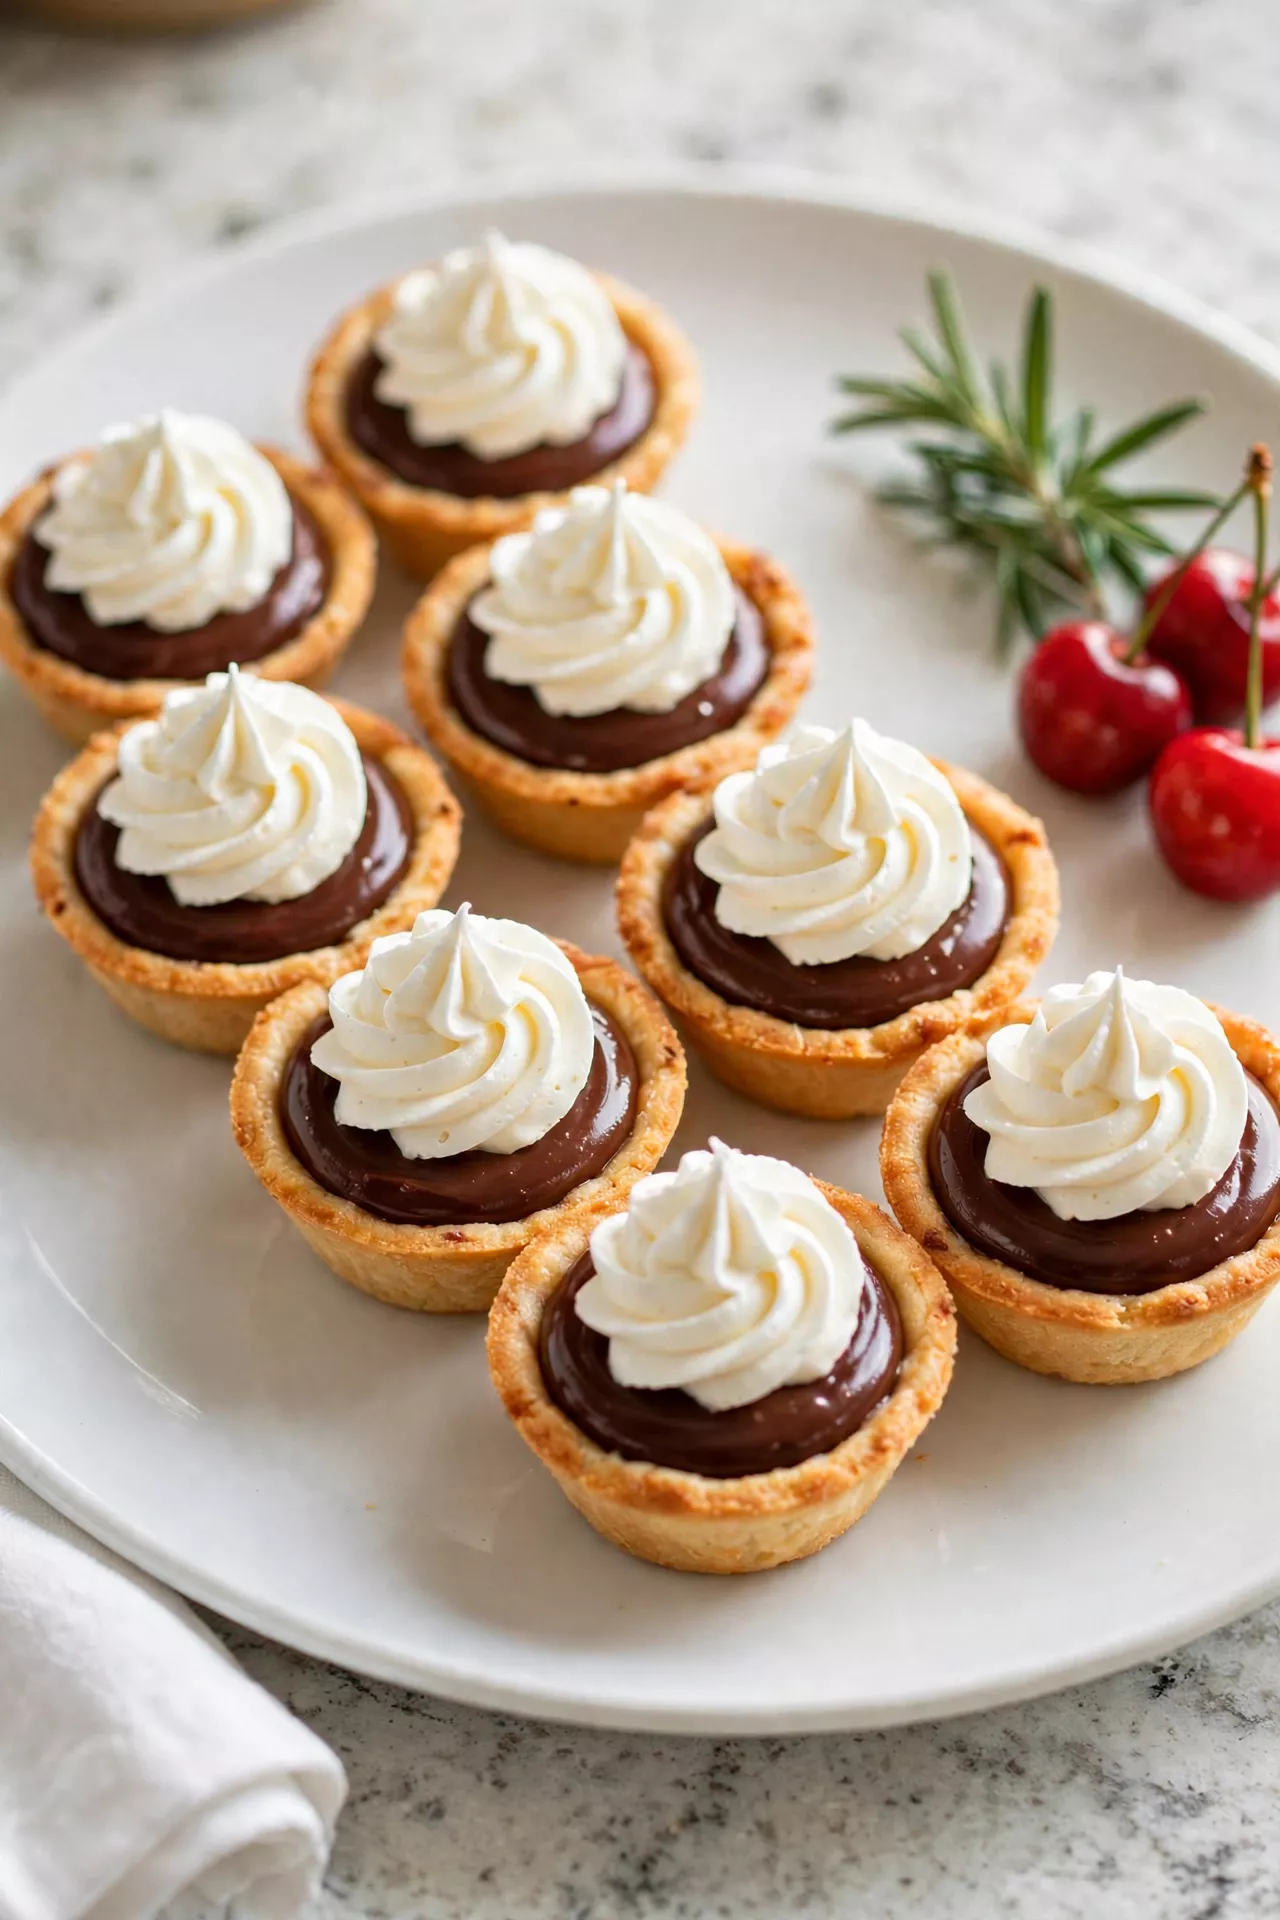
These no-bake chocolate cups are pure comfort — a crunchy graham crust, silky chocolate pudding filling, and a big soft swirl of whipped cream on top. There is no oven and no fuss, just a short chill in the fridge while the filling sets. They are the first dessert to vanish at every family gathering at my house.
Prep Time: 20 minutes | Cook Time: 0 minutes | Servings: 12
Ingredients
- 1 1/2 cups graham cracker crumbs (or chocolate cookie crumbs)
- 5 tablespoons unsalted butter, melted
- 2 tablespoons granulated sugar
- 1 (3.9-ounce) box instant chocolate pudding mix
- 1 3/4 cups cold milk
- 1 1/2 cups whipped cream or whipped topping, plus more for serving
- Chocolate shavings or mini chocolate chips, for the tops
Instructions
- Make the crust mixture by stirring the crumbs, melted butter, and sugar together until every crumb is moistened and it holds together when you squeeze it.
- Press the crusts into a 12-cup muffin tin lined with paper liners, about 2 tablespoons per cup, pressing firmly on the bottom and a little up the sides with the bottom of a small glass.
- Chill the crusts in the fridge for at least 15 minutes while you make the filling. Cold crusts stay firm and slice cleanly under the soft filling.
- Whisk the pudding by beating the instant pudding mix with the cold milk for about 2 minutes, until thick and smooth. Let it stand 5 minutes to set up a little more.
- Fold in whipped cream — about 1 cup of it — gently with a spatula until the filling turns light and mousse-like. Fold slowly so you do not knock out all the air.
- Fill the cups with the chocolate filling, smoothing the tops or leaving soft swirls. Cover the pan loosely with plastic wrap.
- Chill for at least 2 hours, or overnight, until the filling is firm and the crusts hold their shape when you lift a cup out.
- Top and serve with a swirl of whipped cream and a sprinkle of chocolate shavings or mini chips on each cup. Serve cold, straight from the fridge.
Mini Key Lime Pie Cups
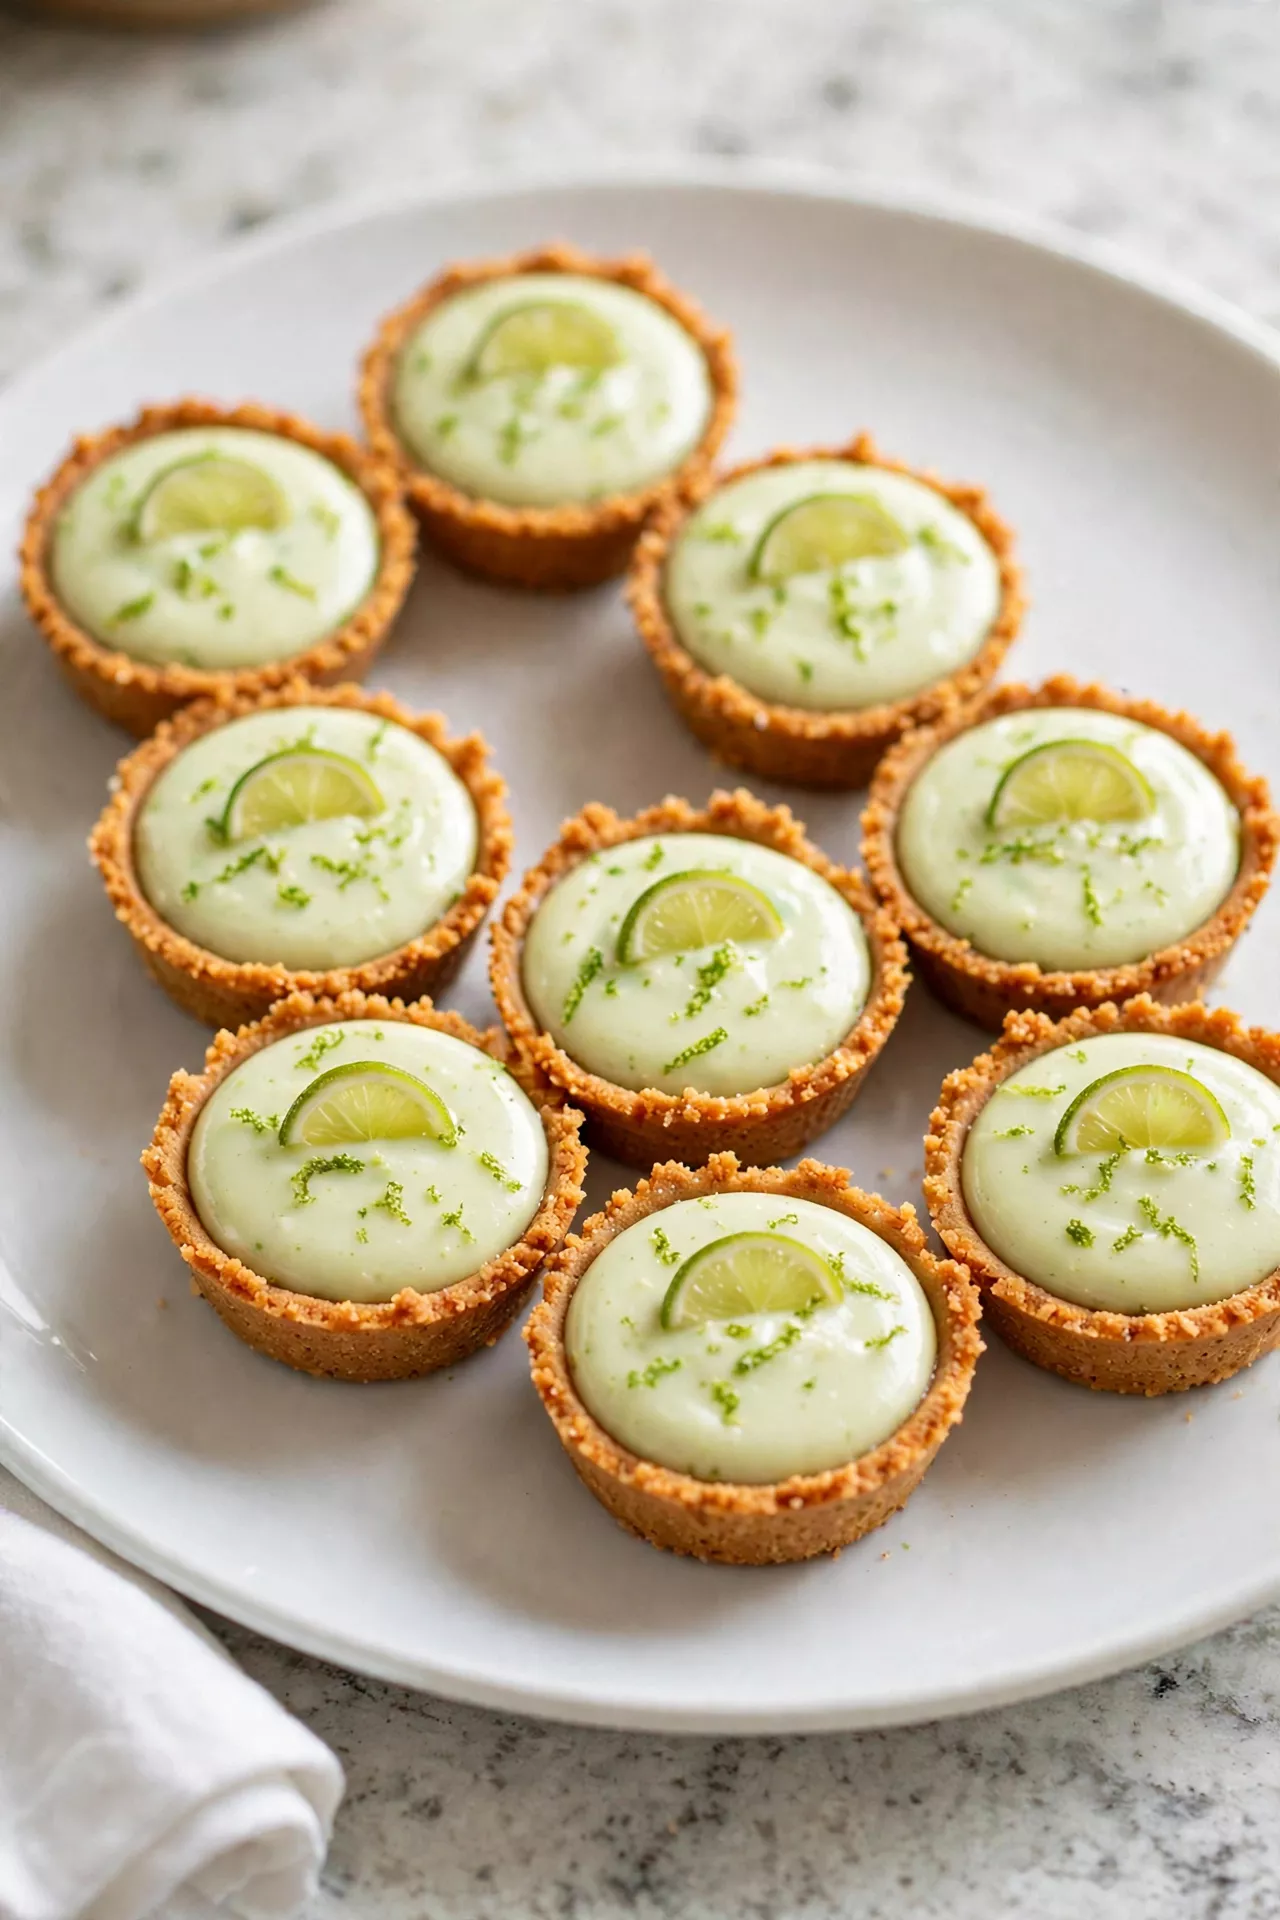
Tart, creamy, and cool, these little key lime cups are sunshine food — a buttery graham crust under a smooth, tangy filling that bakes in just minutes. A short bake sets the filling so each cup slices neatly, and a dollop of whipped cream balances the bright lime. If you cannot find key limes, regular lime juice works just fine and still tastes wonderful.
Prep Time: 15 minutes | Cook Time: 12 minutes | Servings: 12
Ingredients
- 1 1/2 cups graham cracker crumbs
- 5 tablespoons unsalted butter, melted
- 2 tablespoons granulated sugar
- 1 (14-ounce) can sweetened condensed milk
- 1/2 cup key lime juice (or regular lime juice)
- 1 tablespoon lime zest, plus more for garnish
- 3 large egg yolks
- Whipped cream, for serving
Instructions
- Preheat the oven to 350°F (175°C) and line a 12-cup muffin tin with paper liners. Liners help these tender cups come out cleanly.
- Make and press the crusts by mixing the graham crumbs, melted butter, and sugar until it resembles wet sand, then pressing about 2 tablespoons firmly into the bottom of each liner.
- Bake the crusts for 5 minutes, until just set and golden at the edges. Leave the oven on for the filled cups.
- Whisk the filling by beating the sweetened condensed milk, lime juice, lime zest, and egg yolks together until smooth. It will thicken slightly as the lime juice meets the milk — that is exactly what you want.
- Fill the crusts almost to the top with the lime mixture, dividing it evenly between the 12 cups.
- Bake for 7 to 9 minutes more, until the edges look set and the centers jiggle just a little when you shake the pan gently. Do not let the tops brown.
- Cool, then chill the cups on the counter for 20 minutes, then in the fridge for at least 2 hours. Key lime filling firms up and tastes best fully cold.
- Serve cold with a small swirl of whipped cream and a pinch of lime zest on each cup.
Mini Pumpkin Pie Cups
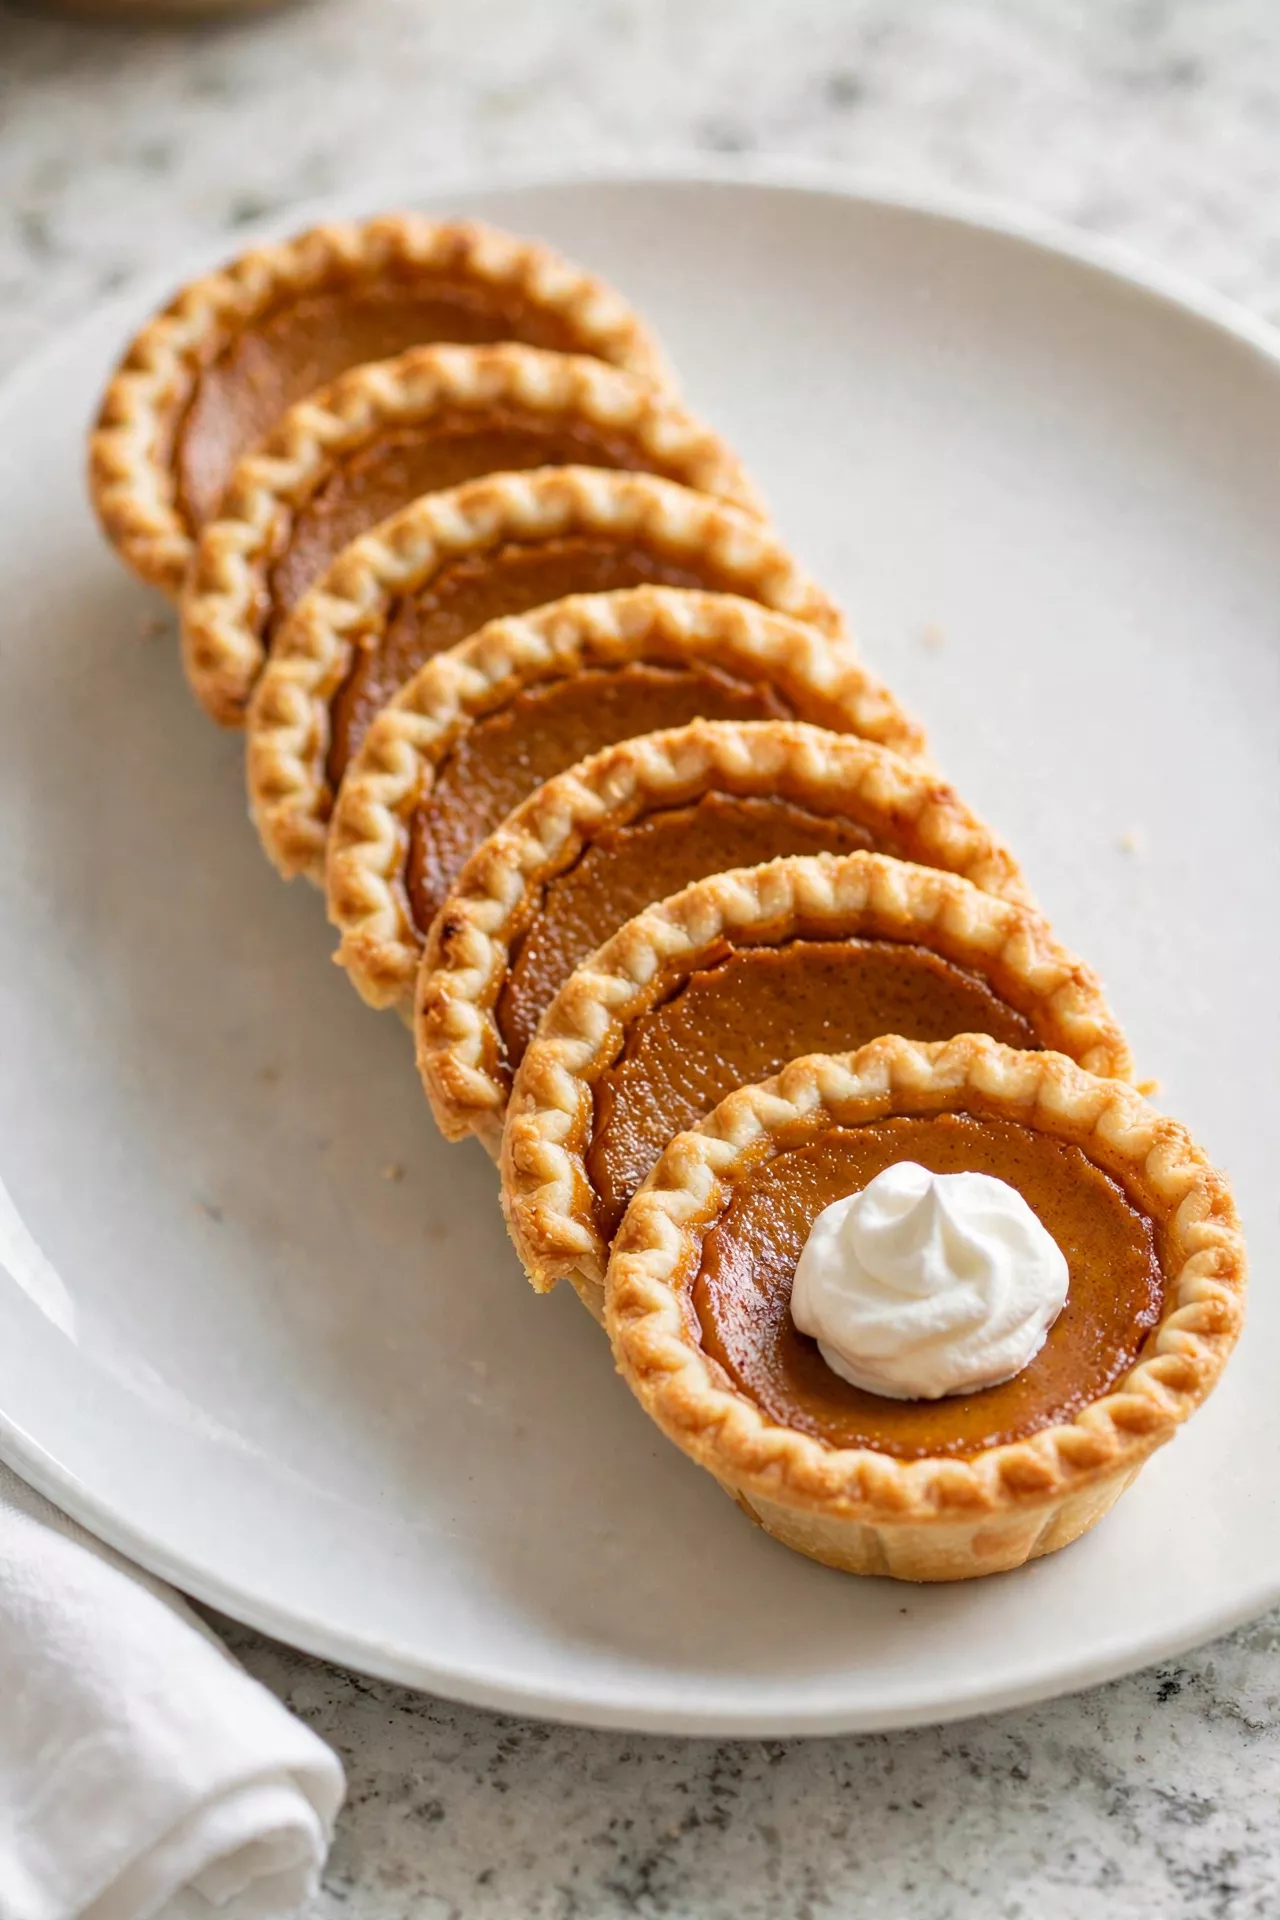
Everything you love about pumpkin pie — warm spices, smooth creamy filling, flaky crust — in a neat little cup you can hold in your hand. These bake in about half the time of a big pie and there is never a cracked top to worry about. A tiny swirl of whipped cream on each one makes them look like they came from a bakery case.
Prep Time: 15 minutes | Cook Time: 30 minutes | Servings: 12
Ingredients
- 2 refrigerated pie crusts (one 14.1-ounce package)
- 1 (15-ounce) can pumpkin puree (not pumpkin pie filling)
- 3/4 cup evaporated milk
- 2 large eggs
- 1/2 cup packed brown sugar
- 1 1/2 teaspoons pumpkin pie spice
- 1/2 teaspoon vanilla extract
- 1/4 teaspoon salt
- Whipped cream, for serving
Instructions
- Preheat the oven to 375°F (190°C) and lightly grease a 12-cup muffin tin. Let the pie crusts soften at room temperature for about 10 minutes.
- Cut and press the crusts by cutting 12 circles about 4 inches wide and pressing one into each muffin cup, making sure the dough hugs the bottom and sides with no air pockets.
- Whisk the pumpkin filling by beating the pumpkin puree, evaporated milk, eggs, brown sugar, pumpkin pie spice, vanilla, and salt together until completely smooth.
- Fill the cups with the pumpkin mixture, almost to the top of the crust. The filling barely rises, so you can fill them generously.
- Bake for 28 to 32 minutes, until the filling is set at the edges and the very center still has a soft jiggle. A knife slid near the edge should come out mostly clean.
- Cool in the pan for 15 minutes — the centers will finish setting as they cool and sink just slightly, which is normal for pumpkin pie.
- Chill before serving for at least 1 hour in the fridge if you have time. Pumpkin pie cups taste best cold or at cool room temperature.
- Top and serve each cup with a swirl of whipped cream and, if you like, the tiniest pinch of extra pumpkin pie spice.
Mini Peach Pie Cups
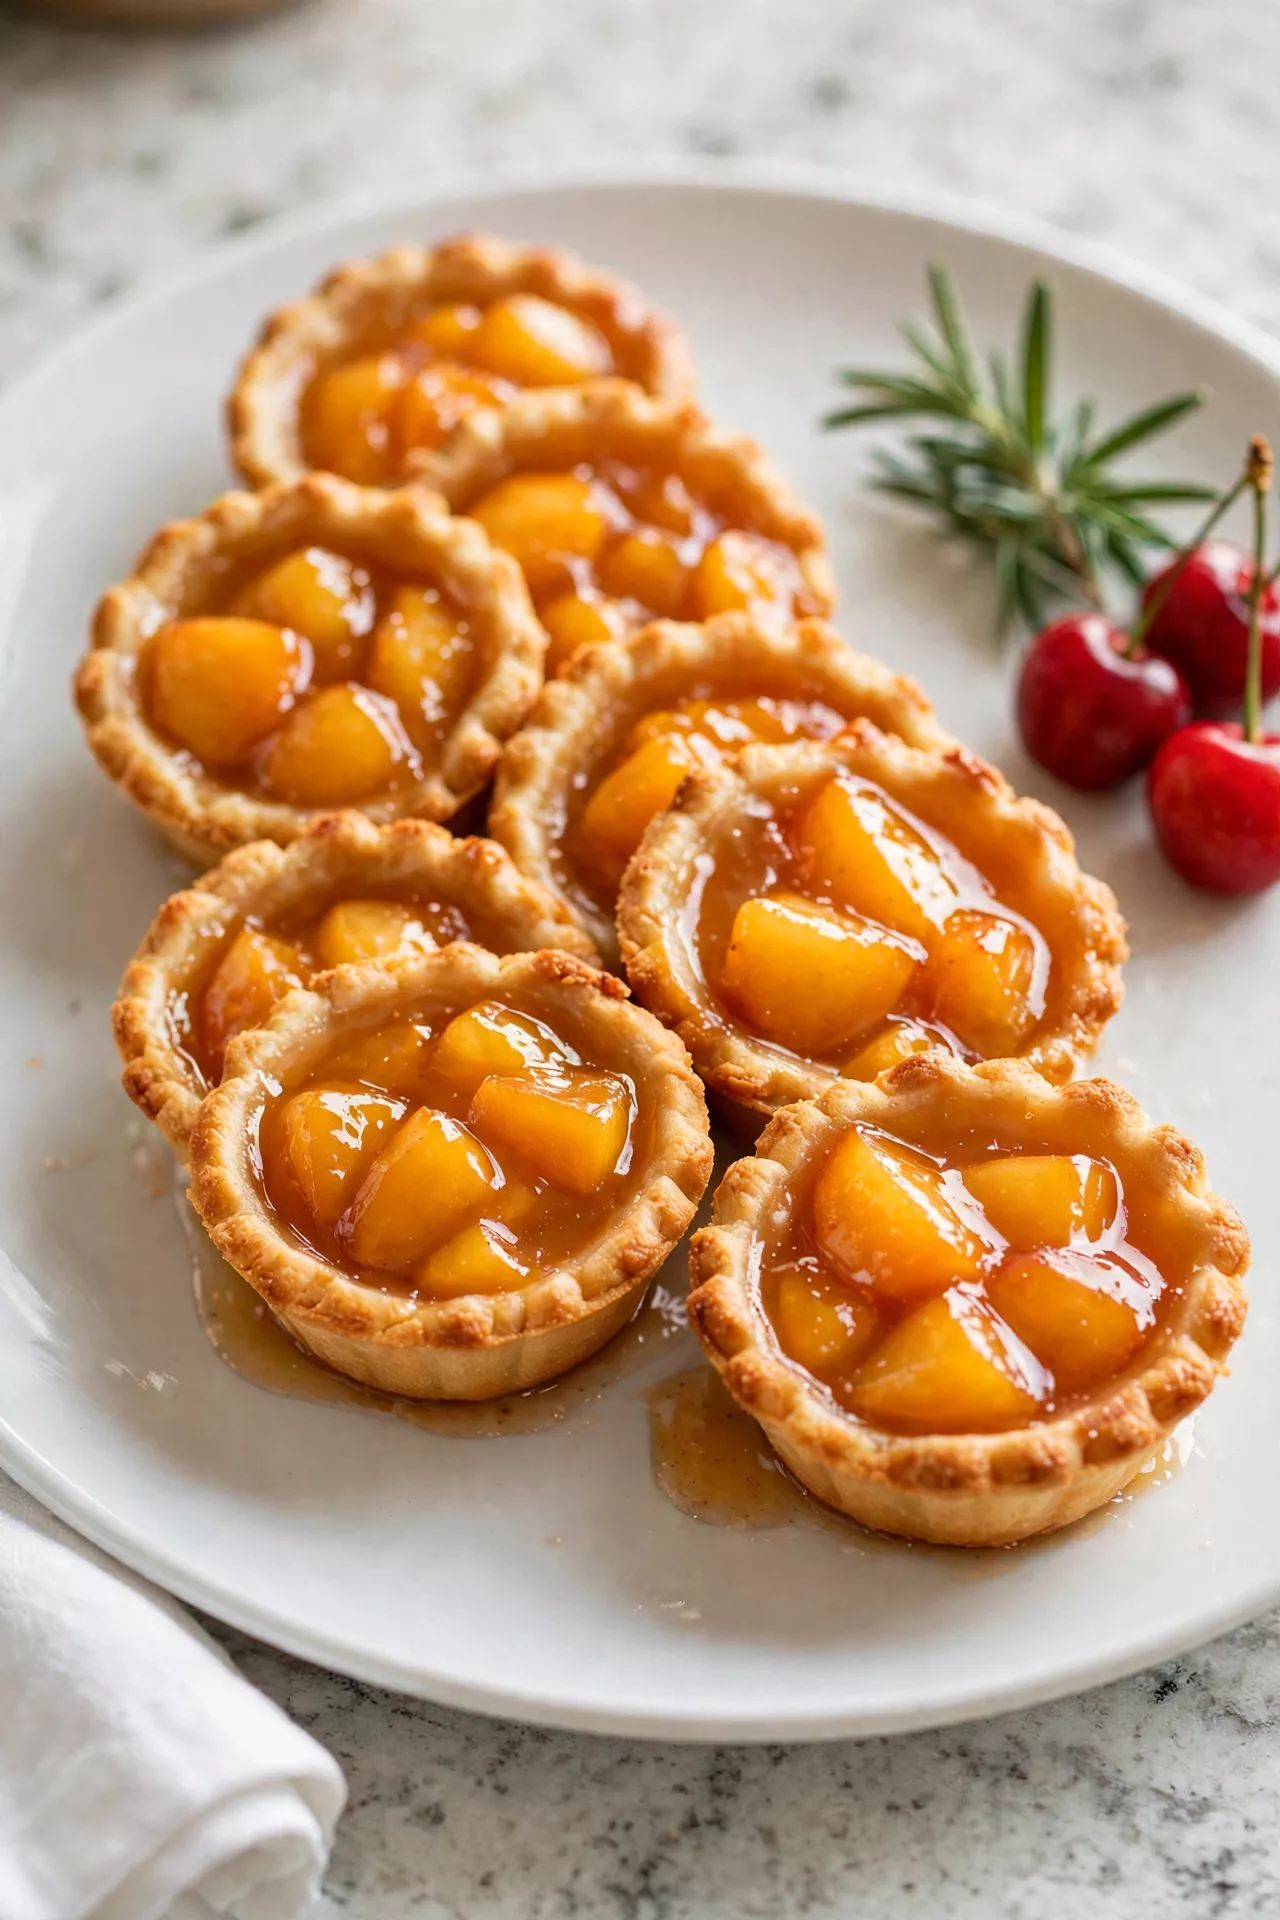
Sweet, juicy peaches with a hint of cinnamon under a golden crust — these little cups taste like the best part of summer. Dicing the peaches small means they soften perfectly in the short bake, and their juices thicken into a glossy filling. When peaches are not in season, thawed frozen peaches work just as well.
Prep Time: 20 minutes | Cook Time: 20 minutes | Servings: 12
Ingredients
- 2 refrigerated pie crusts (one 14.1-ounce package)
- 3 cups finely diced peaches (about 4 ripe peaches, peeled)
- 1/3 cup granulated sugar
- 2 tablespoons cornstarch
- 1/2 teaspoon ground cinnamon
- 1 teaspoon lemon juice
- 1 tablespoon butter, cut into tiny pieces
- 1 large egg, beaten with 1 teaspoon water (for egg wash)
Instructions
- Preheat the oven to 375°F (190°C) and lightly grease a 12-cup muffin tin. Set the pie crusts out for 10 minutes to soften.
- Press in the crusts by cutting 12 circles about 4 inches wide and pressing one into each muffin cup. Keep the crust scraps for the little tops.
- Mix the peach filling by tossing the diced peaches with the lemon juice, sugar, cornstarch, and cinnamon until well coated. If your peaches are very juicy, let the mixture sit 10 minutes and spoon off a little of the extra juice.
- Fill the cups with the peach mixture, mounding it slightly, and dot each with tiny pieces of butter.
- Add lattice or crisscross tops using thin strips cut from the crust scraps, laying two or three strips across each cup. Brush the strips with egg wash for shine.
- Bake for 19 to 23 minutes, until the crust is golden and the peach filling is bubbling thickly in the center.
- Cool in the pan for at least 15 minutes so the filling can set. Peach filling thickens as it cools, so warm cups will be runny.
- Serve warm or at room temperature, plain or with a scoop of vanilla ice cream melting over the top.
Mini Strawberry Pie Cups
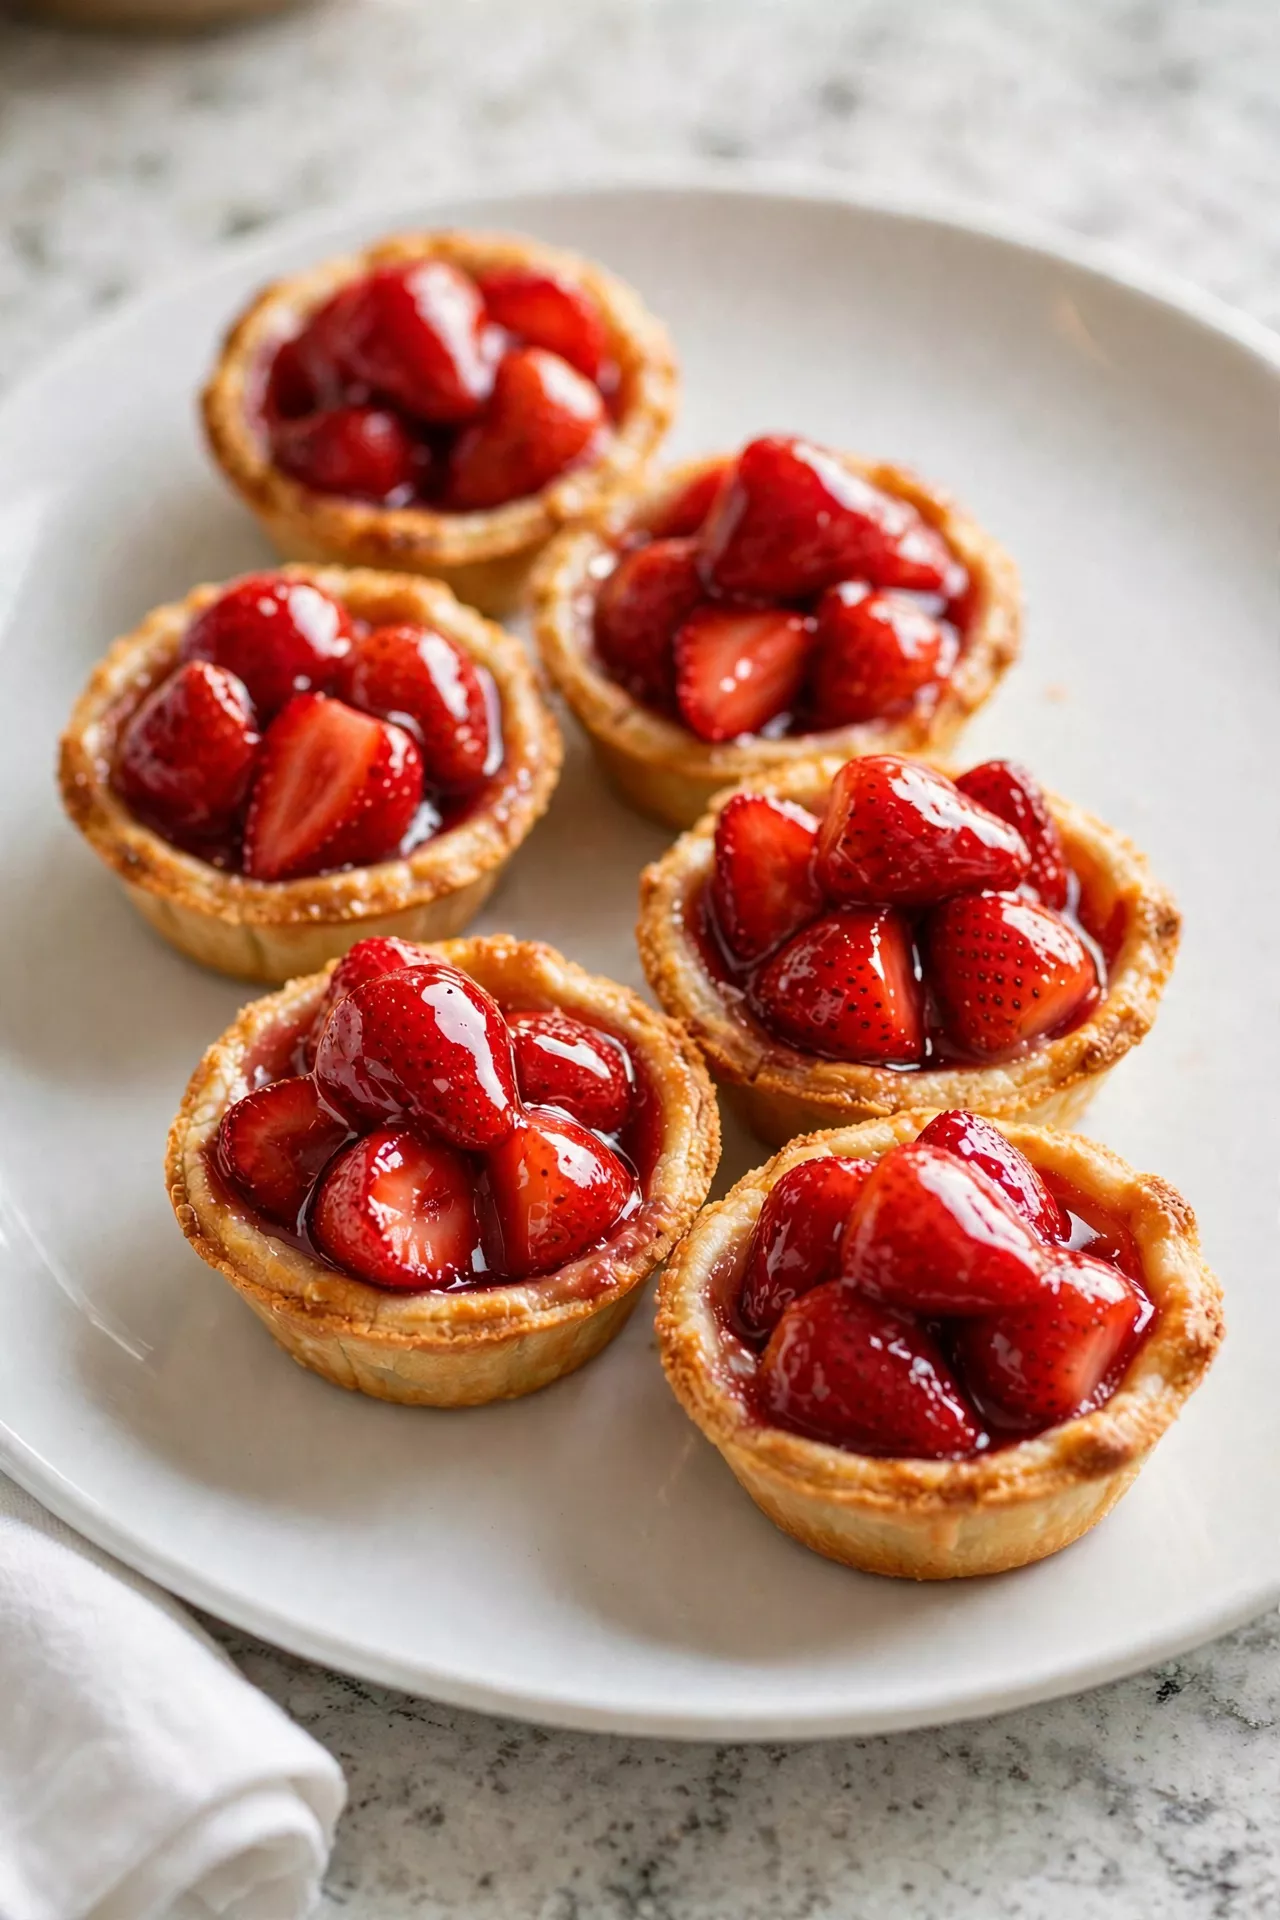
These pretty cups hold a shiny, jammy strawberry glaze piled with fresh berries inside a crisp baked shell — just like the diner classic, only smaller. Most of the work is hands-off chilling while the glaze sets around the fruit. They are at their best in berry season, when the strawberries are deep red and sweet.
Prep Time: 25 minutes | Cook Time: 10 minutes | Servings: 12
Ingredients
- 2 refrigerated pie crusts (one 14.1-ounce package)
- 4 cups fresh strawberries, hulled and halved (about 1 1/2 pounds)
- 3/4 cup granulated sugar
- 2 tablespoons cornstarch
- 3/4 cup water
- 1 teaspoon lemon juice
- Whipped cream, for serving
Instructions
- Preheat the oven to 400°F (200°C) and lightly grease a 12-cup muffin tin. Let the crusts soften at room temperature for 10 minutes.
- Cut and press the crusts into 12 circles about 4 inches wide, pressing one into each cup. Prick the bottoms a few times with a fork so they do not puff up.
- Bake the empty shells for 9 to 11 minutes, until golden and crisp. Cool them completely in the pan — the filling goes into cool shells so the glaze stays shiny.
- Make the glaze base by crushing about 1 cup of the strawberries with a fork. Stir them in a small saucepan with the water, sugar, and cornstarch.
- Cook the glaze over medium heat, stirring constantly, for 3 to 5 minutes, until it boils, turns clear and glossy, and thickens enough to coat a spoon. Stir in the lemon juice and let it cool for 10 minutes.
- Fill the shells by arranging the remaining strawberry halves in each baked shell, cut side down, then spooning the warm glaze over them until the berries are coated and the cups are full.
- Chill for at least 2 hours, until the glaze is set and sliceable. The cups will hold together neatly once cold.
- Serve cold with whipped cream on top. Eat these the day you make them, while the crust is still crisp.
Mini Banana Cream Pie Cups
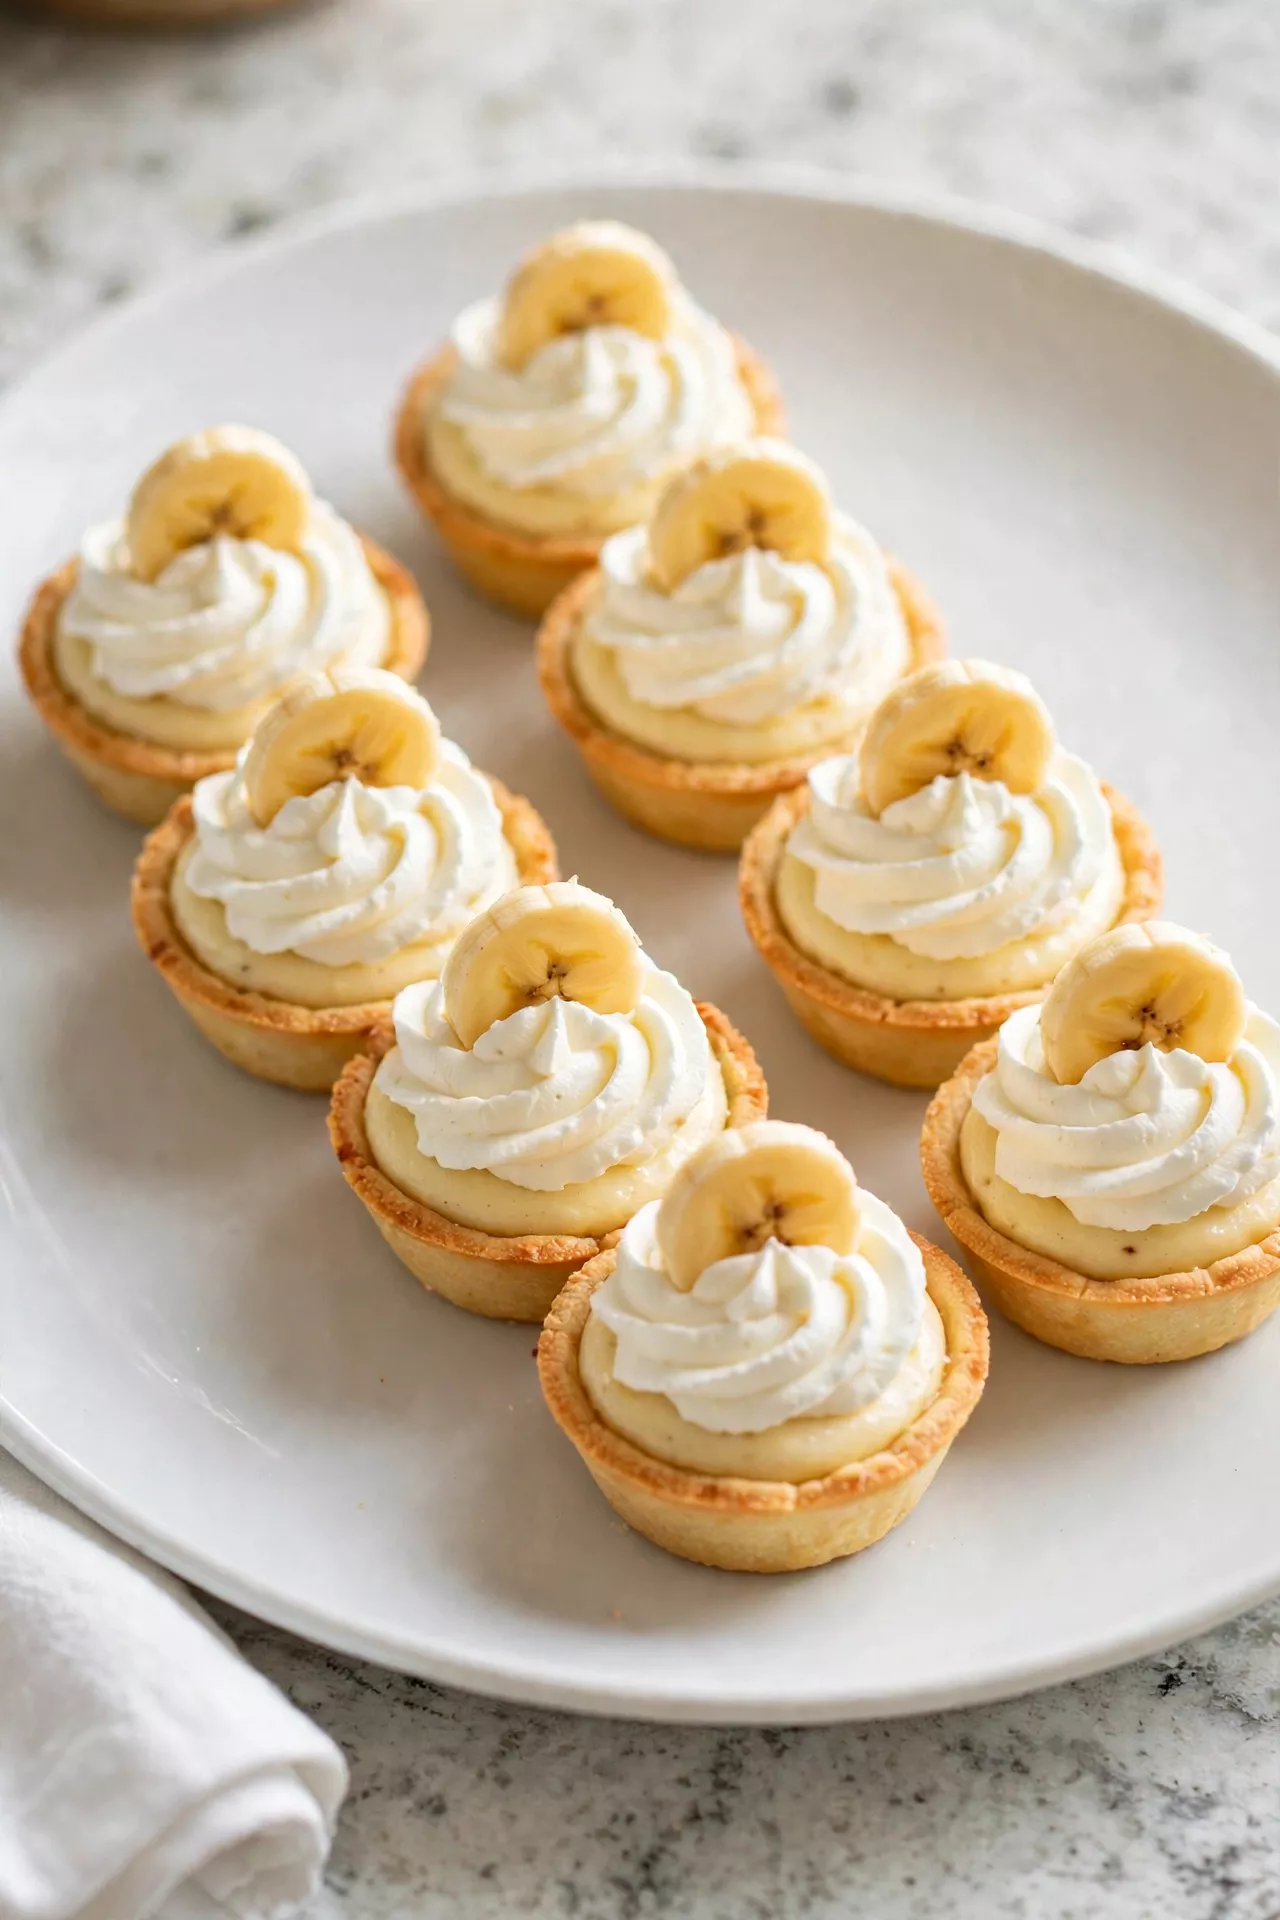
Soft layers of banana pudding, fresh banana slices, and whipped cream in a crunchy graham cup — this is the no-bake pie my grandkids request by name. A crushed vanilla wafer tucked in the middle is my little secret layer, and it turns cake-soft as the cups chill. Make them in the morning and dessert is simply waiting for you at dinnertime.
Prep Time: 20 minutes | Cook Time: 0 minutes | Servings: 12
Ingredients
- 1 1/2 cups graham cracker crumbs
- 5 tablespoons unsalted butter, melted
- 2 tablespoons granulated sugar
- 1 (3.4-ounce) box instant banana cream or vanilla pudding mix
- 1 3/4 cups cold milk
- 3 ripe bananas, sliced
- 12 vanilla wafers (optional, for the middle layer)
- 1 1/2 cups whipped cream or whipped topping
Instructions
- Make the crusts by stirring the graham crumbs, melted butter, and sugar together, then pressing about 2 tablespoons firmly into each cup of a lined 12-cup muffin tin.
- Chill the crusts in the fridge for 15 minutes so they firm up while you prepare the filling.
- Whisk the pudding with the cold milk for about 2 minutes, until thick and smooth, then let it stand 5 minutes to set.
- Fold in whipped cream — about half of it — gently, to make the filling light and creamy instead of heavy.
- Layer the cups by spooning a little pudding into each crust, adding a vanilla wafer if you are using it, then a few banana slices, then more pudding to fill the cup. Working in layers means banana in every bite.
- Cover and chill for at least 2 hours, or up to overnight, until the cups are firm and the wafer layer has softened like cake.
- Top before serving with the remaining whipped cream and one fresh banana slice on each cup. Add the top banana slices at the last minute so they stay pretty and pale.
- Serve cold straight from the fridge. Leftovers keep, covered, for up to 2 days, though the bananas will darken a little.
Mini Coconut Cream Pie Cups
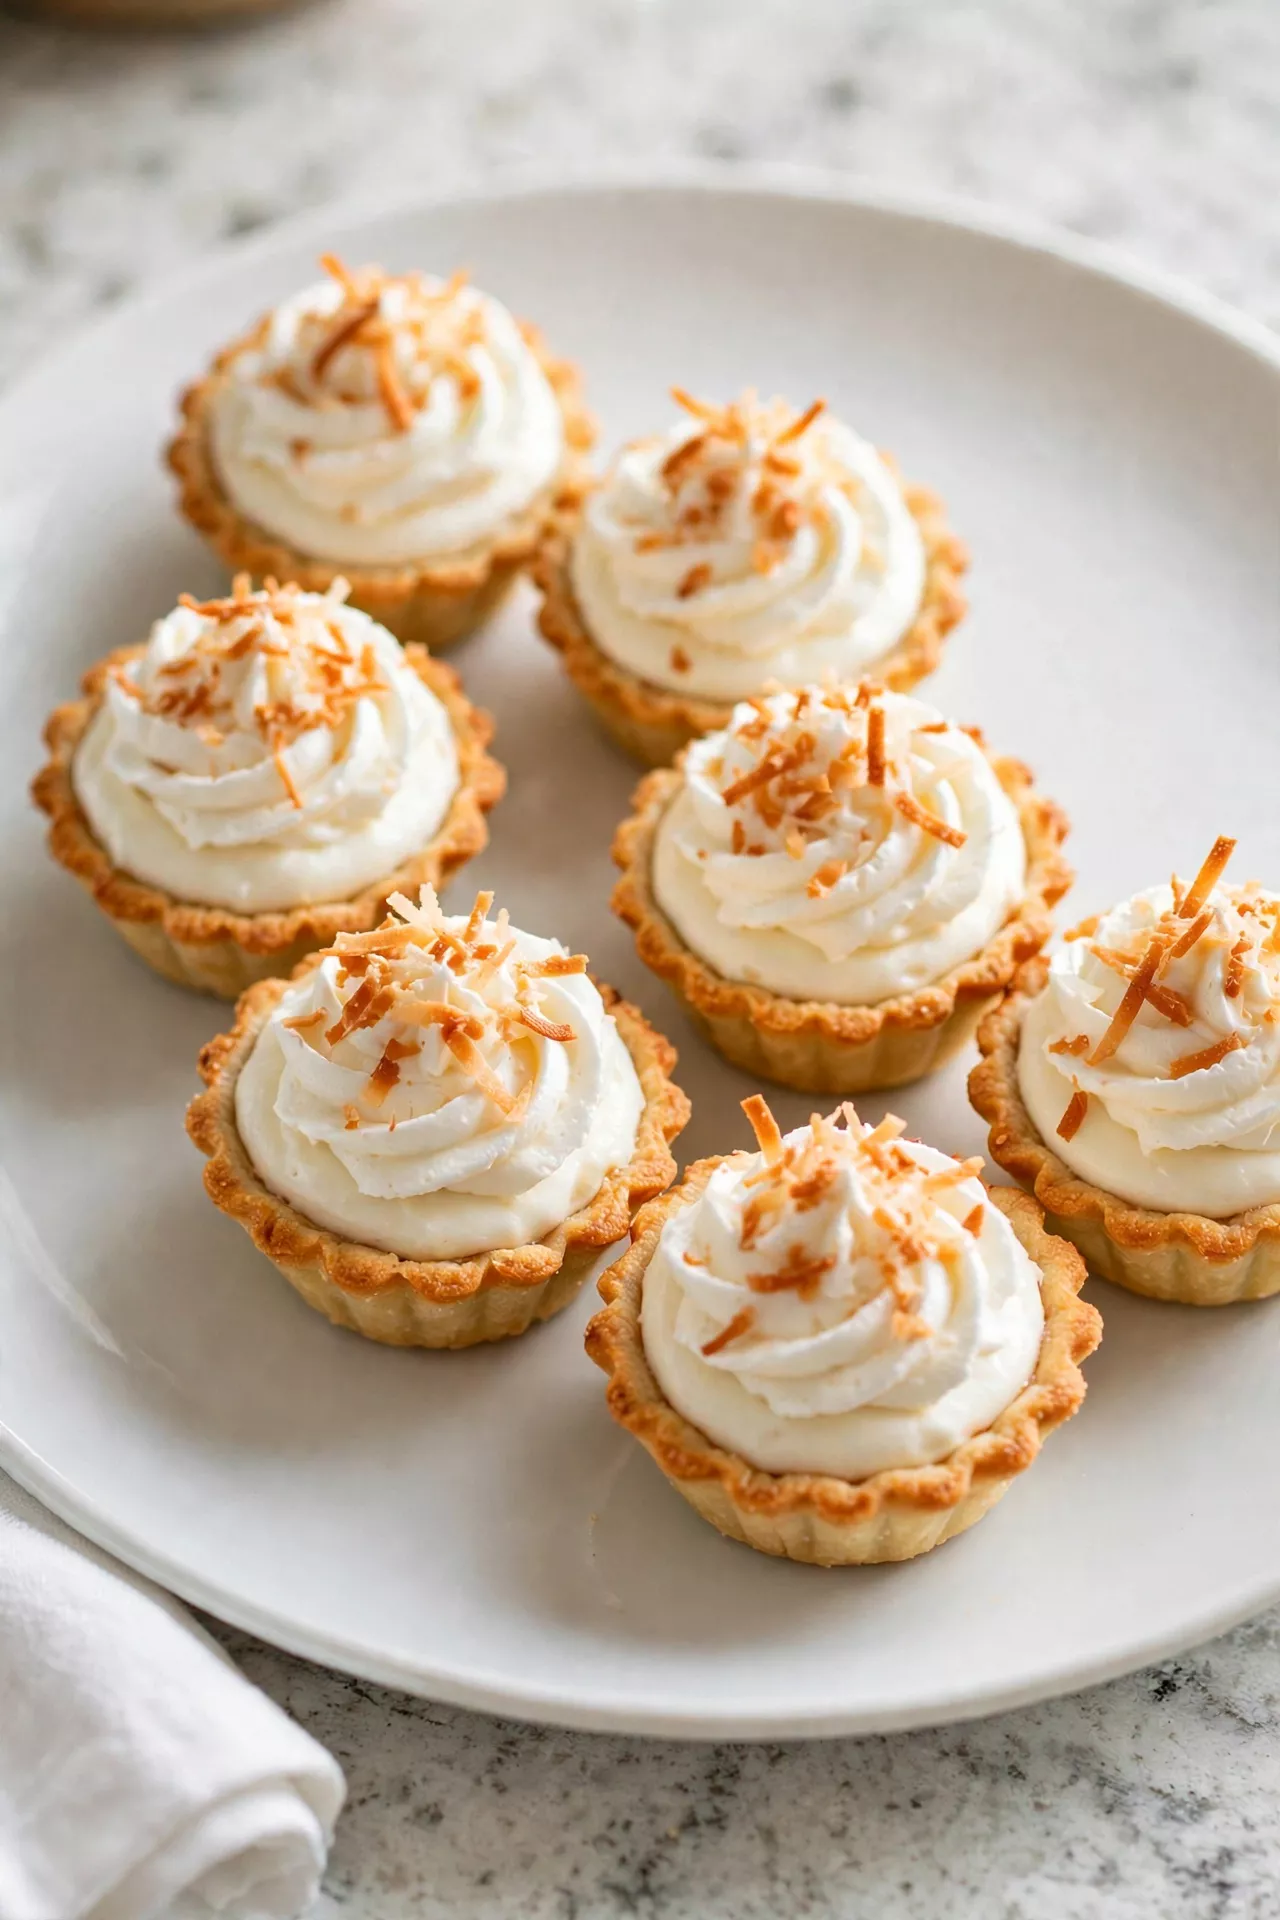
If you love coconut, these are your cups — creamy coconut filling, a soft mountain of whipped cream, and a shower of golden toasted coconut on top. They are completely no-bake, and the filling is the easy instant kind, so they come together fast. The toasted coconut is not optional in my kitchen; it takes two minutes and makes the whole dessert taste special.
Prep Time: 20 minutes | Cook Time: 0 minutes | Servings: 12
Ingredients
- 1 1/2 cups graham cracker crumbs
- 5 tablespoons unsalted butter, melted
- 2 tablespoons granulated sugar
- 1 (3.4-ounce) box instant coconut cream pudding mix
- 1 3/4 cups cold milk
- 1 cup sweetened shredded coconut, divided
- 1 1/2 cups whipped cream or whipped topping
- 1/2 teaspoon coconut or vanilla extract (optional)
Instructions
- Toast the coconut by spreading about 1/2 cup of the shredded coconut in a dry skillet over medium heat and stirring for 2 to 3 minutes, until golden. Watch it closely — it goes from pale to burnt in seconds. Set it aside to cool.
- Make and press the crusts by mixing the graham crumbs, melted butter, and sugar, then pressing about 2 tablespoons firmly into each cup of a lined muffin tin.
- Chill the crusts for 15 minutes in the fridge so they set firm under the creamy filling.
- Whisk the pudding with the cold milk for about 2 minutes until thick, then stir in the extract, if using, and the remaining untoasted shredded coconut.
- Fold in whipped cream — about half of it — gently with a spatula until the filling is light and fluffy.
- Fill the cups generously with the coconut filling, smoothing the tops into soft domes.
- Chill for at least 2 hours, covered, until the filling is set and the cups hold their shape.
- Finish and serve with the remaining whipped cream and a generous sprinkle of the toasted coconut on every cup. Serve cold.
Mini S’mores Pie Cups
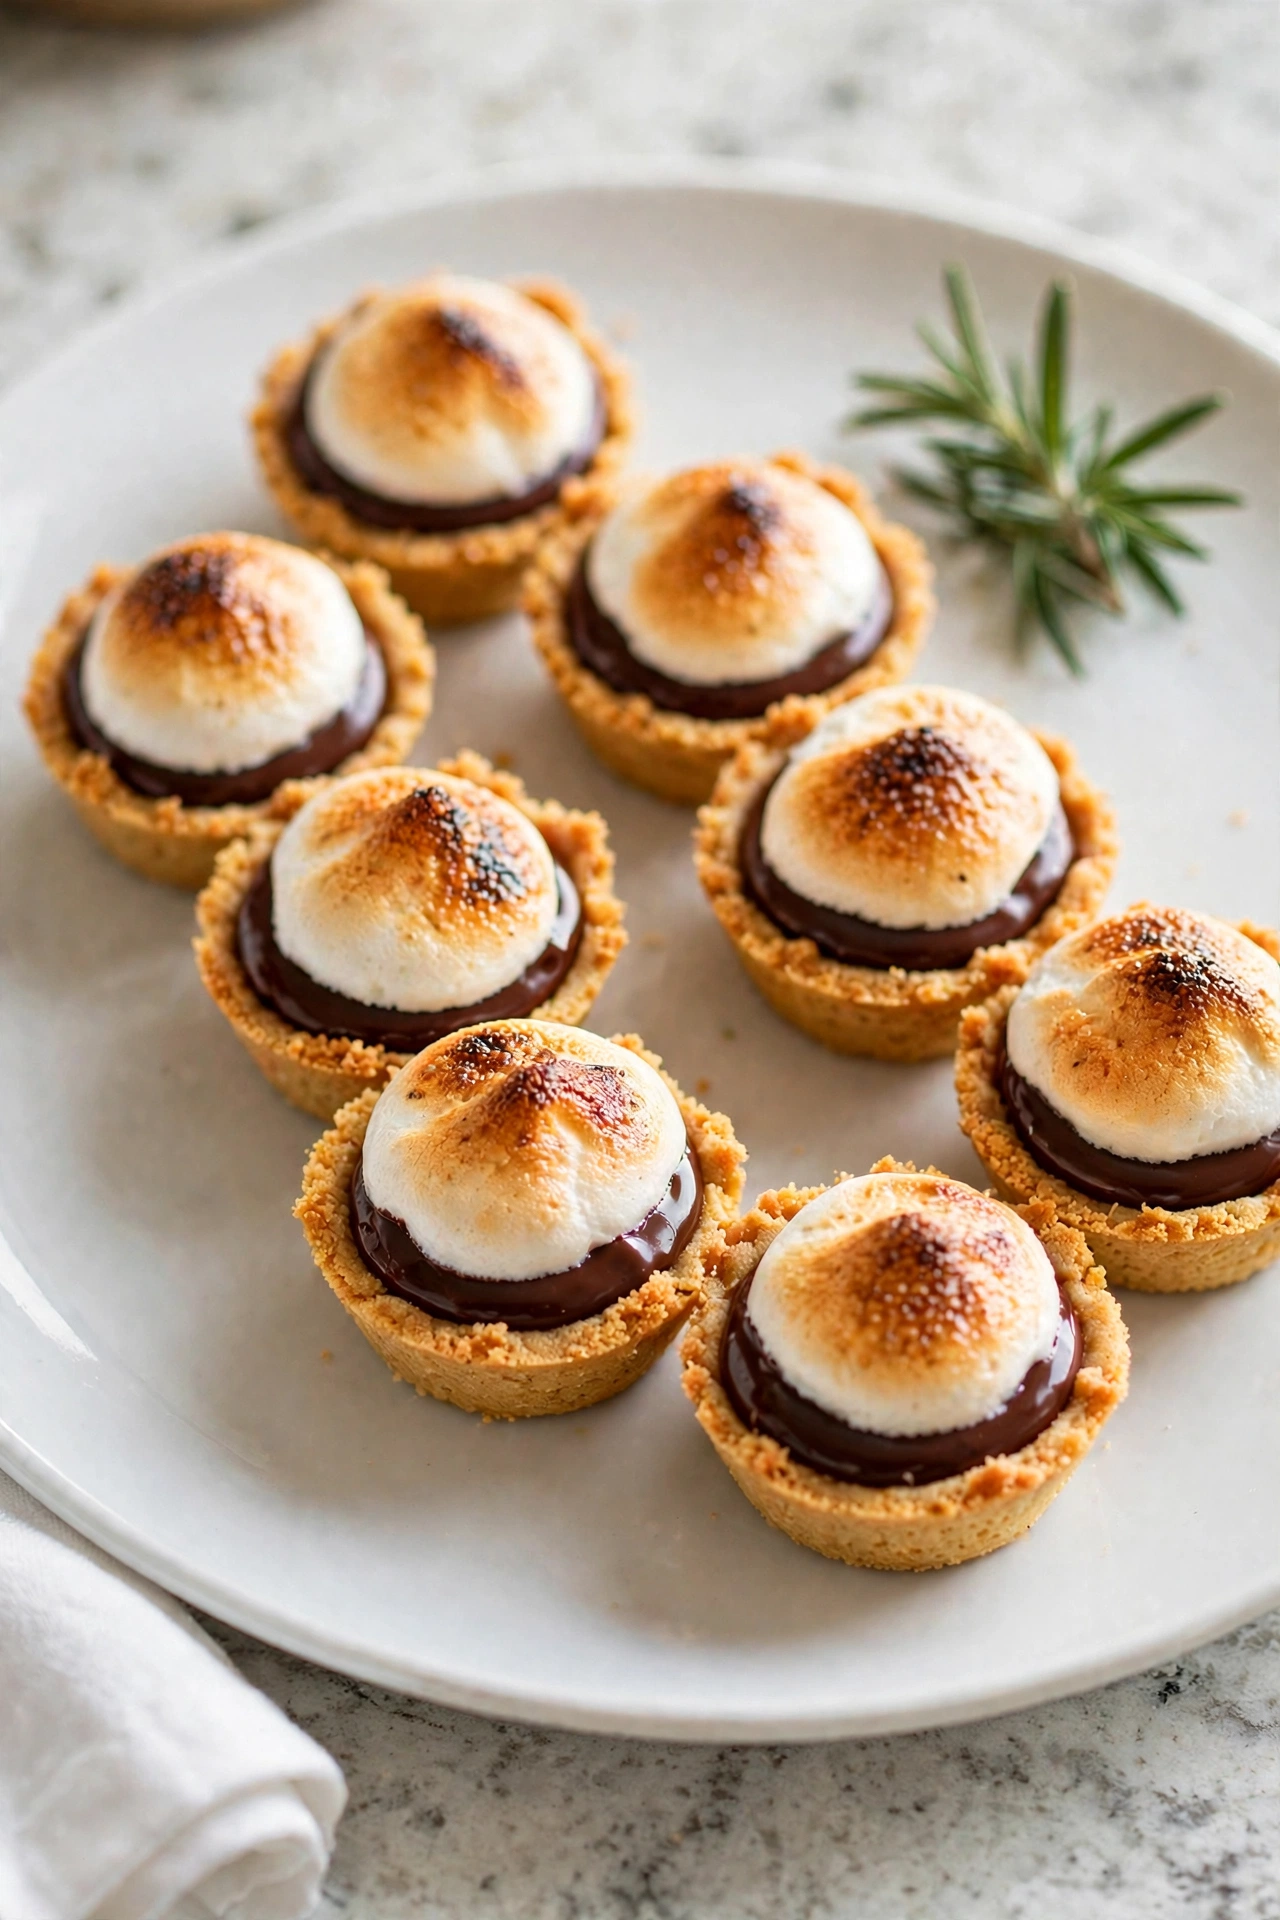
Everything about a campfire s’more, tucked into a pie cup: buttery graham crust, a rich chocolate ganache filling, and a marshmallow top toasted until golden and gooey. There is no campfire needed — a minute under the broiler does the toasting for you. Eat them warm, while the chocolate is still soft and the marshmallow pulls into strings.
Prep Time: 15 minutes | Cook Time: 8 minutes | Servings: 12
Ingredients
- 1 1/2 cups graham cracker crumbs
- 5 tablespoons unsalted butter, melted
- 2 tablespoons granulated sugar
- 1 cup semisweet chocolate chips
- 1/2 cup heavy cream
- 1 teaspoon vanilla extract
- 12 large marshmallows, or about 1 1/2 cups mini marshmallows
Instructions
- Preheat the oven to 350°F (175°C) and line a 12-cup muffin tin with paper liners.
- Make and press the crusts by stirring the graham crumbs, melted butter, and sugar together, then pressing about 2 tablespoons firmly into the bottom of each liner.
- Bake the crusts for 6 to 8 minutes, until set and smelling toasty. Let them cool while you make the ganache.
- Heat the cream in a small saucepan or the microwave until it is steaming and just starting to bubble at the edges — do not let it boil hard.
- Make the ganache by pouring the hot cream over the chocolate chips in a bowl, letting it sit for 2 minutes, then stirring slowly from the center until it turns smooth, dark, and glossy. Stir in the vanilla.
- Fill the crusts with ganache almost to the top and chill for at least 30 minutes, until the chocolate is set but still soft in the middle.
- Top with marshmallow — one large marshmallow or a small handful of minis on each cup — and place the pan under the broiler for 1 to 2 minutes, watching the whole time, until the tops are golden brown.
- Serve warm within a few minutes of toasting, while the marshmallow is gooey. If they sit, a 10-second warm-up in the microwave brings back the melt.
Mini Peanut Butter Pie Cups
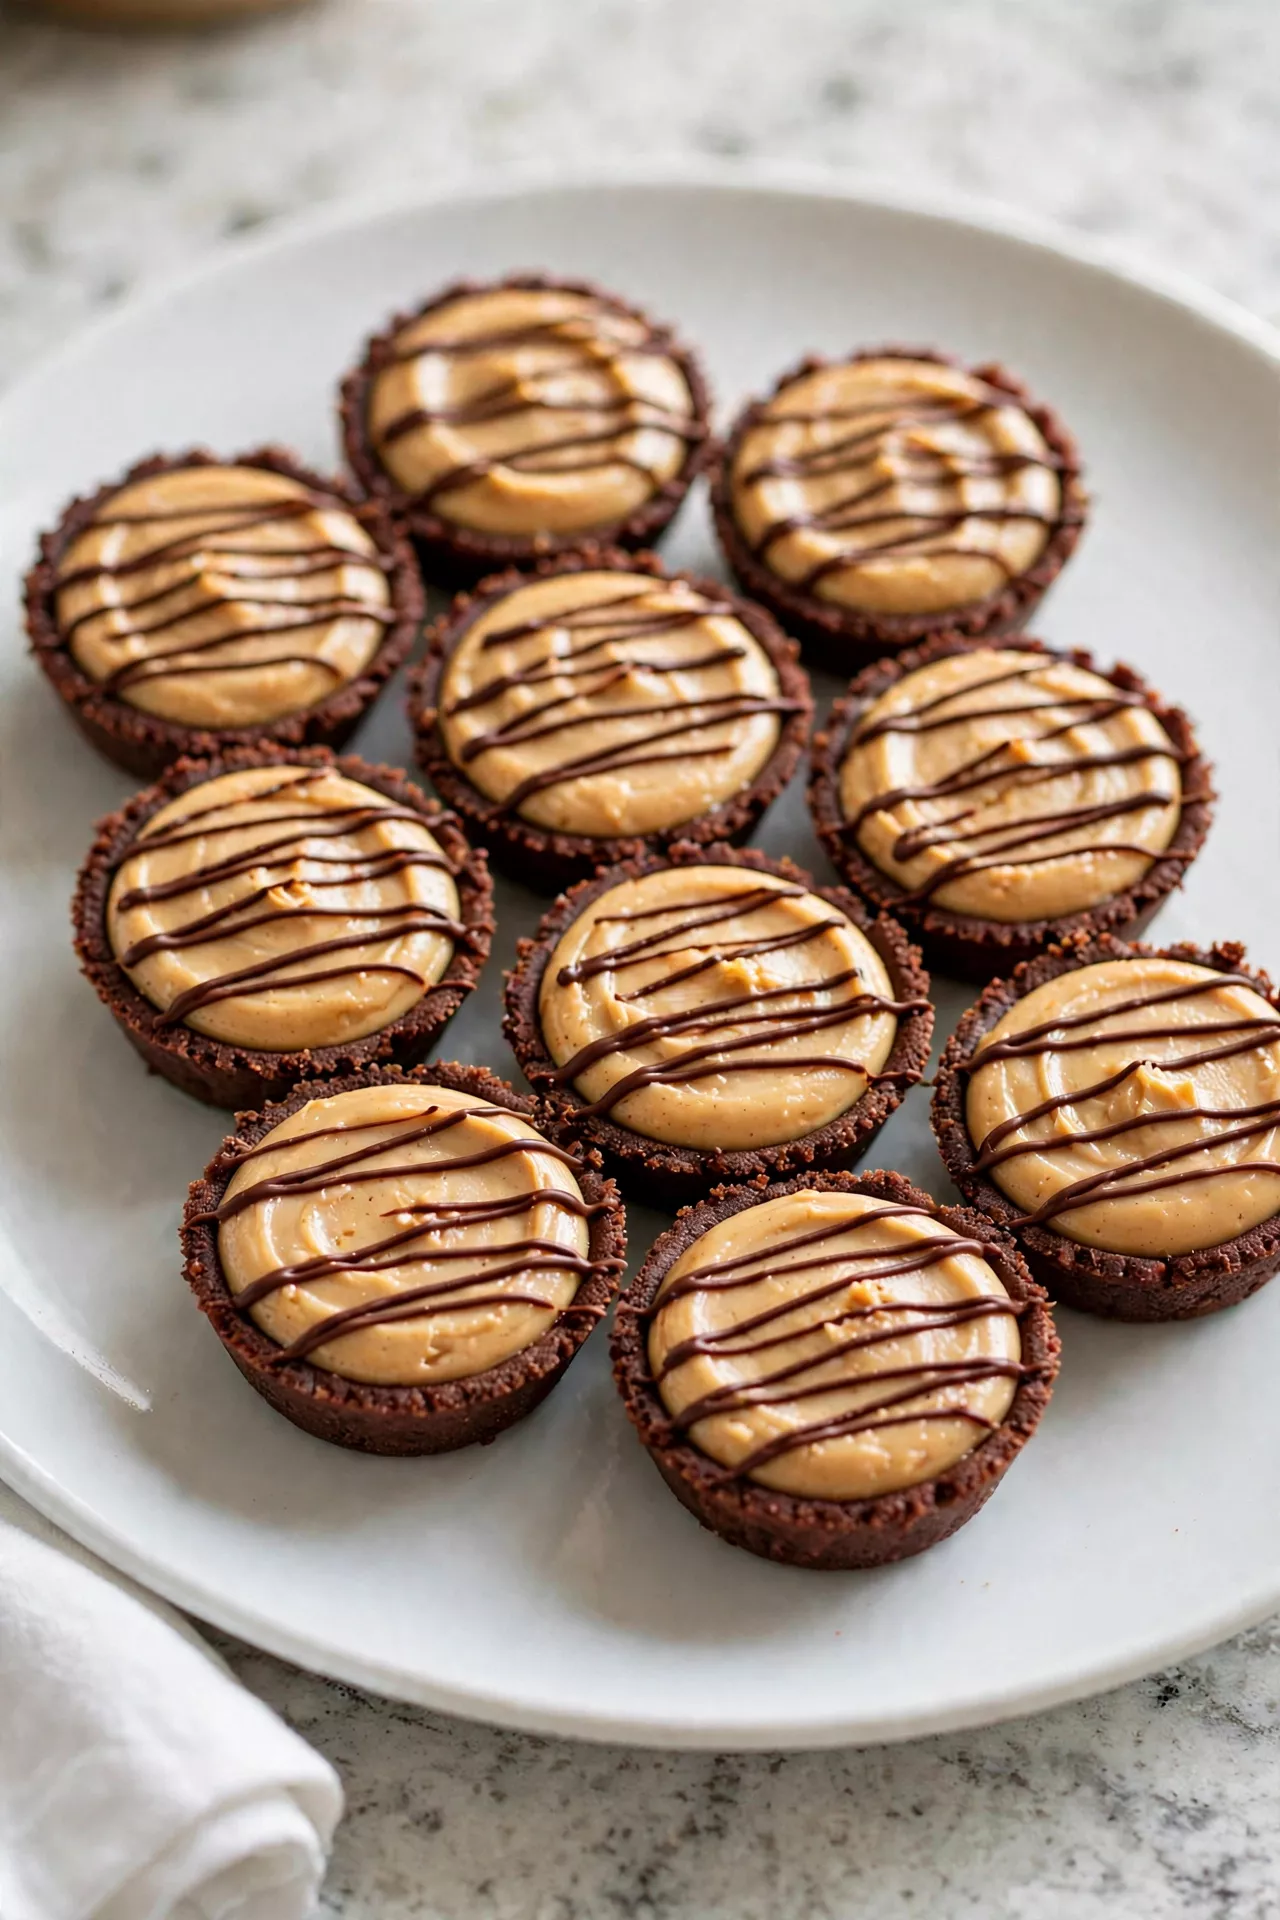
These rich, fluffy peanut butter cups taste like the inside of a peanut butter cup candy, only creamier. The filling is just peanut butter, cream cheese, and whipped topping folded together — no baking, no cooking at all. A chocolate cookie crust underneath and a little drizzle of chocolate on top make them look like a bakery treat.
Prep Time: 20 minutes | Cook Time: 0 minutes | Servings: 12
Ingredients
- 1 1/2 cups chocolate cookie crumbs (such as Oreo crumbs, about 18 cookies)
- 4 tablespoons unsalted butter, melted
- 1 cup creamy peanut butter
- 4 ounces cream cheese, softened
- 3/4 cup powdered sugar
- 1 (8-ounce) tub whipped topping, thawed, divided
- Chocolate sauce or melted chocolate, for drizzling
- Chopped peanuts or mini peanut butter cups, for garnish (optional)
Instructions
- Make and press the crusts by mixing the cookie crumbs with the melted butter until evenly moistened, then pressing about 2 tablespoons firmly into each cup of a lined 12-cup muffin tin.
- Chill the crusts in the freezer for 10 minutes or the fridge for 20 minutes, until firm. A cold, firm crust keeps the soft filling neat.
- Beat the filling base by mixing the peanut butter, softened cream cheese, and powdered sugar together until completely smooth and creamy, with no lumps of cream cheese left.
- Fold in whipped topping — about two-thirds of the tub — gently with a spatula until the filling is light, pale, and fluffy. Fold, do not stir hard, so it stays airy.
- Fill the cups with the peanut butter filling, dividing it evenly and smoothing the tops with the back of a spoon.
- Chill for at least 3 hours, or freeze for 1 hour, until the filling is firm enough to hold its shape when you lift a cup out.
- Finish the tops with a small dollop of the remaining whipped topping and a drizzle of chocolate sauce over each cup.
- Serve cold, with chopped peanuts or a mini peanut butter cup on top if you like. These keep in the fridge for up to 4 days and freeze beautifully for a month.
Mini Salted Caramel Pie Cups
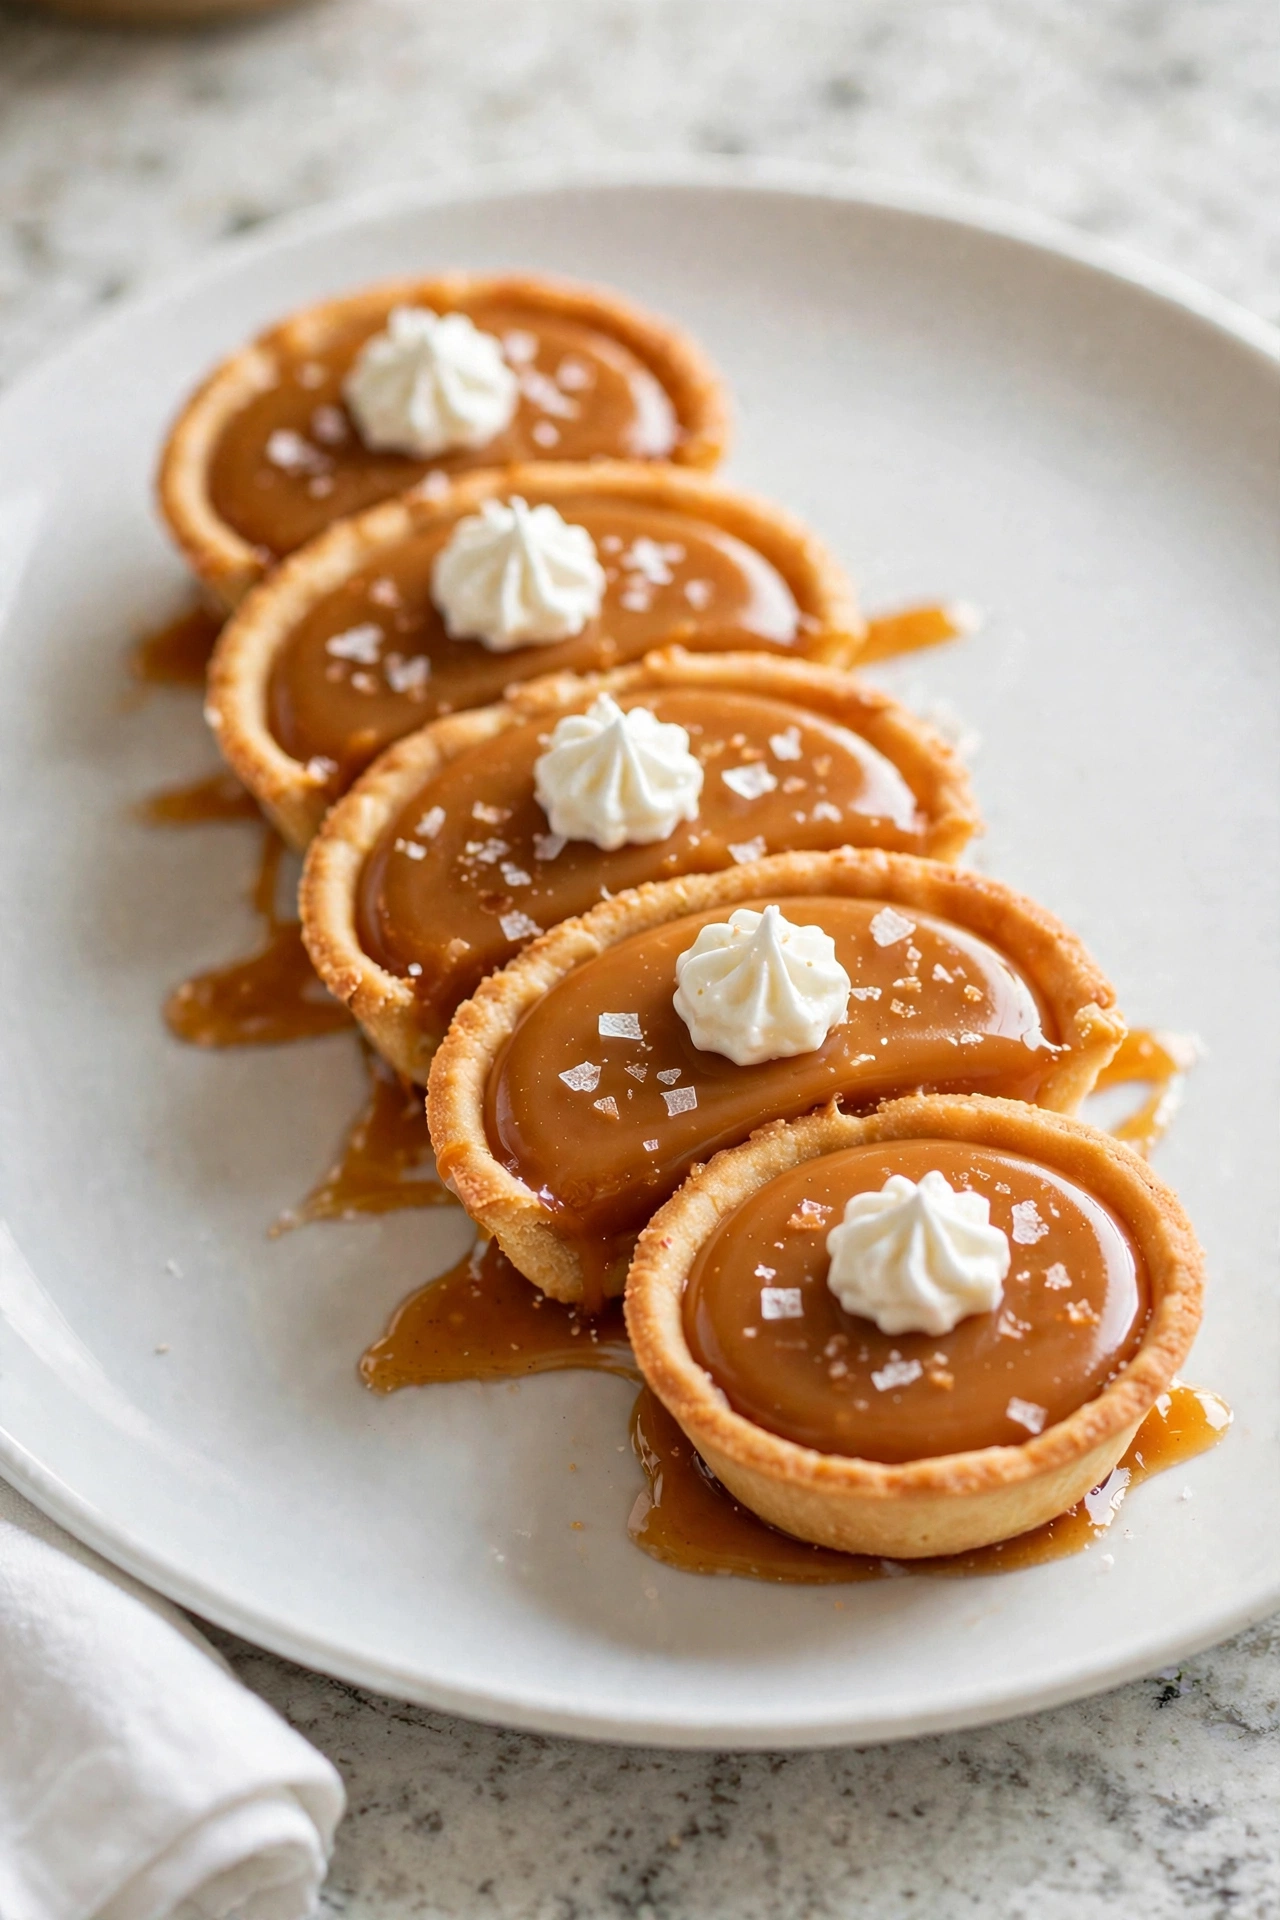
Sweet, buttery caramel with just a whisper of flaky salt on top — these little cups taste like something from a fancy dessert shop, but they are one of the easiest recipes here. A crisp graham crust, a smooth caramel cream filling, and soft whipped cream make a perfect bite. The salt goes on at the very end, so it stays crunchy and bright against the sweet caramel.
Prep Time: 20 minutes | Cook Time: 8 minutes | Servings: 12
Ingredients
- 1 1/2 cups graham cracker crumbs
- 5 tablespoons unsalted butter, melted
- 2 tablespoons granulated sugar
- 8 ounces cream cheese, softened
- 1 cup caramel sauce (store-bought is fine), plus more for drizzling
- 1 1/2 cups whipped cream or whipped topping, divided
- 1/2 teaspoon vanilla extract
- Flaky sea salt, for finishing
Instructions
- Preheat the oven to 350°F (175°C) and line a 12-cup muffin tin with paper liners.
- Make and press the crusts by stirring the graham crumbs, melted butter, and sugar together until it looks like wet sand, then pressing about 2 tablespoons firmly into the bottom of each liner.
- Bake the crusts for 7 to 9 minutes, until lightly golden and set. Cool them completely — warm crusts would melt the creamy filling.
- Beat the caramel filling by mixing the softened cream cheese until smooth, then beating in the caramel sauce and vanilla until the mixture is silky and evenly colored.
- Fold in whipped cream — about 1 cup of it — gently, until the filling turns light and mousse-like with no white streaks.
- Fill the cups with the caramel filling, smoothing the tops. If you like, spoon a thin layer of extra caramel sauce over each one for a glossy finish.
- Chill for at least 3 hours, covered, until the filling is firm and the cups lift out neatly.
- Serve cold with a small swirl of the remaining whipped cream, a drizzle of caramel, and a tiny pinch of flaky sea salt on each cup — added right before serving so it stays crisp.