Ghost Meringue Cookies Recipe
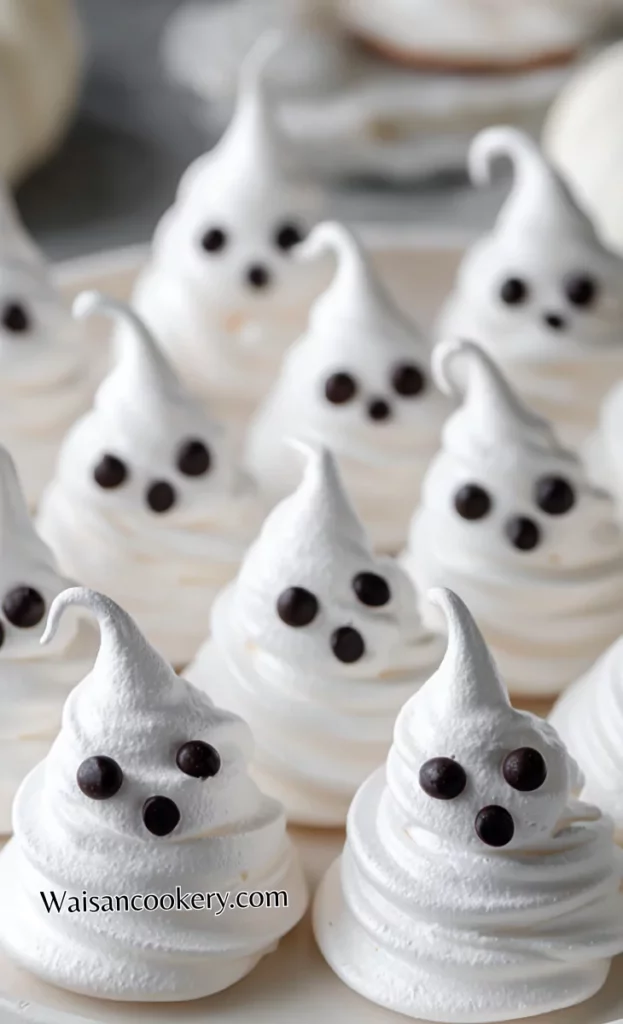
I make these ghost meringue cookies every October with my kids, who love watching egg whites turn into fluffy clouds. After six years of making little ghosts together, seeing the peaks form is still a favorite part of the tradition. Their crisp shells and light vanilla flavor suit a Halloween cookie plate beautifully.
The mixture uses three egg whites, sugar, cream of tartar, vanilla, and salt. Mini chocolate chips make the eyes, and black decorating gel finishes the faces. Clean equipment and slowly added sugar help the ghosts stand upright, while gentle oven heat dries them without much color.
This is a patient baking project, with most of the time spent in the oven. Plan for the full drying and cooling time before decorating or packing them. A dry afternoon is helpful, since humid air can make finished meringues feel sticky.
Why This Dish Is Great
- A small ingredient list makes the vanilla flavor easy to enjoy, with chocolate chips adding a little contrast.
- The tall piped shapes need no rolling, cutting, or frosting, and each slightly different face has its own charm.
- Two trays bake together, so the full batch can dry during the same oven session.
- The crisp texture brings variety to a dessert tray beside chewy bars and soft cookies.
- You can bake the ghosts ahead and add the gel faces shortly before serving to limit moisture on the surface.
Choosing Egg Whites For Meringue
Separate the eggs while cold, working over a small bowl before transferring each white to the mixing bowl. This keeps one broken yolk from affecting all three whites. Glass or stainless steel is useful because it is easier to wash away greasy traces than from a scratched plastic bowl.
Let the whites lose their refrigerator chill for about 20 minutes while preparing the trays. Keep total time outside refrigeration below two hours, or one hour in a kitchen above 90°F. Pasteurized whites suitable for whipping are an option; follow their package guidance, since some carton products do not whip well.
Ingredients
- For the Meringue:
- 3 large egg whites, room temperature
- 3/4 cup granulated sugar
- 1/4 teaspoon cream of tartar
- 1/2 teaspoon vanilla extract
- Pinch of salt
- For Decoration:
- Mini chocolate chips (for eyes and mouths)
- Black decorating gel
- Edible pearl dust (optional)
Measure the sugar before starting and keep it nearby. Fine granulated sugar dissolves more readily, but the amount remains 3/4 cup. The pearl dust is optional and must be labeled edible. Chocolate chips and gel are decorations, so use only enough to make small faces.
Kitchen Equipment You Will Need
As an Amazon Associate I earn from qualifying purchases.
- Electric mixer
- Glass mixing bowls
- Measuring cups
- Measuring spoons
- Silicone spatula
- Piping bag
- Large round piping tip
- Baking sheets
- Parchment paper
- Oven thermometer
- Instant-read thermometer
- Fine-mesh sieve
- Cooling rack
- Food decorating brush
How To Make Ghost Meringue Cookies
Allow about 45 minutes for tempering the whites, mixing, piping, and decorating, plus 2 hours of baking and at least 1 hour of oven cooling: about 3 hours 45 minutes total. The timing assumes both trays fit in the oven together. Larger ghosts or damp weather may need extra drying.
Step 1:
Preheat the oven to 200°F (95°C), checking with an oven thermometer. Position two racks with room above each tray and line two baking sheets with parchment paper. Let the separated egg whites stand briefly while preparing the equipment.
Step 2:
Wash the mixing bowl and beaters thoroughly, rinse, and dry. A wipe with vinegar or lemon juice can help remove greasy traces; wipe dry afterward. Keep egg yolk and oily utensils away from the whites.
Step 3:
Beat the 3 egg whites with the 1/4 teaspoon cream of tartar on medium speed until foamy. Increase the speed as the bubbles become finer and the whites begin to hold soft peaks.
Step 4:
Add the 3/4 cup sugar gradually, about a tablespoon at a time, while beating. Continue until stiff, glossy peaks form, usually 8–10 minutes. Rub a little between clean fingertips; if gritty, keep beating briefly until smoother.
Step 5:
Fold in the 1/2 teaspoon vanilla and pinch of salt with a clean spatula. Keep the folding gentle so the foam stays thick and holds its shape.
Step 6:
Transfer the meringue to a piping bag fitted with a large round tip. A sturdy food storage bag with one corner snipped off also works. Fold the top over a tall cup while filling to keep the outside clean.
Step 7:
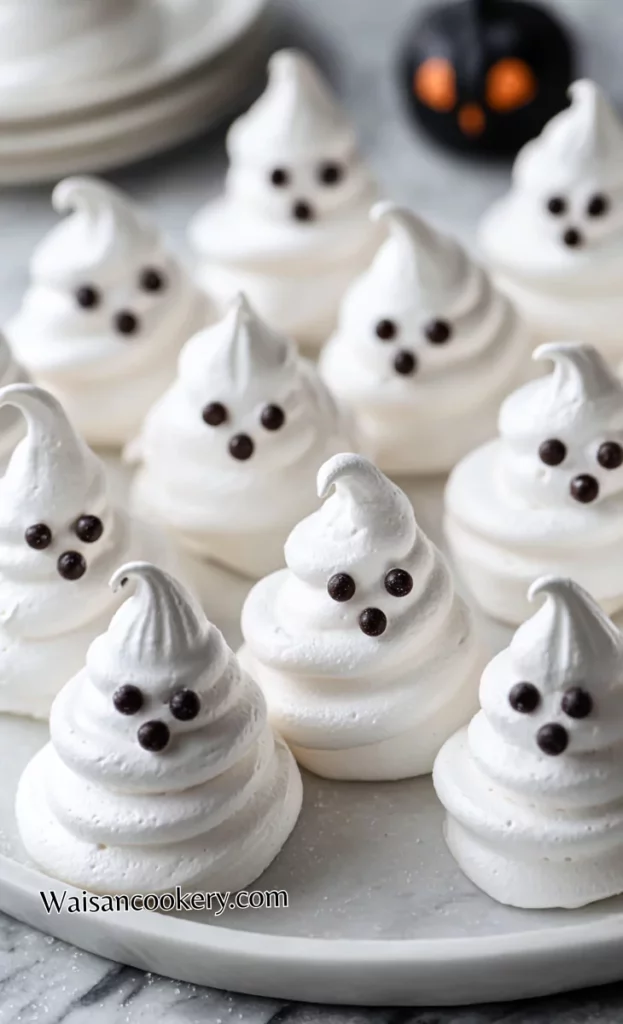
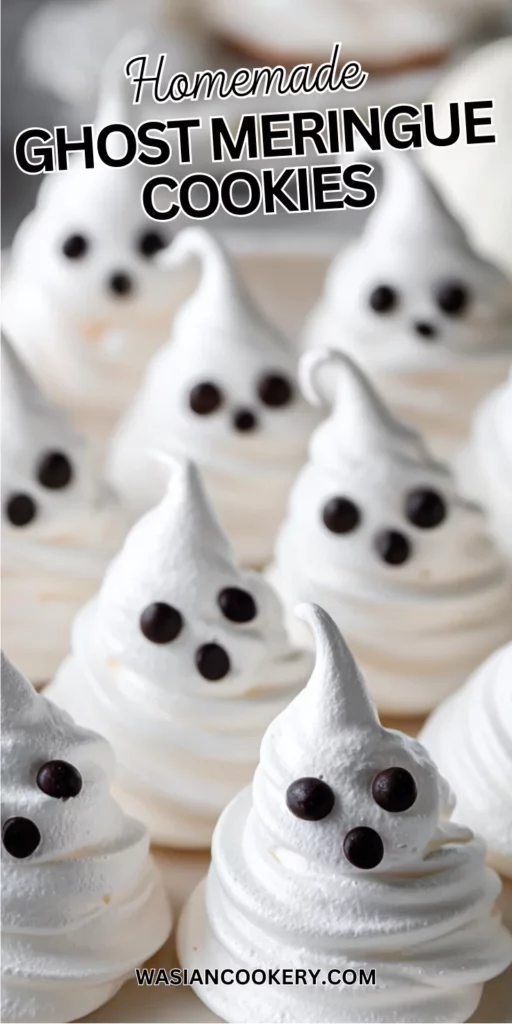
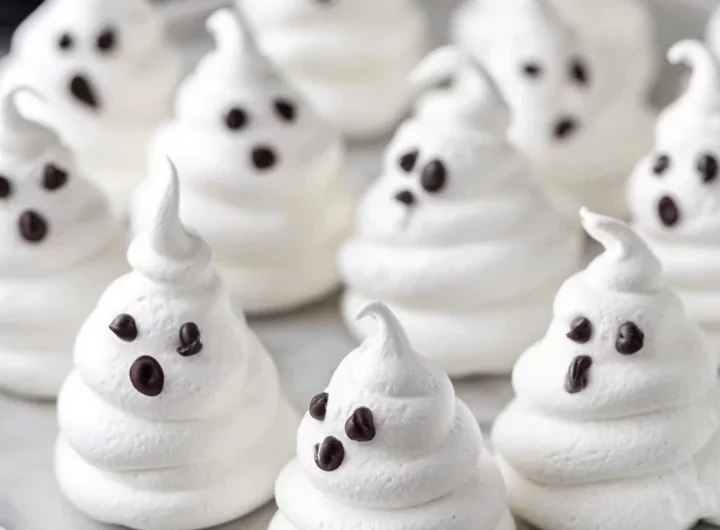
Pipe approximately 30 similar ghosts across both sheets, leaving space between them. Make a round base, then lift upward while easing the pressure to form a pointed head. Small differences in shape are fine.
Step 8:
Gently place mini chocolate chips on the fronts for eyes. Add chip mouths now if desired; reserve black decorating gel for after the cookies are fully cool.
Step 9:
Bake both trays for about 2 hours, switching rack positions gently halfway through if they dry unevenly. A sample should reach at least 165°F inside, release from the parchment, and have a dry center when broken open. If tacky inside, keep drying and check again. Turn off the oven, crack the door, and cool inside for at least 1 hour. If the trays are still warm, finish cooling them on a rack before decorating.
Step 10:
Once completely cool, add small gel mouths and optional edible pearl dust with a clean food decorating brush. Let the gel surface set before serving. Store promptly in an airtight container when the cookies and trays have no remaining warmth.
Notes
- Check the bowl first. A greasy film can stop the whites from building volume even when the mixer runs for a long time.
- Add sugar slowly. The foam should look smooth and glossy rather than loose, grainy, or dull.
- Hold the piping bag upright. Steady pressure creates a broad base that supports the pointed head without tipping.
- Keep the ghosts similar in thickness. A very large center can remain soft after smaller shapes are crisp.
- Check dryness with a spare cookie. A pale surface alone does not show whether the middle is ready.
- Let the oven cool gradually. Moving hot meringues straight into a humid room can soften the outside.
- Pack gently in a rigid container. Parchment between layers protects the tips, but avoid stacking heavy cookies on top.
Ingredients You Can Add
- Almond extract can replace the vanilla for a different flavor; use it sparingly because it is strong.
- Peppermint extract gives a cool mint flavor; replace the vanilla rather than adding several extracts together.
- Gel food coloring adds a pastel tint with less extra liquid than a watery coloring.
- Edible glitter can decorate the cooled ghosts. Choose a product intended to be eaten, not craft glitter.
- Freeze-dried fruit powder adds color and a tart note; sift it and fold gently so clumps do not weigh down the foam.
- Cocoa makes chocolate ghosts. Keep the measured chocolate option below in mind rather than pouring it in freely.
What To Serve
Serve on a wide, dry platter so guests can pick up each ghost by its base. For a Halloween dessert table, pair them with Monster Rice Krispie Treats for a chewy, colorful companion.
Spooky Mummy Brownies bring a richer chocolate bite beside the light meringues. Keep each treat in its own section so frosting does not touch the crisp ghosts.
Add Pumpkin Cheesecake Bars for another seasonal choice, serving those chilled. A ghost also makes a sweet topping for pudding or ice cream; add it immediately before eating so it keeps its crunch.
Recipe Variations And Swaps
- Chocolate ghosts: Sift 2 tablespoons cocoa powder over the finished stiff meringue and fold in with the vanilla. The ghosts will be brown and may need extra drying.
- Mini ghost bites: Pipe approximately 60 one-inch ghosts. Begin checking after 1 hour, then continue until the centers are dry and reach at least 165°F; keep the full cooling step.
- Pastel ghosts: Divide the finished meringue and fold a little gel color into each portion. Work quickly and avoid repeated stirring.
- Lemon ghosts: Replace the vanilla with a little lemon extract for a citrus flavor without adding lemon juice to the finished foam.
- Rose ghosts: Use a small amount of food-grade rose flavoring in place of vanilla. Strong floral flavors can easily overpower this delicate cookie.
- Marshmallow ghosts: Use marshmallow flavoring in place of vanilla, keeping the flavoring light so the meringue does not become wet.
- Shimmering ghosts: Brush edible pearl dust onto cooled cookies for a gentle sheen, keeping the faces simple.
- Chocolate sandwich ghosts: Join two small cooled meringues with a little ganache just before serving. Refrigerate any ganache-filled leftovers and expect softer meringues; this version is best assembled when needed.
How To Store
Store fully cooled, dry meringues in an airtight rigid container in a cool, dry cupboard for about 1–2 weeks for best texture. Separate layers with parchment and keep them away from steam. Gel faces can soften nearby meringue, so decorate only the portion you plan to serve soon.
For longer storage, freeze undecorated ghosts in a well-sealed rigid container for up to 2 months. Thaw with the container closed so condensation collects outside rather than on the cookies. Refrigeration is not helpful for plain crisp meringues, but perishable fillings change their storage needs.
FAQ
Why will my whites not form peaks?
Check for yolk or grease first. If the bowl is clean, continue beating and add the sugar gradually; adding it all at once can slow the process.
Why did the ghosts spread?
The foam may have been too soft or disturbed during folding. It should hold a firm upright peak before it goes into the bag.
Can I bake on a humid day?
Yes, but allow more drying time and pack the cooled cookies promptly. Their crisp texture may not last as long once exposed to damp air.
Why are the cookies turning brown?
The oven may run hot or a tray may sit too near an element. Check the temperature and move the rack farther away rather than raising the heat.
Can I replace the sugar completely?
This recipe depends on sugar for its structure and texture. Sugar substitutes and aquafaba need their own tested formulas rather than a direct swap here.
Can children help with the faces?
They can decorate fully cooled cookies with clean hands. Adults should handle the hot trays, and everyone should avoid tasting the raw egg-white mixture.
Short Description
Crisp vanilla ghost meringue cookies with chocolate-chip eyes and simple gel faces, baked gently and cooled fully for a light Halloween treat.
Ghost Meringue Cookies Recipe
Course: DessertCuisine: French-AmericanDifficulty: Easy30
cookies45
minutes2
hours3
hours45
minutesCrisp vanilla ghost meringue cookies with chocolate-chip eyes and simple gel faces, baked gently and cooled fully for a light Halloween treat.
Ingredients
- For the Meringue:
3 large egg whites, room temperature
3/4 cup granulated sugar
1/4 teaspoon cream of tartar
1/2 teaspoon vanilla extract
Pinch of salt
- For Decoration:
Mini chocolate chips (for eyes and mouths)
Black decorating gel
Edible pearl dust (optional)
Directions
- Preheat the oven to 200°F (95°C), checking with an oven thermometer. Position two racks with room above each tray and line two baking sheets with parchment paper. Let the separated egg whites stand briefly while preparing the equipment.
- Wash the mixing bowl and beaters thoroughly, rinse, and dry. A wipe with vinegar or lemon juice can help remove greasy traces; wipe dry afterward. Keep egg yolk and oily utensils away from the whites.
- Beat the 3 egg whites with the 1/4 teaspoon cream of tartar on medium speed until foamy. Increase the speed as the bubbles become finer and the whites begin to hold soft peaks.
- Add the 3/4 cup sugar gradually, about a tablespoon at a time, while beating. Continue until stiff, glossy peaks form, usually 8–10 minutes. Rub a little between clean fingertips; if gritty, keep beating briefly until smoother.
- Fold in the 1/2 teaspoon vanilla and pinch of salt with a clean spatula. Keep the folding gentle so the foam stays thick and holds its shape.
- Transfer the meringue to a piping bag fitted with a large round tip. A sturdy food storage bag with one corner snipped off also works. Fold the top over a tall cup while filling to keep the outside clean.
- Pipe approximately 30 similar ghosts across both sheets, leaving space between them. Make a round base, then lift upward while easing the pressure to form a pointed head. Small differences in shape are fine.
- Gently place mini chocolate chips on the fronts for eyes. Add chip mouths now if desired; reserve black decorating gel for after the cookies are fully cool.
- Bake both trays for about 2 hours, switching rack positions gently halfway through if they dry unevenly. A sample should reach at least 165°F inside, release from the parchment, and have a dry center when broken open. If tacky inside, keep drying and check again. Turn off the oven, crack the door, and cool inside for at least 1 hour. If the trays are still warm, finish cooling them on a rack before decorating.
- Once completely cool, add small gel mouths and optional edible pearl dust with a clean food decorating brush. Let the gel surface set before serving. Store promptly in an airtight container when the cookies and trays have no remaining warmth.
Notes
- Total time is about 225 minutes: 45 minutes for preparation and decorating, 120 minutes baking, and at least 60 minutes cooling. Both trays bake together; extra drying extends the total.
- Yield is approximately 30 ghosts, depending on piping size. Keep them similar so they dry evenly.
- For chocolate ghosts, sift 2 tablespoons cocoa powder over the stiff meringue and fold in gently with the vanilla. For approximately 60 one-inch mini ghosts, start checking after 1 hour and continue until fully dry and at least 165°F inside.
- Use a clean grease-free bowl, add sugar gradually, and avoid tasting raw meringue. Keep raw whites out of refrigeration less than 2 hours, or 1 hour above 90°F.
- Cool fully before sealing. Add wet gel decoration close to serving; humidity and condensation soften meringue.