Thumbprint Cookies Recipe
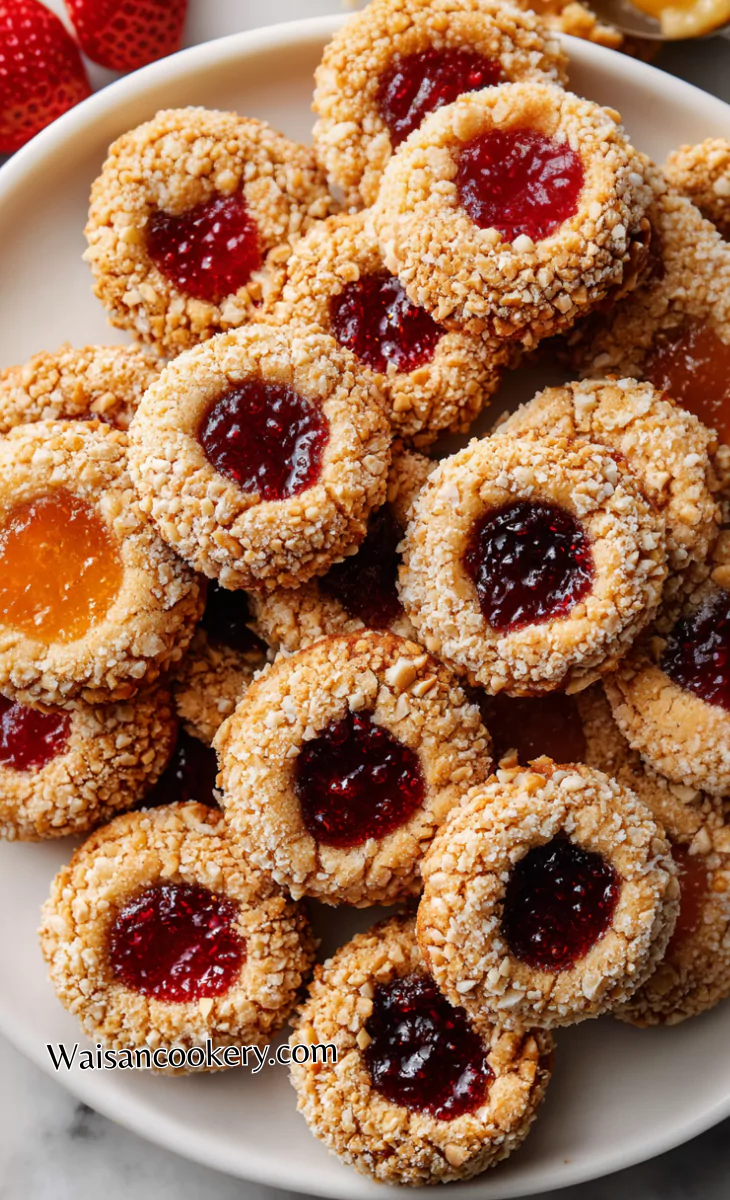
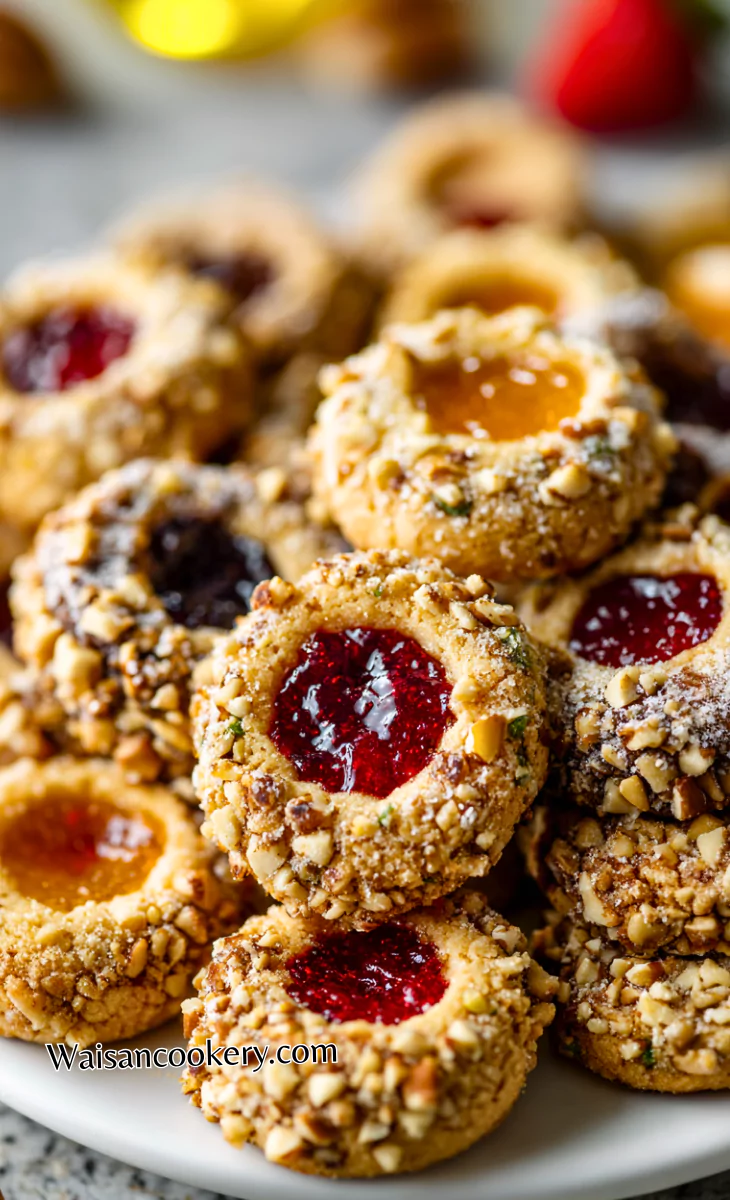
I make these thumbprint cookies during the holiday season, when cookie exchanges call for something pretty and manageable. The buttery dough, crunchy nut coating, and bright jam centers have made them a regular part of my baking. They look lovely in a gift box without needing elaborate decorating.
I use softened butter for smooth mixing, thick jam for neat centers, and finely chopped nuts that cling to the egg-white coating. My kids like choosing the jams and helping make the thumbprints. Adults handle the oven and reshape any warm cookies with a spoon.
These cookies need a short refrigerator rest before shaping and enough cooling time after baking. The jam goes in after the cookies leave the oven. That keeps the filling easy to control and lets you use several flavors from the same batch of dough.
Why This Dish Is Great
- The centers can hold different jams, so one batch gives you several colors and fruit flavors.
- Egg yolks enrich the dough while the whites help the chopped nuts stick, using both parts of the eggs.
- The filling is added after baking, which keeps it easy to portion without watching jam bubble in the oven.
- Chilled dough is easier to roll and press, making the shaping step more comfortable for beginners.
- Unfilled cookies freeze well for later filling, which is useful when a busy holiday week is approaching.
Choosing Butter And Jam
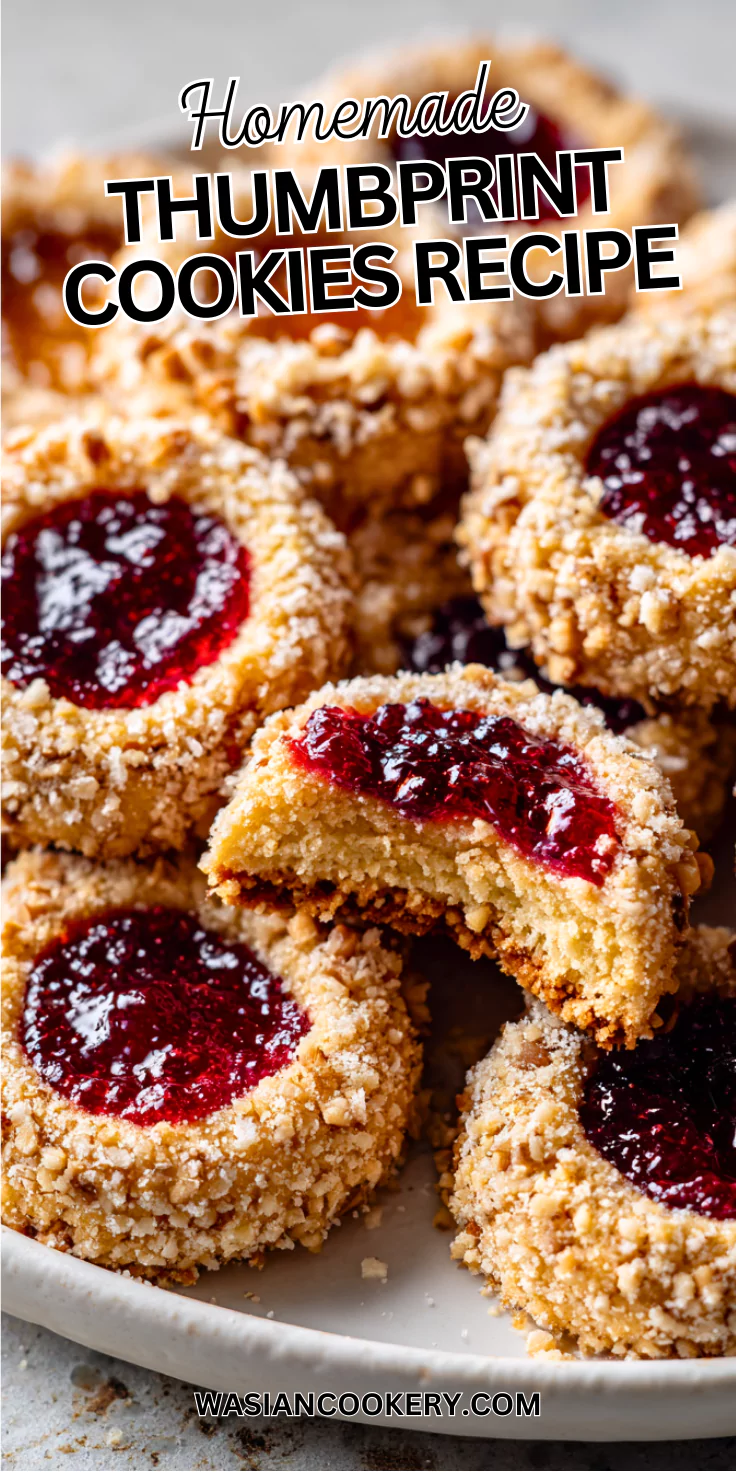
Soften the butter until it gives slightly when pressed but still holds its shape. A shiny, partly melted stick makes soft dough that can spread too much. Cut the butter into pieces to soften more evenly, and keep the bowl away from a warm oven while mixing.
Choose a thick jam or preserve with a flavor you enjoy. Raspberry, strawberry, and apricot are all good choices. Stir it smooth before filling and break up large fruit pieces with the spoon. Very runny jam can soak into the cookie and overflow a shallow center.
Ingredients
- For the Cookies:
- 1 cup (2 sticks) unsalted butter, softened
- 2/3 cup granulated sugar
- 2 large egg yolks
- 1 teaspoon vanilla extract
- 1/2 teaspoon almond extract
- 2 cups all-purpose flour
- 1/2 teaspoon salt
- For Coating and Filling:
- 2 egg whites, lightly beaten
- 1½ cups finely chopped pecans or walnuts
- 1/2 cup jam or preserves (raspberry, strawberry, or apricot)
- Powdered sugar for dusting (optional)
Separate the two eggs, putting both yolks into the dough and reserving both whites for coating. Finely chop the pecans or walnuts instead of grinding them to powder. The 1/2 cup jam is the filling supply; begin with about 1/2 teaspoon per cookie and keep any unused jam clean and refrigerated.
Kitchen Equipment You Will Need
As an Amazon Associate I earn from qualifying purchases.
- Electric mixer
- Mixing bowls
- Measuring cups
- Measuring spoons
- Silicone spatula
- Baking sheets
- Parchment paper
- Cooling racks
- Cookie scoop
- Small spoon
- Fine-mesh sieve
- Chef knife
- Cutting board
- Fine grater
How To Make Thumbprint Cookies
Plan about 35 minutes of active preparation, 30 minutes chilling, up to 45 minutes for three oven batches and handling, and 30 minutes for the final batch to cool: about 2 hours 20 minutes total. Each tray bakes 12–14 minutes. This makes approximately 40–48 small cookies, depending on shaping; divide the batch into four generous sharing portions.
Step 1:
Beat the 1 cup softened butter and 2/3 cup granulated sugar until light and fluffy, about 3 minutes. Scrape the bowl, then mix in the 2 egg yolks, 1 teaspoon vanilla, and 1/2 teaspoon almond extract until smooth.
Step 2:
Add the 2 cups flour and 1/2 teaspoon salt. Mix on low just until no dry flour remains, scraping the bottom of the bowl. Stop before the dough becomes tough from repeated mixing.
Step 3:
Cover the dough and refrigerate for 30 minutes. Keep the reserved egg whites covered in the refrigerator while the dough chills. The dough should feel firm enough to roll without smearing on your hands.
Step 4:
While the dough chills, preheat the oven to 350°F (175°C). Line baking sheets with parchment. Finely chop the 1 1/2 cups pecans or walnuts and place them in a shallow bowl; lightly beat the 2 reserved egg whites in another bowl.
Step 5:
Roll the dough into similar 1-inch balls, approximately 40–48 depending on size. Dip each lightly in the egg whites, let excess drip off, then roll in the chopped nuts. Keep unshaped dough chilled between trays; discard any coating leftovers that contacted raw egg.
Step 6:
Place the balls about 2 inches apart. Press a deep well into each center with a thumb or the rounded back of a small spoon, stopping before the bottom becomes thin. Pinch any large cracks gently closed.
Step 7:
Bake one tray on the center rack for 5 minutes. Carefully reshape puffed centers with the back of a spoon, never a finger on hot dough. Return to the oven for another 7–9 minutes, until edges are lightly golden and centers look set. Repeat with the remaining trays.
Step 8:
Fill the warm cookies with about 1/2 teaspoon jam each, using the measured 1/2 cup as the supply. Keep the filling inside each well; save any clean surplus jam for serving rather than forcing it into small centers.
Step 9:
Let each tray stand for 5 minutes before transferring the cookies carefully to cooling racks. Cool fully, about 25 minutes more for the last tray, until the bases are firm and the jam is no longer warm.
Step 10:
If desired, sift powdered sugar over the cooled cookies shortly before serving. Pack only when completely cool, with parchment between layers, and keep the filled centers from pressing against neighboring cookies.
Notes
- Measure flour lightly. Spoon it into the measuring cup and level the top; packing it down can make the dough crumbly.
- Chop nuts evenly. Small pieces coat the balls more neatly, while large chunks can fall away during shaping.
- Use only a thin egg-white coating. Let drips fall back into the bowl before rolling the dough in nuts.
- Press the centers gradually. Support the sides with your other hand if the edges start splitting.
- Keep a solid base. A well that goes through the cookie cannot hold the jam neatly after baking.
- Cool baking sheets between batches. Putting chilled dough on a hot pan can start melting the butter before it enters the oven.
- Let the cookies firm before lifting. A thin spatula supports the tender base better than picking up a warm cookie by its edges.
Ingredients You Can Add
- Lemon or orange zest adds a gentle citrus note to the dough without changing the jam filling.
- Chocolate ganache can replace the jam once the cookies cool; use a filling thick enough to stay inside the wells.
- Dulce de leche gives a caramel center. Spoon it into cooled cookies and follow the product storage instructions.
- Chocolate-hazelnut spread makes a simple chocolate filling, especially with the pecan coating.
- A prepared cream cheese filling gives a cheesecake-style center; refrigerate the filled cookies promptly.
- Fine coconut flakes can replace part of the nut coating. Watch the edges closely because coconut can brown quickly.
What To Serve
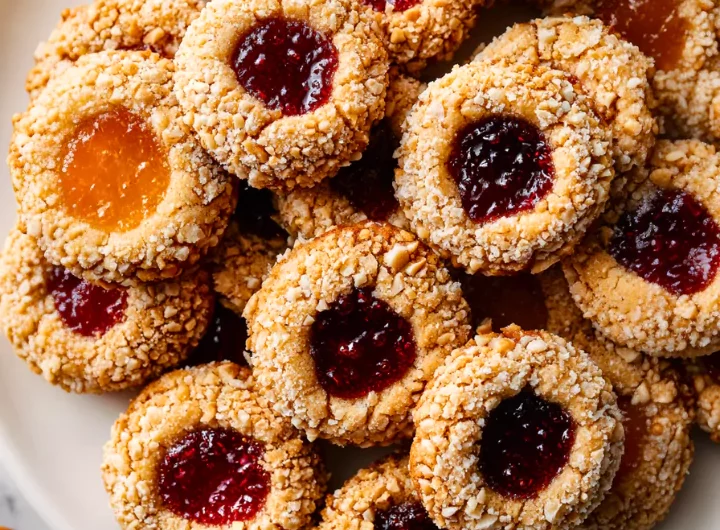
Arrange the cookies in small groups by jam flavor, with raspberry beside apricot for an easy color contrast. They are lovely with tea, coffee, or a glass of milk. Keep the platter level so the soft filling stays inside the centers.
For a fall dessert table, serve them with Pumpkin Cheesecake Bars. The crisp nut edges offer a different texture beside those creamy bars, which should stay chilled until serving.
For Halloween, add Spooky Mummy Brownies and Monster Rice Krispie Treats. Use separate sections of the tray so jam, chocolate decorations, and soft coatings do not stick to one another.
Recipe Variations And Swaps
- Raspberry centers: Use raspberry preserves for the full filling supply. Seedless jam gives a smoother center, while seeded jam adds a little texture.
- Apricot centers: Use thick apricot preserves and chop any large fruit pieces before spooning them into the wells.
- Mixed jam tray: Divide the measured 1/2 cup jam among two or three flavors. Fill a few cookies with each so every flavor is easy to identify.
- Walnut coating: Choose the walnut option in place of pecans, keeping the same 1 1/2 cups and chopping them finely.
- Plain edges: Skip the nuts and egg-white coating for a smooth outside. Keep the dough chilled and use the same doneness cues.
- Lemon curd centers: Fill cooled cookies with prepared lemon curd instead of jam. Refrigerate them and follow the curd storage directions.
- Whole-wheat blend: Replace half the 2 cups all-purpose flour with whole-wheat pastry flour. Expect a more earthy flavor and slightly firmer crumb; avoid adding extra flour during shaping.
- Holiday spice: Mix a small pinch of cinnamon, ginger, or nutmeg into the flour. Choose one warm flavor first so the almond and jam still come through.
How To Store
Keep jam-filled cookies in an airtight container in a cool room for several days for best texture, provided the jam label permits that storage. Separate layers with parchment. Refrigerate any cream cheese, cream-based ganache, or lemon-curd version and use within 3–4 days or the filling’s shorter stated limit; do not leave those out longer than two hours, or one hour above 90°F.
Freeze unfilled, fully cooled cookies for up to 3 months in a rigid container with parchment between layers. Thaw covered at room temperature, then add the jam. Filled cookies can also freeze, but the filling may soften or release moisture, so unfilled cookies usually give a neater finish after thawing.
FAQ
Why did the cookies spread?
The butter or dough may have been too warm, or the tray may still have been hot. Chill soft dough and let the next tray cool before loading it.
Why is the dough cracking?
Very cold dough or too much flour can make it crumbly. Let chilled dough soften briefly until workable and press small cracks together gently.
Should I bake the jam inside?
For this recipe, add it after baking while the cookies are warm. That makes the filling easy to control and avoids bubbling jam.
How do I keep the wells open?
Reshape them after the first 5 minutes of baking with the rounded back of a spoon. Leave enough dough underneath to support the filling.
Can I make the dough ahead?
Keep it covered in the refrigerator for up to 2 days. Let it soften just enough to roll, then keep the shaped cookies cool while the oven heats.
Can I make these vegan or gluten-free?
Those changes affect both the dough and coating. Use a recipe developed for that purpose rather than assuming flax eggs, coconut oil, or a different flour will behave identically here.
Short Description
Buttery thumbprint cookies coated in chopped pecans or walnuts and filled after baking with colorful jam, with a short chill for easy shaping.
Thumbprint Cookies Recipe
Course: Desserts4
servings35
minutes45
minutes2
hours20
minutesButtery thumbprint cookies coated in chopped pecans or walnuts and filled after baking with colorful jam, with a short chill for easy shaping.
Ingredients
- For the Cookies:
1 cup (2 sticks) unsalted butter, softened
2/3 cup granulated sugar
2 large egg yolks
1 teaspoon vanilla extract
1/2 teaspoon almond extract
2 cups all-purpose flour
1/2 teaspoon salt
- For Coating and Filling:
2 egg whites, lightly beaten
1½ cups finely chopped pecans or walnuts
1/2 cup jam or preserves (raspberry, strawberry, or apricot)
Powdered sugar for dusting (optional)
Directions
- Beat the 1 cup softened butter and 2/3 cup granulated sugar until light and fluffy, about 3 minutes. Scrape the bowl, then mix in the 2 egg yolks, 1 teaspoon vanilla, and 1/2 teaspoon almond extract until smooth.
- Add the 2 cups flour and 1/2 teaspoon salt. Mix on low just until no dry flour remains, scraping the bottom of the bowl. Stop before the dough becomes tough from repeated mixing.
- Cover the dough and refrigerate for 30 minutes. Keep the reserved egg whites covered in the refrigerator while the dough chills. The dough should feel firm enough to roll without smearing on your hands.
- While the dough chills, preheat the oven to 350°F (175°C). Line baking sheets with parchment. Finely chop the 1 1/2 cups pecans or walnuts and place them in a shallow bowl; lightly beat the 2 reserved egg whites in another bowl.
- Roll the dough into similar 1-inch balls, approximately 40–48 depending on size. Dip each lightly in the egg whites, let excess drip off, then roll in the chopped nuts. Keep unshaped dough chilled between trays; discard any coating leftovers that contacted raw egg.
- Place the balls about 2 inches apart. Press a deep well into each center with a thumb or the rounded back of a small spoon, stopping before the bottom becomes thin. Pinch any large cracks gently closed.
- Bake one tray on the center rack for 5 minutes. Carefully reshape puffed centers with the back of a spoon, never a finger on hot dough. Return to the oven for another 7–9 minutes, until edges are lightly golden and centers look set. Repeat with the remaining trays.
- Fill the warm cookies with about 1/2 teaspoon jam each, using the measured 1/2 cup as the supply. Keep the filling inside each well; save any clean surplus jam for serving rather than forcing it into small centers.
- Let each tray stand for 5 minutes before transferring the cookies carefully to cooling racks. Cool fully, about 25 minutes more for the last tray, until the bases are firm and the jam is no longer warm.
- If desired, sift powdered sugar over the cooled cookies shortly before serving. Pack only when completely cool, with parchment between layers, and keep the filled centers from pressing against neighboring cookies.
Notes
- Allow about 140 minutes total: 35 active preparation, 30 chilling, up to 45 for three baking batches and handling, and 30 cooling after the final batch. Each tray bakes 12–14 minutes. More trays or a longer chill extend the total.
- The batch makes approximately 40–48 small cookies depending on shaping. Divide the batch into four generous sharing portions.
- Jam is added after baking. Begin with about 1/2 teaspoon per cookie from the measured 1/2 cup; refrigerate any clean unused jam. Discard egg-white and nut coating leftovers that contacted raw egg.
- Reshape hot cookies with a spoon, never a bare thumb. Keep remaining dough chilled and use cool baking sheets for each batch.
- Refrigerate cookies filled with cream cheese, cream-based ganache, or lemon curd; follow the filling storage directions and use within 3–4 days or sooner if required.