Candy Corn Fudge Recipe
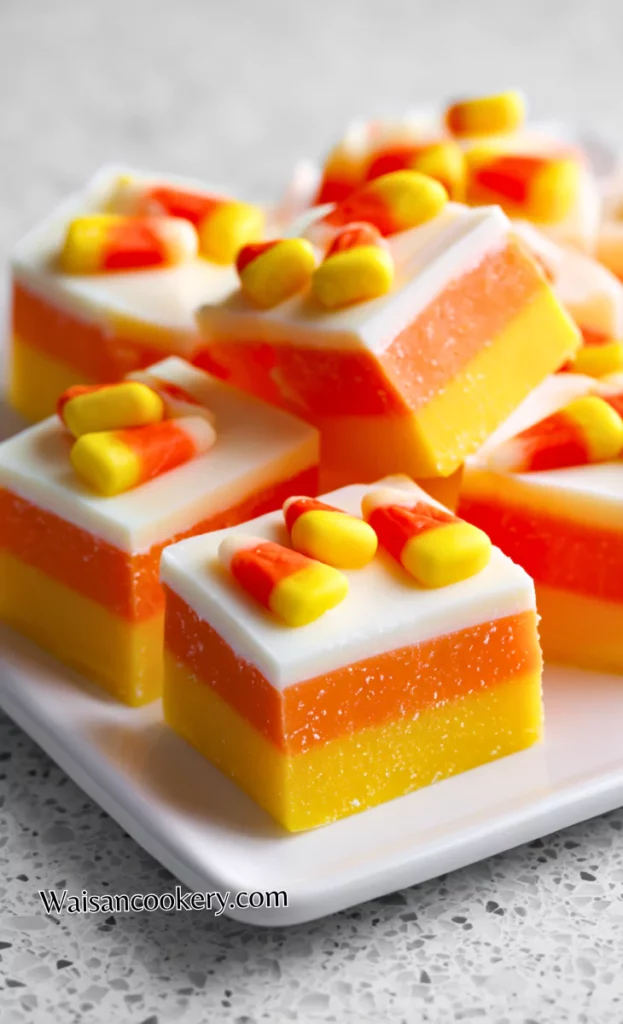
I love the cheerful white, yellow, and orange layers in this candy corn fudge. It has been a much-requested treat at parties and bake sales, which is why I make batch after batch during Halloween season. The little candies make the theme clear before anyone takes a bite. It is a rich white chocolate treat with a soft, creamy texture, and the small squares fit nicely onto a crowded dessert plate.
I have been perfecting this recipe for seven years since my daughter’s preschool Halloween party, where it became a favorite. I use white chocolate chips, gel food coloring, and real vanilla extract. Having the bowls and colors ready first matters because the melted mixture thickens as it cools, leaving less time to fuss with the layers.
An 8×8-inch pan makes 36 small pieces. Allow about 15 minutes of preparation, 5 minutes for heating and stirring, 10 minutes of brief chilling between layers, and at least 2 hours for the finished slab to firm up. That is about 2 hours 30 minutes in total, with extra chilling whenever the center needs it.
Why This Dish Is Great
- The whole base melts together before you divide it, keeping the ingredient measuring simple.
- White chocolate lets the Halloween colors show clearly without a separate colored frosting.
- A small square pan gives you 36 bite-size portions for sharing or gift boxes.
- The recipe uses the refrigerator to set, leaving the oven free for dinner or other baking.
- You can choose tidy layers or a loose swirl using the same measured ingredients.
- Making it ahead leaves only slicing and arranging to do before guests arrive.
Choosing The White Chocolate Chips
Choose white chocolate chips with a flavor you enjoy on their own and check their melting instructions. White baking chips differ between brands; some hold their shape longer before they soften. Stir them well before deciding that they need another burst of heat. A chip shape can remain even when the inside is already soft.
Use sweetened condensed milk, not evaporated milk. The two cans can look similar on the shelf, but they bring very different amounts of sugar and moisture. The fudge also includes butter, so this is a softer style of fudge. Keep it chilled for clean slices and do not expect the snap of a plain chocolate bar.
Ingredients
For the Fudge:
- 3 cups white chocolate chips
- 1 can (14 oz) sweetened condensed milk
- 1/4 cup unsalted butter
- 1 teaspoon vanilla extract
- Orange food coloring (gel or liquid)
- Yellow food coloring (gel or liquid)
- 1/4 teaspoon salt
For Topping:
- 1 cup candy corn
- Extra candy corn for decoration
Kitchen Equipment You Will Need
As an Amazon Associate I earn from qualifying purchases.
- 8×8-inch square pan
- Parchment paper
- Microwave-safe bowls
- Measuring cups
- Measuring spoons
- Silicone spatula
- Tablespoon
- Sharp knife
- Cutting board
- Airtight container
How To Make Candy Corn Fudge
Step 1
Prepare the pan: Line an 8×8-inch square pan with parchment, leaving handles on opposite sides. Set out three microwave-safe bowls and the white, yellow, and orange layer ingredients before heating anything.
Step 2
Melt the base: Put the 3 cups white chocolate chips, the full 14-ounce can of sweetened condensed milk, and the 1/4 cup butter in one bowl. Microwave at half power in 30-second bursts, stirring thoroughly each time. This usually takes about 2–3 minutes of heating; stop when the mixture stirs smooth, without boiling it.
Step 3
Add the flavoring: Stir the 1 teaspoon vanilla and 1/4 teaspoon salt into the warm base until evenly mixed. Scrape the sides and bottom so the flavoring is spread throughout.
Step 4
Divide the mixture: Divide the base into three roughly equal portions, using the other two bowls. Keep each portion separate; all three come from the same batch of melted ingredients.
Step 5
Add the colors: Leave one portion white. Stir yellow coloring into the second and orange into the third, adding a little at a time. Use only enough to reach the color you want.
Step 6
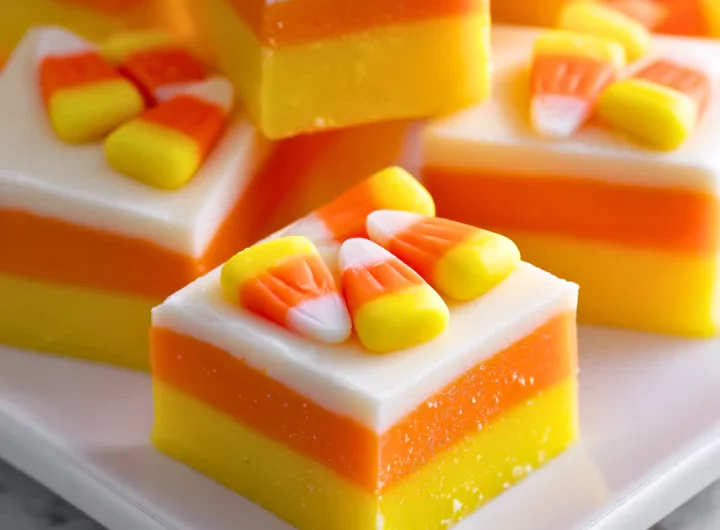
Build the layers: Spread the white portion in the pan and refrigerate for about 5 minutes, until slightly firmer on top. Gently spoon and spread the yellow portion over it; refrigerate for another 5 minutes. Add the orange portion. If a waiting portion becomes too stiff to spread, microwave it for 5 seconds and stir before adding it. For swirled fudge instead, skip the two brief chills, add the three colors, and draw a knife through them a few times.
Step 7
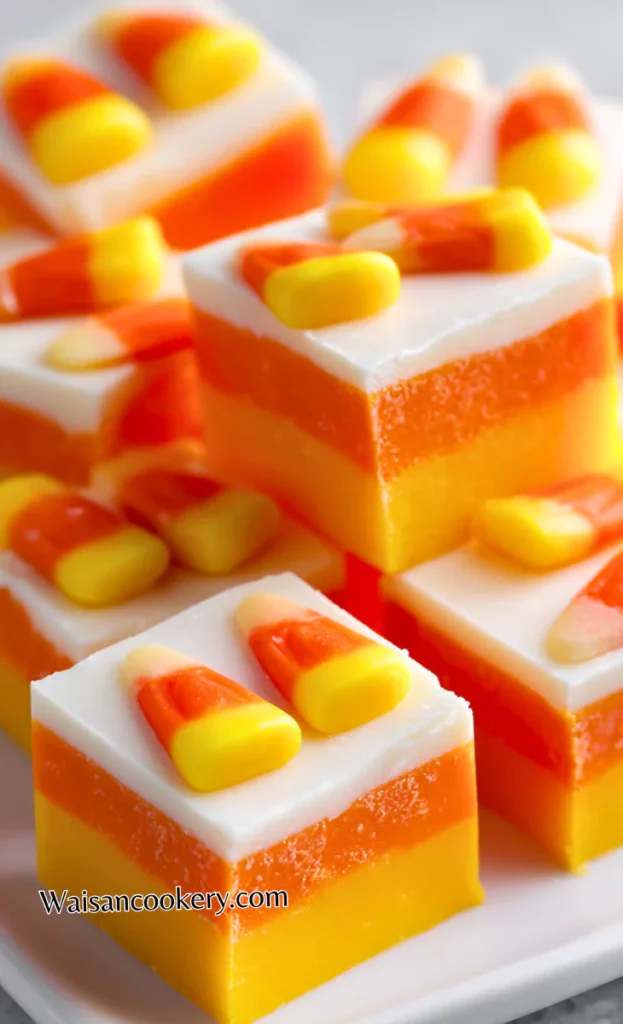
Add the topping: Gently press the 1 cup candy corn onto the soft orange surface. Add the extra candy corn only if desired for decoration. Arrange the pieces with your planned cuts in mind so the knife can pass between large candies.
Step 8
Chill until firm: Refrigerate the finished pan for at least 2 hours, and longer if the center is still soft. The whole slab should hold its shape when lifted and cut; the waiting time starts after the last layer and topping are in place.
Step 9
Slice and store: Lift the firm fudge with the parchment and place it on a cutting board. Cut into 6 rows each way for 36 small squares, wiping the knife between cuts. Refrigerate in an airtight container with parchment between layers.
Notes
- Keep the heat gentle. Vigorous bubbling is unnecessary and can leave the white chocolate grainy or oily.
- Stir thoroughly between heating bursts. Residual heat often melts the last small pieces without another trip to the microwave.
- Gel coloring gives a strong color with a small amount. Liquid coloring is an option, but extra liquid can soften the finished fudge.
- Let each lower layer firm slightly rather than harden completely. Spoon the next layer on gently so the colors stay distinct.
- Spread from small dollops instead of pouring everything onto one spot. A heavy pour can push through a soft lower layer.
- Keep water off the knife and board. If you warm the knife under hot water, dry it completely before slicing.
- The chilling time is a minimum, not a promise. A thick slab, warm refrigerator, or different chips may need several more hours.
Ingredients You Can Add
- Marshmallow fluff: Use a small decorative swirl on top rather than replacing the measured chocolate that helps the fudge set.
- Pumpkin spice: A light sprinkle stirred into the orange portion gives it a warm autumn flavor.
- Crushed pretzels: Add a thin scattering beneath the fudge or over the top for a salty crunch.
- Mini chocolate chips: Sprinkle between slightly cooled layers so they keep more of their shape.
- Edible glitter: Use only a product labeled edible with a food ingredient list, never craft glitter or decorative dust.
- Almond or orange extract: Use cautiously in place of some vanilla, following the extract label because strengths differ.
What To Serve With Candy Corn Fudge
One of my favorite presentations is cutting some pieces into triangles to echo candy corn. The number of pieces will change with the shape. Arrange them beside Monster Rice Krispie Treats for two different textures, leaving a little space so the decorations do not stick together.
For a Halloween meal, Jack O’Lantern Stuffed Peppers give you a savory dish before the sweet tray comes out. Serve the fudge with coffee, tea, or warm apple cider. Small servings suit this rich dessert and leave room for other party food.
For a buffet, put Eyeball Meatballs on the savory side and bring out a small plate of chilled fudge at a time. Keep autumn leaves and nonfood decorations away from the pieces. Gift portions in food-safe bags or boxes once fully firm, with a note to keep them cool.
Recipe Variations And Swaps
- Swirled colors: Skip the brief layer chills and gently marble the three portions together. A few turns are enough; too much mixing makes the colors muddy.
- Cookies and cream: Scatter crushed chocolate sandwich cookies through the white portion. Keep the pieces small enough to slice without pulling apart a square.
- Pretzel bottom: Press a thin layer of crushed pretzels into the lined pan before spreading the white fudge. Loose crumbs may remain when you cut it.
- Pumpkin spice layer: Flavor only the orange portion with the optional spice. Leaving the other colors plain keeps the vanilla flavor noticeable.
- Different candy topping: Swap the decorative candy corn for another small candy you enjoy. The three colored layers still give the fudge a Halloween look.
- Other holidays: Keep the three portions but choose different food colors. If you make additional batches, each needs its own heating, layering, and full chilling time.
- Chocolate version: Milk or dark chocolate changes the flavor and how firmly this mixture sets, and hides the colors. Use a formula developed for that chocolate instead of treating it as an identical replacement.
- Special-diet version: Sugar-free chocolates and condensed-milk alternatives behave differently. This recipe is not a tested sugar-free formula; choose a suitable separate recipe instead of relying on direct swaps.
How To Store
For this soft fudge, refrigerate the cut pieces in an airtight container and use within 1 week for best quality. Place parchment between layers and keep the lid closed so the fudge does not dry out or pick up refrigerator smells. Bring out only what you plan to serve; the pieces soften as they warm.
For longer storage, wrap portions well and freeze for up to 3 months. Thaw in the refrigerator while wrapped, then open the package after thawing to limit moisture collecting on the surface. Candy corn can become sticky or lose its tidy look after freezing, so add fresh extra decorations just before serving if needed.
FAQ
Why did the colors run together?
The lower layer was too soft, or the next portion was added with too much force. Give the lower layer its brief chill and spread the next layer gently in small spoonfuls.
Why is my fudge still soft?
It may simply need more chilling, especially with softer chips or added liquid coloring. Chill until the center holds a cut edge. Do not add random amounts of flour or sugar to rescue it.
Can I use candy melts?
Candy melts have a different fat blend and can set differently. The listed base is white chocolate chips; for predictable results, use those rather than assuming every coating product is an exact substitute.
Can I leave out the condensed milk?
No simple swap is given here. Cream and powdered sugar do not behave like sweetened condensed milk in this formula, so use a different recipe if you need to avoid it.
Does the fudge need a candy thermometer?
No. This method melts a chocolate-based mixture instead of boiling a sugar syrup to a particular stage. Watch the heat, stir frequently, and let the refrigerator do the setting.
Can I make this the night before?
Yes, overnight chilling is convenient. Keep the pan covered after the surface has cooled, then lift and slice the firm slab before serving or packing it.
Short Description
Creamy white chocolate fudge gets white, yellow, and orange layers with candy corn on top. One 8×8-inch pan makes 36 small pieces after thorough chilling.
Candy Corn Fudge Recipe
Course: DessertCuisine: AmericanDifficulty: Easy36
pieces15
minutes5
minutes2
hours30
minutesCreamy white chocolate fudge gets white, yellow, and orange layers with candy corn on top. One 8×8-inch pan makes 36 small pieces after thorough chilling.
Ingredients
- For the Fudge:
3 cups white chocolate chips
1 can (14 oz) sweetened condensed milk
1/4 cup unsalted butter
1 teaspoon vanilla extract
Orange food coloring (gel or liquid)
Yellow food coloring (gel or liquid)
1/4 teaspoon salt
- For Topping:
1 cup candy corn
Extra candy corn for decoration
Directions
- Prepare the pan: Line an 8×8-inch square pan with parchment, leaving handles on opposite sides. Set out three microwave-safe bowls and the white, yellow, and orange layer ingredients before heating anything.
- Melt the base: Put the 3 cups white chocolate chips, the full 14-ounce can of sweetened condensed milk, and the 1/4 cup butter in one bowl. Microwave at half power in 30-second bursts, stirring thoroughly each time. This usually takes about 2–3 minutes of heating; stop when the mixture stirs smooth, without boiling it.
- Add the flavoring: Stir the 1 teaspoon vanilla and 1/4 teaspoon salt into the warm base until evenly mixed. Scrape the sides and bottom so the flavoring is spread throughout.
- Divide the mixture: Divide the base into three roughly equal portions, using the other two bowls. Keep each portion separate; all three come from the same batch of melted ingredients.
- Add the colors: Leave one portion white. Stir yellow coloring into the second and orange into the third, adding a little at a time. Use only enough to reach the color you want.
- Build the layers: Spread the white portion in the pan and refrigerate for about 5 minutes, until slightly firmer on top. Gently spoon and spread the yellow portion over it; refrigerate for another 5 minutes. Add the orange portion. If a waiting portion becomes too stiff to spread, microwave it for 5 seconds and stir before adding it. For swirled fudge instead, skip the two brief chills, add the three colors, and draw a knife through them a few times.
- Add the topping: Gently press the 1 cup candy corn onto the soft orange surface. Add the extra candy corn only if desired for decoration. Arrange the pieces with your planned cuts in mind so the knife can pass between large candies.
- Chill until firm: Refrigerate the finished pan for at least 2 hours, and longer if the center is still soft. The whole slab should hold its shape when lifted and cut; the waiting time starts after the last layer and topping are in place.
- Slice and store: Lift the firm fudge with the parchment and place it on a cutting board. Cut into 6 rows each way for 36 small squares, wiping the knife between cuts. Refrigerate in an airtight container with parchment between layers.
Notes
- Total time allows 15 minutes preparation, 5 minutes heating and stirring, two 5-minute layer chills, and at least 2 hours chilling the finished pan. Chill longer if needed.
- Use the full measured base once, then divide it into three portions. The 1 cup candy corn is the topping; extra candy corn is optional decoration.
- Use sweetened condensed milk, not evaporated milk. A little coloring goes a long way; excess liquid can soften the fudge.
- For swirled fudge, omit the two brief layer chills but still chill the finished pan for at least 2 hours. Refrigerate airtight and use within 1 week for best quality.