Best Dallas BBQ Sticky Wings Recipe
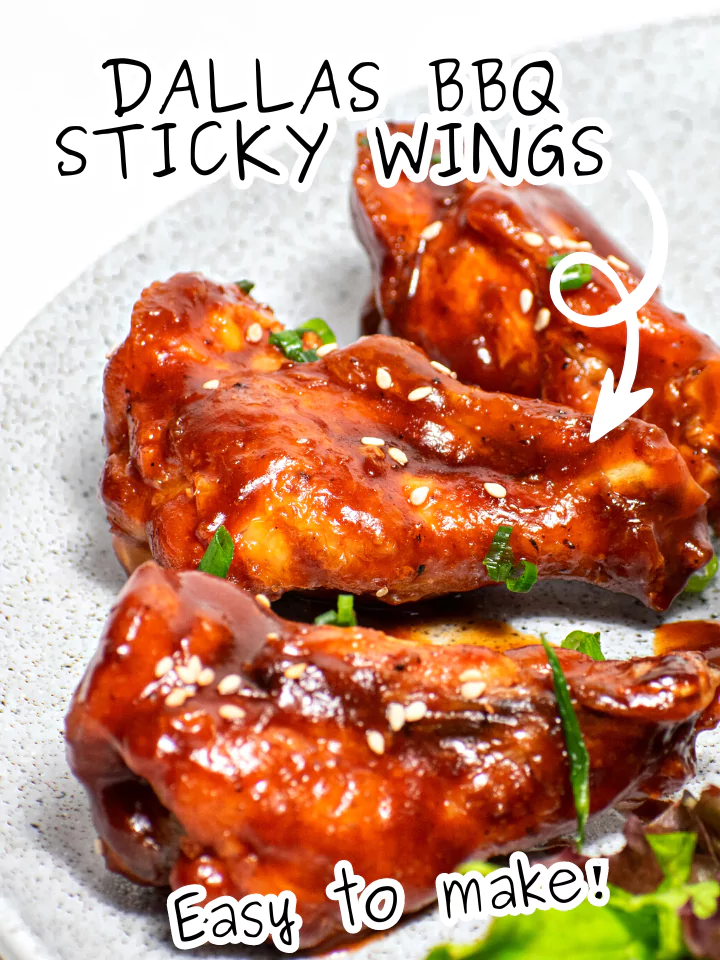
I love these Dallas BBQ Sticky Wings as a home-style take on sweet, saucy chicken wings. Fried flats and drumettes get a glossy coating of barbecue sauce, honey, soy sauce, garlic, vinegar, and smoked paprika.
The skin is crisp when it comes out of the oil, then softens a little under the sticky sauce. Serve the wings soon after tossing for the best balance of juicy chicken and that sweet, tangy coating.
This is an inspired homemade recipe, not an official restaurant formula. Allow about 55 minutes for preparation, sauce, and two frying batches. Smaller equipment or larger wings can take longer, so use a thermometer to check the chicken.
Ingredients and Flavor Choices
- 2 lbs chicken wings, split into flats and drumettes
- 1 cup barbecue sauce
- 1/4 cup honey
- 2 tablespoons soy sauce
- 2 cloves garlic, minced
- 1 tablespoon apple cider vinegar
- 1/2 teaspoon smoked paprika
- Salt and pepper, to taste
- Vegetable oil, for frying
- Optional: sesame seeds, chopped green onions for garnish
Use raw wing sections with both flats and drumettes. Whole wings need to be separated at the joints before you begin; remove the tips if starting with whole wings, then measure the two pounds of sections for this recipe.
The barbecue sauce has the biggest effect on the finished flavor. A regular tomato-based sauce gives a familiar sweet, smoky base. A very sweet honey barbecue sauce makes the added honey more noticeable, while a strongly peppery sauce makes the wings hotter. Choose a sauce you enjoy without changing the listed amount.
Honey helps the sauce cling and adds sweetness. Apple cider vinegar supplies a little tang, and soy sauce brings salt and savory flavor. Mince the garlic finely so it softens during the short simmer rather than leaving large raw-tasting pieces. Smoked paprika adds a gentle smoky note; it isn’t the same as hot chili powder.
Go lightly with salt on the raw chicken because both bottled sauces can be salty. The optional sesame seeds and green onions add a little texture and freshness after the wings are coated.
Kitchen Equipment You Will Need
As an Amazon Associate I earn from qualifying purchases.
- Deep-frying thermometer
- Instant-read thermometer
- Metal spider strainer
- Deep heavy pan
- Deep fryer
- Saucepan
- Wire draining rack
- Baking tray
- Tossing bowl
Frying Setup
A deep-frying thermometer monitors the oil, while an instant-read thermometer checks the chicken. A metal spider strainer helps lift cooked wings out without scooping up excess oil. Have a deep heavy pan or suitable fryer, saucepan, rack, tray, and a clean tossing bowl ready before heating anything.
Use a pan with enough room for oil displacement and bubbling. Follow a fryer’s fill marks; for stovetop frying, keep the pot no more than half full of oil and leave at least two inches below the rim. Keep utensils and the chicken’s surface dry. Stay beside the stove, keep water away, and never use water on a grease fire.
How to Make Dallas BBQ Sticky Wings
1. Combine the barbecue sauce, honey, soy sauce, minced garlic, apple cider vinegar, and smoked paprika in a small saucepan. Bring to a gentle simmer, then reduce the heat and cook for 5–10 minutes, stirring, until glossy and slightly thickened. Set aside.
2. Use fully thawed raw wings and pat them dry. Season lightly with salt and pepper. Heat vegetable oil in a deep heavy pan or fryer to 375°F (190°C), following the appliance fill marks. For stovetop frying, use a deep pot no more than half full of oil, with at least two inches of clear space below the rim.
3. Carefully lower the wings into the oil in uncrowded batches. Fry for about 10–12 minutes per batch, turning as needed. Check the thickest meat away from the bone with a clean thermometer after lifting a wing out: it must reach at least 165°F. Cook longer when needed and let the oil return to 375°F between batches.
4. Drain the cooked wings on a rack over a tray. Transfer to a clean large bowl, pour over the prepared warm sauce, and toss gently until evenly coated. Do not return sauced wings to the frying oil.
5. Sprinkle with the optional sesame seeds and chopped green onions just before serving.
6. Serve promptly. Allow about 15 minutes preparation and 40 minutes cooking for the sauce, two frying batches, and oil-temperature recovery, about 55 minutes total. Additional batches or larger wings take longer.
The Right Sauce Consistency
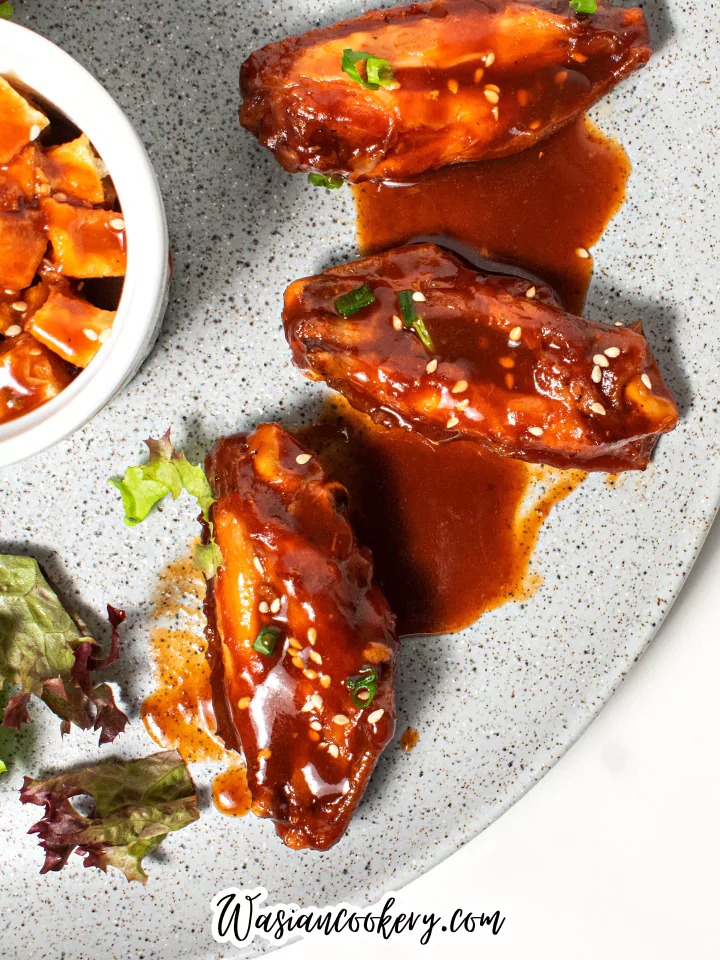
The sauce should coat a spoon while still flowing easily. A gentle simmer brings the garlic and bottled sauces together without making a candy-like glaze. Stir along the bottom and corners of the saucepan, where the honey mixture can catch if the heat is too high.
Bottled barbecue sauces vary in thickness, so look at the texture as well as the clock. If yours is already quite thick, use the shorter end of the simmering time. Once it leaves a shiny coating on a spoon, take it off the heat. It will become a little thicker as it cools.
Keep the sauce separate from raw chicken. This recipe fries the wings plain and coats them after cooking. Sweet sauce can scorch in hot oil, so avoid marinating the wings in this glaze before frying or returning coated wings to the fryer.
Frying and Doneness Tips
Patting the thawed wings dry helps limit splattering and gives the skin a better start. Lower them into the oil carefully in small batches. The oil temperature drops when cold chicken enters, so wait for it to recover before starting the next batch rather than loading in more wings immediately.
The original 10–12 minute frying window is a starting point for split wings, not a safety guarantee. Lift a larger piece out to check the thickest meat without touching bone. If it hasn’t reached 165°F, return it to the oil and continue cooking. Check several pieces across the batches.
Drain the cooked wings on a rack over a tray rather than piling them into a deep bowl straight away. Trapped steam softens the skin. For two batches, keep the first batch on an oven-safe rack in a low oven while the second cooks, then toss and serve together.
Troubleshooting Sticky Wings
The wings look brown but aren’t done inside. Check that the oil isn’t running hotter than intended, and avoid overcrowding. Keep cooking until the chicken reaches the safe temperature. Very large drumettes can need longer than flats; remove smaller finished pieces as they are ready.
The sauce won’t cling. Let the wings drain before tossing so surface oil doesn’t interfere with the coating. Warm sauce flows around the wings more evenly than a cold, stiff glaze. Toss gently with a broad spoon, turning the wings from the bottom of the bowl.
The wings lost their crispness. Some softening is normal once fried skin meets sauce. Coat them close to serving time and avoid covering the platter tightly, which traps steam. These are sticky wings, so a dry, crackly coating won’t last as long as it does on unsauced chicken.
Serving Ideas
Serve the wings with plenty of napkins and a bowl for the bones. Dinosaur Barbeque Coleslaw gives a cool, crunchy contrast, while Tomato Cucumber Salad keeps the sides fresh and simple. A little Wingstop-style Blue Cheese Dip works alongside celery sticks for anyone who enjoys a creamy dip with wings.
The recipe card keeps the original four servings. That is a practical guide rather than a fixed number of wing pieces, since their size varies. For a main meal, add your preferred sides. If using leftover chicken in sandwiches, wraps, or a salad, remove every bone first.
Storage and Reheating
Refrigerate leftovers in shallow containers within two hours, or one hour if the surroundings are hotter than 90°F. Store at 40°F or below and use within three to four days. Keep any clean extra sauce in a separate covered container rather than pouring it over the stored wings.
Freeze cooked wings in a sealed freezer-safe container if you won’t finish them in that time. Use within about two months for best texture. Thaw overnight in the refrigerator. The glaze and skin will soften during storage, so reheated wings won’t have exactly the texture of a freshly fried batch.
Reheat in a moderate oven on a lined tray, covering loosely if the sauce begins to darken. Check the thickest meat reaches 165°F before eating. A microwave also works for a quick portion, although it softens the skin further. Reheat only the amount you plan to serve.
Frequently Asked Questions
Can I fry frozen wings? Thaw these raw wings fully in the refrigerator and dry them before frying. Ice and surface water cause hot oil to splatter. The timing here assumes thawed pieces, so don’t put a frozen block of wings into the pan.
Are these wings spicy? That depends mainly on the barbecue sauce you choose. The listed recipe contains no hot sauce or cayenne. Use a mild barbecue sauce if you want a sweet, gently smoky result.
Are they gluten-free? Ordinary soy sauce often contains wheat, and barbecue sauce ingredients vary. Check every label if gluten is a concern. The recipe as listed should not be assumed gluten-free.
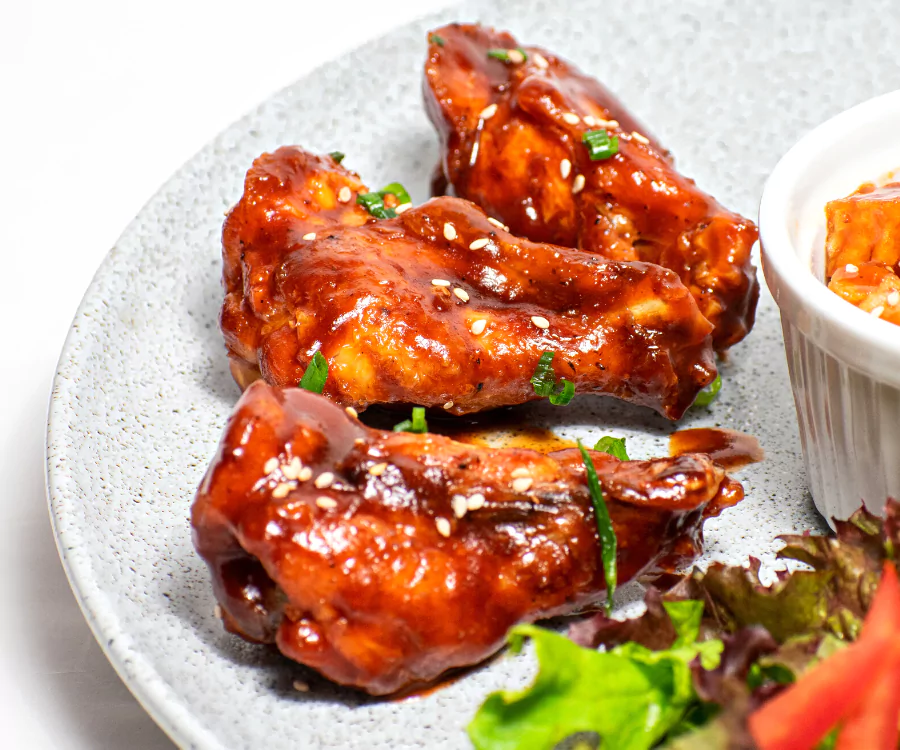
Dallas BBQ Sticky Wings Recipe
Course: Main, AppetizersCuisine: AmericanDifficulty: Easy4
servings15
minutes40
minutes55
minutesHome-style fried chicken wings tossed in a sticky barbecue, honey, soy, and garlic sauce. Inspired by restaurant-style wings; not an official restaurant recipe.
Ingredients
2 lbs chicken wings, split into flats and drumettes
1 cup barbecue sauce
1/4 cup honey
2 tablespoons soy sauce
2 cloves garlic, minced
1 tablespoon apple cider vinegar
1/2 teaspoon smoked paprika
Salt and pepper, to taste
Vegetable oil, for frying
Optional: sesame seeds, chopped green onions for garnish
Directions
- Combine the barbecue sauce, honey, soy sauce, minced garlic, apple cider vinegar, and smoked paprika in a small saucepan. Bring to a gentle simmer, then reduce the heat and cook for 5–10 minutes, stirring, until glossy and slightly thickened. Set aside.
- Use fully thawed raw wings and pat them dry. Season lightly with salt and pepper. Heat vegetable oil in a deep heavy pan or fryer to 375°F (190°C), following the appliance fill marks. For stovetop frying, use a deep pot no more than half full of oil, with at least two inches of clear space below the rim.
- Carefully lower the wings into the oil in uncrowded batches. Fry for about 10–12 minutes per batch, turning as needed. Check the thickest meat away from the bone with a clean thermometer after lifting a wing out: it must reach at least 165°F. Cook longer when needed and let the oil return to 375°F between batches.
- Drain the cooked wings on a rack over a tray. Transfer to a clean large bowl, pour over the prepared warm sauce, and toss gently until evenly coated. Do not return sauced wings to the frying oil.
- Sprinkle with the optional sesame seeds and chopped green onions just before serving.
- Serve promptly. Allow about 15 minutes preparation and 40 minutes cooking for the sauce, two frying batches, and oil-temperature recovery, about 55 minutes total. Additional batches or larger wings take longer.