Air Fryer Chickpeas Recipe
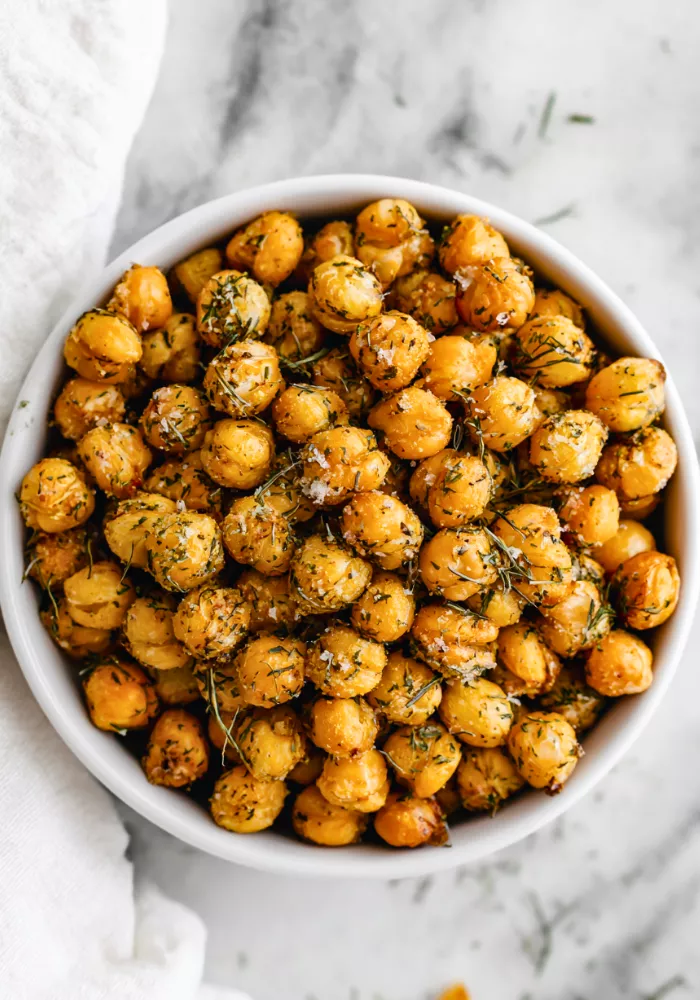
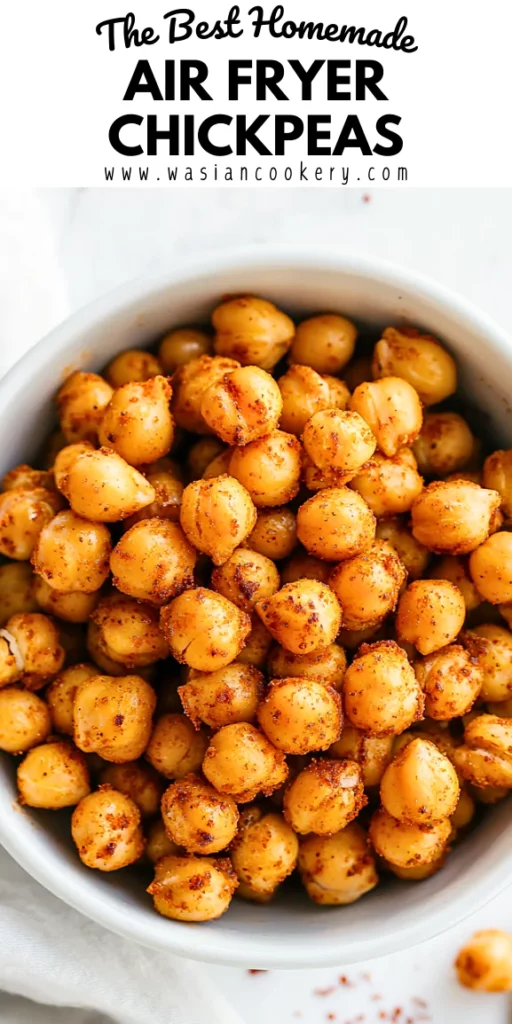
I love making air fryer chickpeas because a simple can turns into a warm, savory snack with very little fuss. Olive oil helps the garlic and pepper cling to the chickpeas, while optional smoked paprika and cayenne let you choose how smoky or spicy to make them.
I prefer to enjoy them as a snack or as a crunchy topping for salads and soups. Their best texture comes from a dry surface, enough space in the basket, and a short cooling time. Those little steps matter more than adding extra oil.
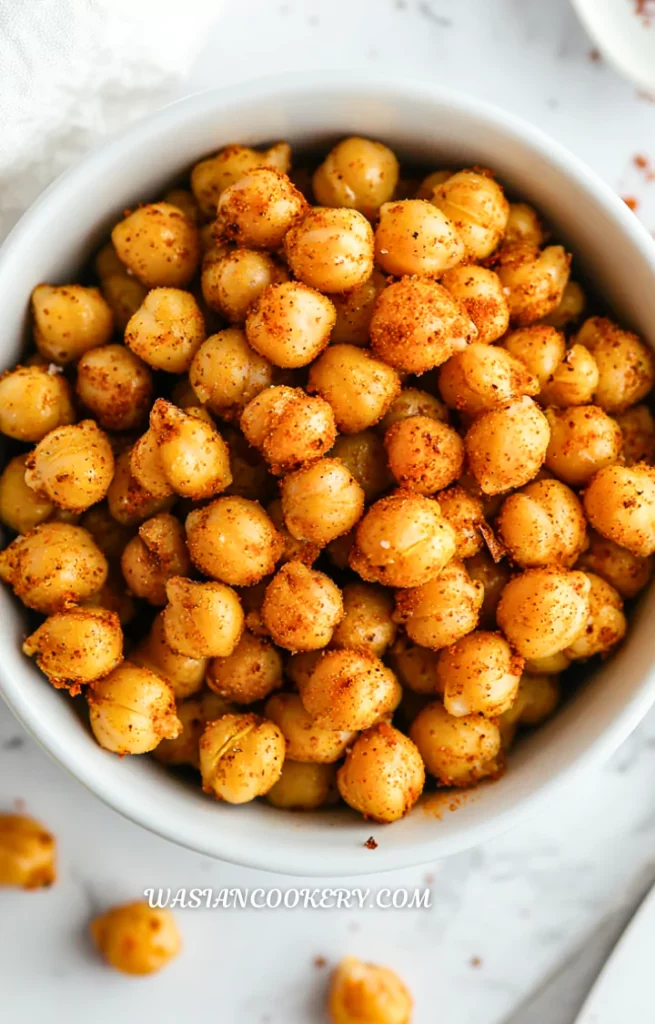
This recipe uses one can of chickpeas and simple seasonings. Plan on about 38 minutes, including drying, preheating, and cooling. Air fryers vary, so use the timing as a starting point and check a cooled chickpea before deciding that the batch is ready.
Why This Dish Is Great
- A pantry staple becomes a snack without soaking dried beans or heating a large oven.
- One tablespoon of olive oil coats the batch and carries the garlic and spice flavors.
- The same chickpeas can top a lunch bowl, brighten a salad, or accompany a dip.
- The optional paprika and cayenne make it easy to choose a mild or spicy finish.
- A small batch is convenient when you want to enjoy the chickpeas while they are at their crunchiest.
What Is the Best Main Ingredient?
Use canned chickpeas, also called garbanzo beans, that hold their shape when rinsed. The 15-ounce amount is the can’s labeled weight, including liquid; drain that liquid away before cooking. Very soft, broken chickpeas can still taste good, but small fragments brown faster and may fall through a wide basket.
Plain chickpeas let the seasonings shine. A no-salt-added can works with the measured salt in this recipe without introducing extra brine flavor. After rinsing, dry them until the surface looks matte rather than wet. Removing skins that loosen on the towel is helpful, but peeling every bean is unnecessary.
Ingredients
- 1 can (15 oz) chickpeas, drained and rinsed
- 1 tbsp olive oil
- ½ tsp salt
- ½ tsp black pepper
- ½ tsp garlic powder
- ½ tsp smoked paprika (optional)
- ¼ tsp cayenne pepper (optional, for spice)
Garlic powder spreads evenly over the small chickpeas and is less likely to leave large scorched pieces than chopped garlic. Smoked paprika adds warmth without necessarily adding heat; cayenne provides the heat. Keep both optional ingredients separate until you decide which flavors you want in this batch.
Kitchen Equipment You Will Need
As an Amazon Associate I earn from qualifying purchases.
- Air fryer
- Can opener
- Colander
- Paper towels
- Mixing bowl
- Measuring spoons
- Silicone spatula
- Oven mitts
- Cooling tray
- Serving bowl
- Citrus zester
- Saucepan
- Instant-read food thermometer
- Shallow food storage containers
- Heatproof trivet
- Cheese grater
How To Make Air Fryer Chickpeas
Step 1
Drain and rinse the chickpeas in a colander. Spread them over paper towels, pat thoroughly dry, and leave them spread out for about 5 minutes while you gather the seasonings. Remove loose skins, but do not worry about peeling every chickpea. Allow about 12 minutes altogether for draining, drying, and seasoning.
Step 2
In a bowl, toss the dry chickpeas with the olive oil, salt, black pepper, garlic powder, smoked paprika if using, and optional cayenne. Stir until coated, with no puddle of oil or water at the bottom.
Step 3
Set the air fryer to 375°F (190°C) and preheat for 3 minutes, or follow your model's preheating instructions. Use its correctly installed basket and crisper plate. Leave the basket unlined, and never preheat with loose paper or foil inside.
Step 4
Place the chickpeas in a single layer in the basket. Air fry for 12–15 minutes, shaking carefully every 5 minutes. Keep within your appliance's loading instructions. If they will not fit without piling up, cook in two batches instead.
Step 5
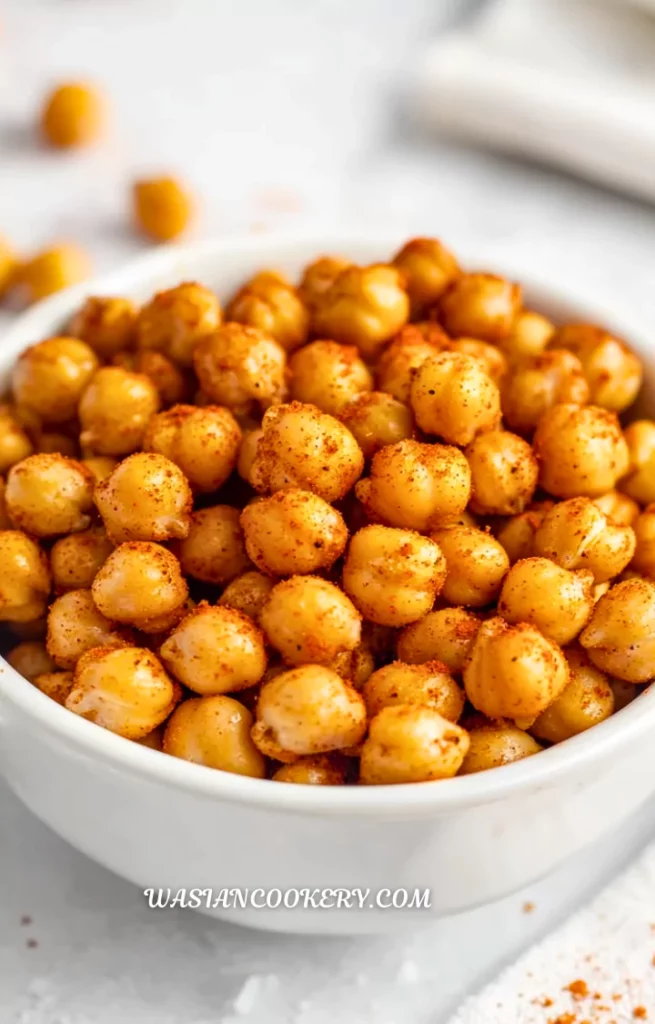
Check a chickpea after letting it cool enough to taste. The outside should be golden and dry, with a pleasantly crisp bite. If the center is still soft, cook for another 2–3 minutes and check again. Watch closely because garlic powder and paprika can darken before the chickpeas finish drying.
Step 6
Spread the cooked chickpeas on a clean tray for about 5 minutes so steam escapes, then serve. They become firmer as they cool. The 38-minute total allows 15 minutes for preparation and preheating, up to 18 minutes cooking, and 5 minutes cooling for one batch; a second batch adds another 12–18 minutes.
Notes
- Dry carefully. Water left between the chickpeas delays browning, so replace a soaked towel with a dry one before seasoning.
- Leave room for air. A crowded basket creates uneven patches; shaking helps, but it does not replace sensible batch sizes.
- Use the measured oil. More oil will not rescue wet chickpeas and can leave a greasy coating instead of a crisp surface.
- Shake gently over a heatproof surface. Hold the basket handle securely, and avoid pressing a release button while shaking a detachable basket.
- Skip liners for this recipe. Follow the manufacturer’s instructions for accessories, and never block the basket or lower air passages with paper or foil.
- Watch the color near the end. Dark spices can hide browning, so check the texture of a cooled chickpea as well as its appearance.
- Cool in a shallow layer. A deep bowl traps steam, softening the chickpeas just when their shells are beginning to firm up.
Ingredients You Can Add
- Cumin: A small pinch adds an earthy note alongside the paprika without changing the basic method.
- Chili powder: Use a light sprinkle for a warmer flavor, checking whether the blend already contains salt.
- Lemon zest: Add freshly grated zest after cooking for brightness without pouring extra liquid over the crisp shells.
- Parmesan: Sprinkle finely grated cheese over the warm chickpeas after cooking so it does not burn in the basket.
- Honey: A little drizzle after cooking makes a sweet coating, but expect a softer, stickier snack.
- Cinnamon and sugar: Add after cooking for a sweet variation, preferably to a batch made without the savory seasonings.
What To Serve With Air Fryer Chickpeas
My favorite way to serve these chickpeas is warm in a small bowl, with a yogurt-based dip alongside. For a fresh contrast, make tomato cucumber salad and scatter the chickpeas over individual portions immediately before eating.
They also add a roasted bite to Greek pasta salad. Keep the chickpeas separate from the dressing until serving, since a wet salad softens them quickly. This is especially helpful when packing the salad ahead for lunch.
For a fuller dinner, serve them beside Greek chicken bowls or your usual grain bowl. Add the chickpeas last, after any sauce. Nuts or seeds can join a snack bowl, but keep wet fruit and dips on the side.
Variations and Swaps
- Spicy chickpeas: Include the optional cayenne, then taste a cooled chickpea before adding any extra heat.
- Garlic herb chickpeas: Add a pinch of dried oregano after cooking for a savory herb finish.
- Smoky chickpeas: Use the optional smoked paprika and leave out cayenne for warmth without sharp heat.
- Lemon pepper chickpeas: Finish with lemon zest and let the measured black pepper provide the peppery bite.
- Taco-style chickpeas: Use a little salt-free taco seasoning in place of the garlic and optional paprika.
- Sweet chickpeas: Leave out the garlic, pepper, paprika, and cayenne, then finish with cinnamon and a little maple syrup.
- Cheesy chickpeas: Toss with Parmesan or nutritional yeast after cooking, while the oil-coated surfaces are still warm.
- Home-cooked chickpeas: Start with fully boiled, drained chickpeas from a separate recipe. Dry beans cannot go straight into this short air-frying method.
Storage
These homemade chickpeas have not been dried or tested for pantry storage. They may still contain moisture even when the outside feels crisp. For leftovers, use a shallow container and refrigerate within 2 hours, or within 1 hour if the room is above 90°F. Keep at 40°F or colder and use within 3–4 days. Do not seal a steaming pile and leave it on the counter.
Refrigeration softens the texture, so a fresh small batch is best for snacking. To warm leftovers, spread them in the basket at 350°F (175°C), shake after 2–3 minutes, and continue as needed until thoroughly heated to 165°F. Let them cool briefly before eating. Reheating may improve their crunch, but it cannot make improperly stored chickpeas safe.
FAQ
Why are my chickpeas still soft?
They may have been wet, crowded, or removed too soon. Cool one before checking the center. If the coating is already getting dark, stop chasing a harder crunch at the expense of burnt spices.
Do I need to peel every chickpea?
No. Remove loose skins that come away during drying. A few attached skins are fine; thorough surface drying and a shallow cooking layer matter more than perfect peeling.
Can I start with dried chickpeas?
Only after soaking and fully boiling them according to a separate chickpea recipe or package directions. Canned chickpeas are already cooked. The air fryer step here browns and dries them; it does not replace that first cooking stage.
How long do they stay crunchy?
They are crunchiest soon after cooking and cooling. Humidity, the brand of chickpeas, and any added sauce affect the texture. There is no reliable promise of several crunchy days, and leftovers should be refrigerated.
Can I double this recipe?
Yes, but cook separate shallow batches instead of filling the basket deeply. Double the ingredient quantities for the larger recipe, and allow an additional cooking cycle. Check later batches early because the appliance is already hot.
Can I use less oil?
The measured tablespoon gives the seasonings an even coating. An oil-free version will have a different surface and spices may fall off, so expect a different result rather than the same texture with one ingredient removed.
Short Description
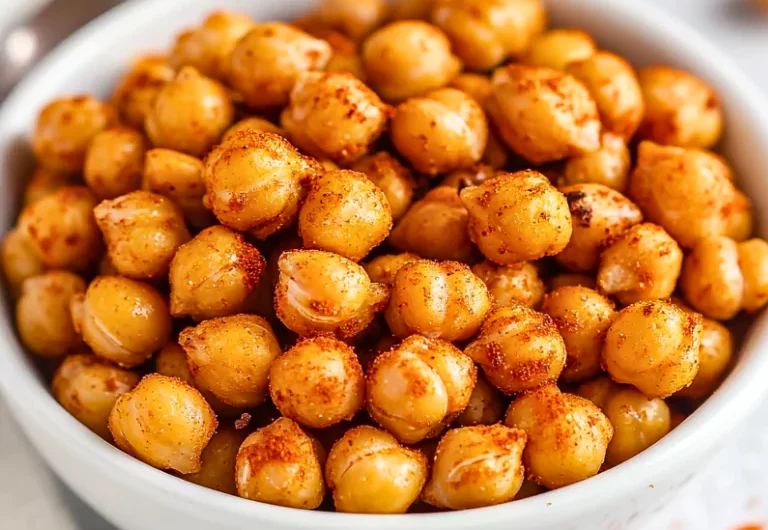
Air fryer chickpeas with olive oil, garlic, and optional smoky spices make a warm snack or salad topping. Dry well, cook in a shallow layer, and cool briefly before serving.
Air Fryer Chickpeas
Course: Snacks, SidesCuisine: Mediterranean, Middle EasternDifficulty: Easy2
servings15
minutes18
minutes38
minutesAir fryer chickpeas with olive oil, garlic, and optional smoky spices make a warm snack or salad topping. Dry well, cook in a shallow layer, and cool briefly before serving.
Ingredients
1 can (15 oz) chickpeas, drained and rinsed
1 tbsp olive oil
½ tsp salt
½ tsp black pepper
½ tsp garlic powder
½ tsp smoked paprika (optional)
¼ tsp cayenne pepper (optional, for spice)
Directions
- Drain and rinse the chickpeas in a colander. Spread them over paper towels, pat thoroughly dry, and leave them spread out for about 5 minutes while you gather the seasonings. Remove loose skins, but do not worry about peeling every chickpea. Allow about 12 minutes altogether for draining, drying, and seasoning.
- In a bowl, toss the dry chickpeas with the olive oil, salt, black pepper, garlic powder, smoked paprika if using, and optional cayenne. Stir until coated, with no puddle of oil or water at the bottom.
- Set the air fryer to 375°F (190°C) and preheat for 3 minutes, or follow your model’s preheating instructions. Use its correctly installed basket and crisper plate. Leave the basket unlined, and never preheat with loose paper or foil inside.
- Place the chickpeas in a single layer in the basket. Air fry for 12–15 minutes, shaking carefully every 5 minutes. Keep within your appliance’s loading instructions. If they will not fit without piling up, cook in two batches instead.
- Check a chickpea after letting it cool enough to taste. The outside should be golden and dry, with a pleasantly crisp bite. If the center is still soft, cook for another 2–3 minutes and check again. Watch closely because garlic powder and paprika can darken before the chickpeas finish drying.
- Spread the cooked chickpeas on a clean tray for about 5 minutes so steam escapes, then serve. They become firmer as they cool. The 38-minute total allows 15 minutes for preparation and preheating, up to 18 minutes cooking, and 5 minutes cooling for one batch; a second batch adds another 12–18 minutes.
Notes
- Timing allows one batch: 15 minutes preparation/preheating, up to 18 minutes cooking, and 5 minutes cooling. Add 12–18 minutes per additional batch.
- Refrigerate leftovers within 2 hours, or 1 hour above 90°F, and use within 3–4 days. This recipe does not establish room-temperature shelf stability.