Monster Eye Cookies Recipe
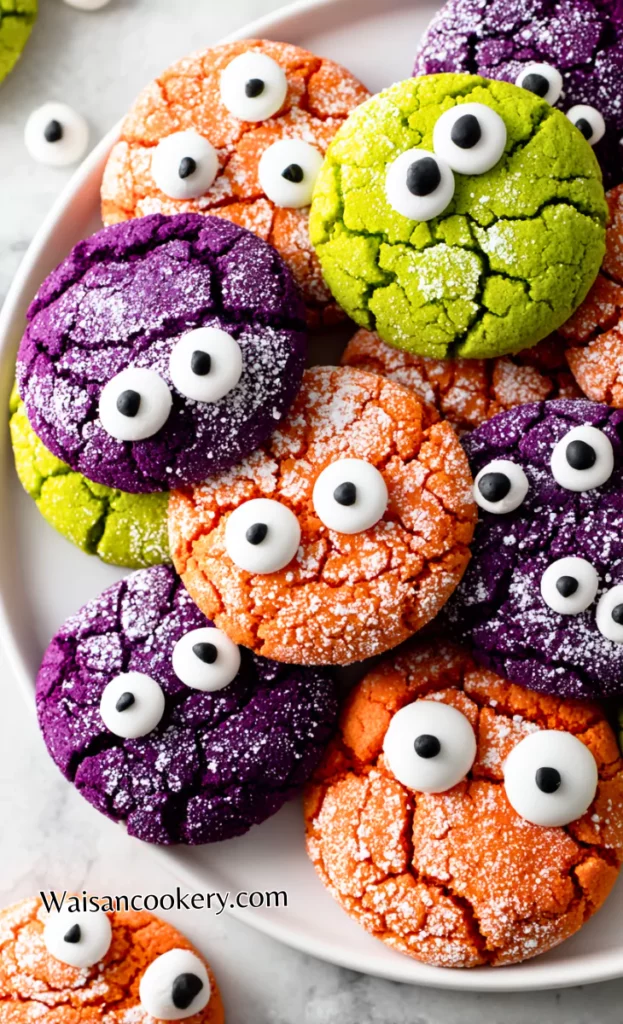
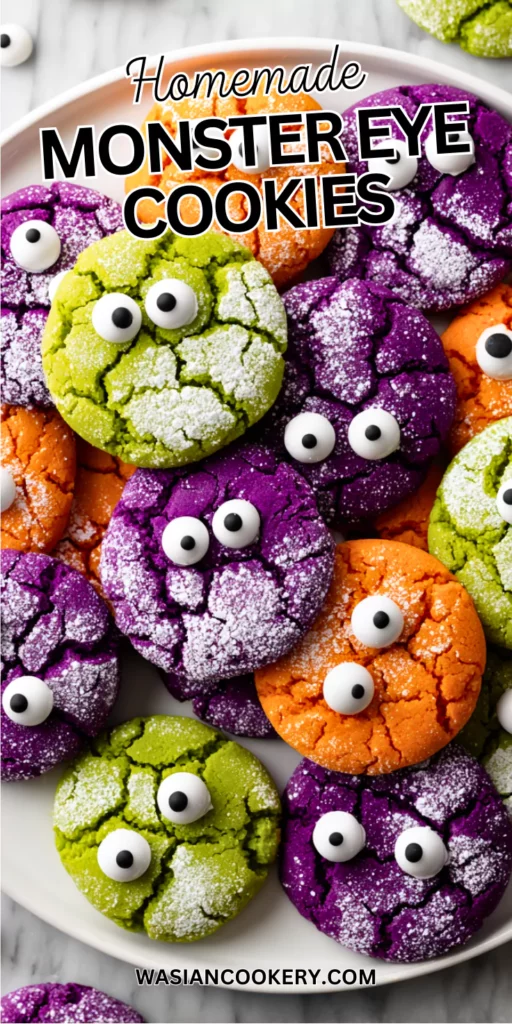
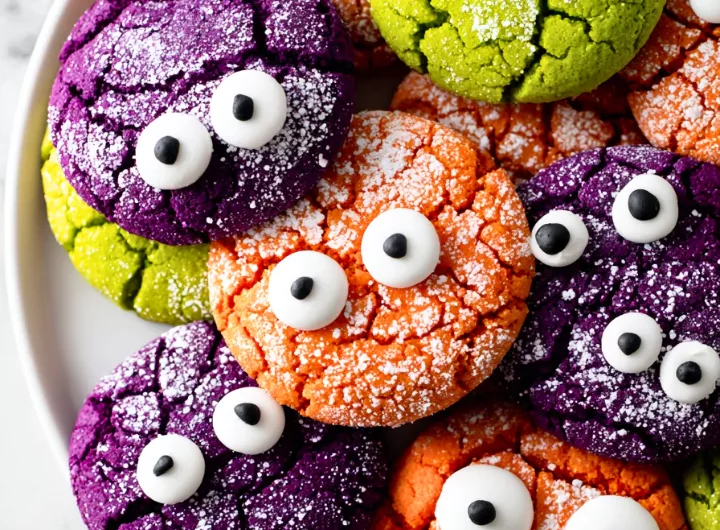
I love the bright colors and funny faces on these Monster Eye Cookies. My Halloween baking tradition began with them when I needed an easy treat for a school party. White cake mix gives the dough a pale base for green, orange, and purple.
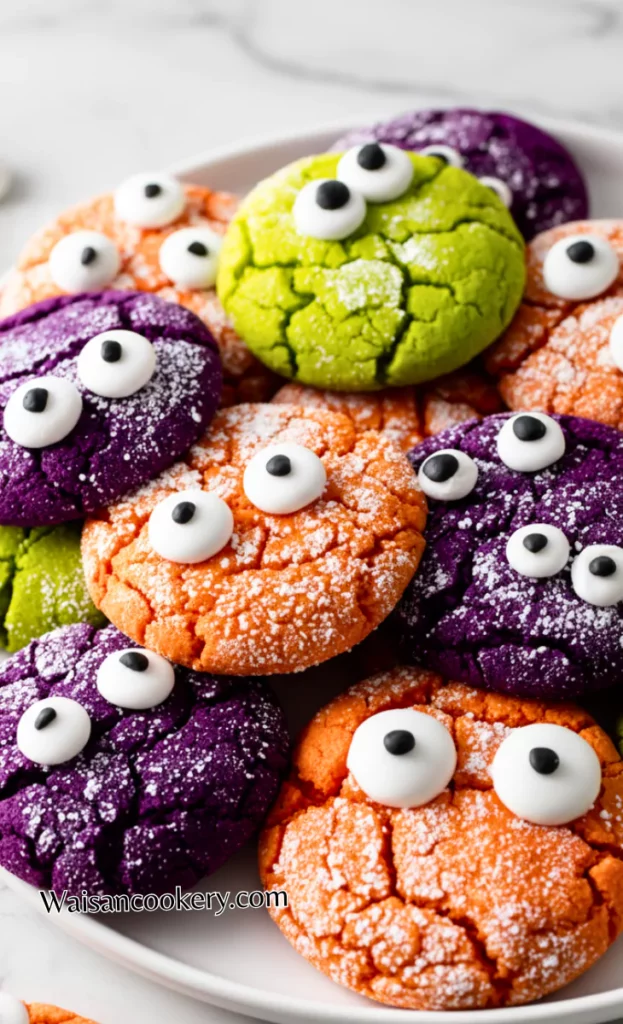
I use gel food coloring for strong shades and buy candy eyes in bulk during October. A generous powdered-sugar coating makes the colored cracks stand out. Some faces can have one big eye, while others get a little cluster.
The dough comes together quickly, but baking, cooling, and setting need their own time. This recipe makes 24 cookies and uses 18.25 ounces of dry cake mix. Check the package weight before starting, and save the decorating for after the cookies have cooled.
Why This Dish Is Great
- A simple dough: Cake mix, eggs, oil, and vanilla make the base. There is no separate butter-creaming step or long list of dry ingredients.
- Three colors: Dividing one dough into three bowls keeps the flavor consistent while giving the finished platter plenty of variety.
- Forgiving faces: Candy eyes can sit at different angles. The monsters do not need matching expressions or carefully piped outlines.
- Soft centers: The cookies stay tender when baked until set, then allowed to finish firming on the sheet before moving to a rack.
- Flexible preparation: Bake the cookies ahead and decorate later. A cool, dry surface makes it easier to attach the eyes neatly.
Choosing The Cake Mix And Colors
Use 18.25 ounces of ordinary white cake mix, roughly 517 grams, measured dry. Boxes come in different sizes, so one smaller package does not supply the amount needed here. If necessary, weigh the required amount from two packages of the same mix. Follow this cookie recipe rather than adding the water or extra ingredients printed in the cake directions.
Concentrated gel food coloring adds color with little extra liquid. Use products labeled for food, add a little at a time, and mix each portion separately. Natural food colors can work too, but shades may be softer after baking. A white cake mix gives clearer colors than a yellow or chocolate base.
Ingredients
For the Cookies
- 1 box white cake mix (18.25 oz)
- 2 large eggs
- 1/3 cup vegetable oil
- 1 teaspoon vanilla extract
For Coloring
- Green food coloring
- Orange food coloring
- Purple food coloring
- Powdered sugar for rolling
For the Eyes
- 48-72 candy eyes (various sizes)
- 1/4 cup white chocolate chips (melted, for "glue")
All 2 eggs, 1/3 cup oil, and 1 teaspoon vanilla go into the base dough. The powdered sugar coats the outside; it is not mixed into the dough. Use 48–72 candy eyes across 24 cookies, about two or three each on average. The 1/4 cup white chocolate chips is the decorating glue.
Kitchen Equipment You Will Need
As an Amazon Associate I earn from qualifying purchases.
- Mixing bowl
- Small mixing bowls
- Silicone spatula
- Measuring cups
- Measuring spoons
- Kitchen scale
- Baking sheets
- Parchment paper
- Cookie scoop
- Cooling rack
- Thin spatula
- Microwave-safe bowl
- Teaspoon
- Oven thermometer
- Piping bag
- Serving platter
- Airtight freezer containers
How To Make Monster Eye Cookies
Budget about 1 hour 40 minutes: 40 minutes total mixing, rolling, and decorating; about 25 minutes for two baking batches and brief chocolate melting; 20 minutes cooling after the final batch; and 15 minutes setting. This is a practical allowance without relying on overlap. Sticky dough may need an extra 15–20 minutes chilling.
Step 1
Heat the oven to 350°F (175°C) and line two baking sheets with parchment. Use a center rack and bake one sheet at a time. Check that you have the full 18.25 ounces of dry white cake mix; smaller boxes need extra mix from another identical package.
Step 2
Mix all the cake mix with the 2 large eggs, 1/3 cup vegetable oil, and 1 teaspoon vanilla until no dry pockets remain. Scrape the bottom of the bowl. The dough should be thick. Do not taste raw dough, and wash hands and utensils after contact with the raw eggs and mix.
Step 3
Divide the dough evenly among three bowls. Color one portion green, one orange, and one purple, starting with a little food coloring and mixing until even. If any dough is too sticky to roll, cover and chill for 15–20 minutes, then check again. Add that optional chill to the total.
Step 4
Divide each colored portion into eight equal pieces for 24 cookies altogether. Roll into balls and coat generously in powdered sugar, using a clean small bowl. The cracks develop in the oven; the raw balls should simply look coated in white sugar.
Step 5
Arrange 12 balls on each prepared sheet, about 2 inches apart, and flatten each only slightly. Keep the second sheet in the refrigerator while the first bakes. If your sheets cannot fit 12 with enough space, use additional batches and allow more baking time.
Step 6
Bake one sheet for 10–12 minutes, until the edges and tops are set and the centers are soft but no longer wet or glossy with raw dough. Continue briefly if needed. Bake the second sheet the same way, allowing about 20–24 minutes baking for both batches.
Step 7
Let each batch stand on its sheet for 2 minutes, or slightly longer if too fragile to lift. Transfer gently with a thin spatula to a rack and cool completely, allowing about 20 minutes after the final batch. Hot cookies can make the decorating chocolate run.
Step 8
Place all 1/4 cup white chocolate chips in a dry microwave-safe bowl. An adult should heat in short intervals at reduced power, stirring each time, until just melted. Allow roughly 1–2 minutes including stirring, and stop before scorching. Follow the chip package if it gives specific melting directions.
Step 9
Use small dots of melted white chocolate to attach the 48–72 candy eyes to the cooled cookies. Plan two or three eyes each on average, varying the faces while sharing the chosen eye count across the batch. Use any remaining melted white chocolate for tiny mouths or extra dots.
Step 10
Let the decorated cookies stand for about 15 minutes, or longer until the chocolate is firm and the eyes hold in place. Keep them flat during setting. Once fully cool and set, serve or pack in an airtight container with space around raised decorations.
Notes
- Read the weight: Check ounces before opening the mix. The amount of dry mix matters more than the number of boxes on the counter.
- Separate colors: Use a clean spoon for each bowl. Moving a purple spoon into the orange dough can quickly make a muddy shade.
- Coat generously: Roll until the whole surface is white. Thin spots may disappear into the dough as the cookies spread and bake.
- Portion evenly: Similar-sized balls bake more evenly. Divide each color into eight before shaping so the last cookies are not much smaller.
- Watch the centers: Soft is fine, but wet raw dough needs longer. Cookie size, pan color, and oven accuracy can change the baking time.
- Cool before decorating: Warm cookies are not needed to hold the eyes. A small fresh dot of melted chocolate sticks to a cool, dry cookie.
- Let the faces set: Test one eye gently before packing. Warm rooms may need more than 15 minutes for the chocolate to become firm.
Ingredients You Can Add
- Edible glitter: Mix a little into the rolling sugar only when labeled edible with an ingredient list. Craft glitter and decorative-only dust stay off cookies.
- Lemon or almond extract: A small amount changes the flavor. Keep it light and check the product label when baking for guests with allergies.
- Sprinkles: Press a few onto the tops before baking for spots. Leave room for the eyes that will be attached later.
- Chocolate-chip mouths: Add a chip to a fresh chocolate dot on a cooled cookie. Match the size to the candy eyes.
- Red decorating gel: Draw tiny lines around the eyes for a bloodshot look. Some gels stay tacky, so avoid stacking these cookies.
- Black frosting: Pipe small eyebrows or a smile after the eye glue sets. Follow the frosting’s storage directions if they are shorter.
What To Serve
Arrange the monsters on a dark platter to show their colors, keeping the cookies flat so their eyes stay attached. Spooky Mummy Brownies make a nice chocolate companion on a separate tray. A simple glass of milk suits both treats.
For a decorating afternoon, bake and cool everything before bringing out the edible toppings. Monster Rice Krispie Treats add a chewy shape to the table. Let children help with age-appropriate decorations while adults handle all heating and cutting.
Serve a Halloween dinner such as Jack O’Lantern Stuffed Peppers before the cookie platter. If sending treats to school or a shared event, check its food rules and include ingredient information. Cake mix and candy labels can vary between brands.
Recipe Variations And Swaps
- Chocolate monsters: Use the same measured weight of chocolate cake mix for darker cookies. Bright dough colors will show less clearly, while pale eyes stand out.
- Funfetti faces: Fold sprinkles into the dough for scattered color. Choose baking sprinkles rather than hard decorative beads.
- Natural colors: Use food coloring made for baking and follow its label. Adding vegetable juices changes the dough’s moisture and is not a direct color swap.
- Gluten-free monsters: A gluten-free cake mix can behave differently, so use a cookie recipe developed for that mix. Check candy eyes, coating, and all other labels too.
- Vegan monsters: Choose a tested vegan cake-mix cookie method and suitable eyes and coating. Replacing eggs with flax changes the dough; this recipe does not establish the needed ratio.
- Reduced-sugar version: Specialty mixes and sugar substitutes may spread or brown differently. Use their own cookie directions; this dessert is not automatically suitable for any medical diet.
- Mini monsters: Divide each color into 16 pieces for about 48 half-size cookies. Begin checking around 8 minutes and continue until set; extra trays change the overall schedule.
- One-color creatures: Keep all the dough together and use one food color. Make different faces with the same total eye count instead of adding liquid for an uncertain glow effect.
How To Store
Keep fully cooled, set cookies airtight at cool room temperature for up to 5 days, following any shorter decoration-label directions. Parchment between layers reduces sticking, but a single layer best protects tall eyes. Humidity can dull the powdered-sugar coating; it does not stay bright white indefinitely.
For longer storage, freeze in a single layer until firm, then pack in an airtight freezer container for up to 2 months. Thaw covered at room temperature so moisture collects on the container rather than directly on the cookies. For the neatest faces, freeze undecorated cookies and add eyes after thawing; sugar and candy colors may still change.
FAQ
Why did the sugar coating disappear?
A thin coating or humid storage can make it fade. Coat the raw balls generously and cool cookies completely before sealing the container.
My cake-mix box is smaller. Can I still use it?
You need 18.25 ounces of dry mix in total. Weigh extra from an identical package rather than guessing changes to the eggs or oil.
Why is my dough too sticky?
Warm dough or excess liquid coloring can make rolling difficult. Chill briefly and use gel colors next time; do not keep adding flour without a suitable adjusted recipe.
Can I use brownie mix?
Brownie mix has a different formula and is not a direct substitute here. Use a brownie-mix cookie recipe, then decorate the cooled cookies as monsters.
Why are the candy eyes falling off?
Attach them with fresh melted white chocolate on cool, dry cookies. Keep the cookies flat until the chocolate has set completely.
Can I decorate the next day?
Yes. Store the cooled plain cookies airtight, then attach eyes the next day. Allow the chocolate another 15 minutes or longer to set before packing.
Short Description
Monster Eye Cookies are soft cake-mix cookies in green, orange, and purple, with a powdered-sugar coating and candy eyes attached with white chocolate. Bake, cool, decorate, and let the eyes set before serving.
Monster Eye Cookies
Course: DessertCuisine: AmericanDifficulty: Easy24
cookies40
minutes25
minutes1
hour40
minutesIngredients
- For the Cookies:
1 box white cake mix (18.25 oz)
2 large eggs
1/3 cup vegetable oil
1 teaspoon vanilla extract
- For Coloring:
Green food coloring
Orange food coloring
Purple food coloring
Powdered sugar for rolling
- For the Eyes:
48-72 candy eyes (various sizes)
1/4 cup white chocolate chips (melted, for “glue”)
Directions
- Heat the oven to 350°F (175°C) and line two baking sheets with parchment. Use a center rack and bake one sheet at a time. Check that you have the full 18.25 ounces of dry white cake mix; smaller boxes need extra mix from another identical package.
- Mix all the cake mix with the 2 large eggs, 1/3 cup vegetable oil, and 1 teaspoon vanilla until no dry pockets remain. Scrape the bottom of the bowl. The dough should be thick. Do not taste raw dough, and wash hands and utensils after contact with the raw eggs and mix.
- Divide the dough evenly among three bowls. Color one portion green, one orange, and one purple, starting with a little food coloring and mixing until even. If any dough is too sticky to roll, cover and chill for 15–20 minutes, then check again. Add that optional chill to the total.
- Divide each colored portion into eight equal pieces for 24 cookies altogether. Roll into balls and coat generously in powdered sugar, using a clean small bowl. The cracks develop in the oven; the raw balls should simply look coated in white sugar.
- Arrange 12 balls on each prepared sheet, about 2 inches apart, and flatten each only slightly. Keep the second sheet in the refrigerator while the first bakes. If your sheets cannot fit 12 with enough space, use additional batches and allow more baking time.
- Bake one sheet for 10–12 minutes, until the edges and tops are set and the centers are soft but no longer wet or glossy with raw dough. Continue briefly if needed. Bake the second sheet the same way, allowing about 20–24 minutes baking for both batches.
- Let each batch stand on its sheet for 2 minutes, or slightly longer if too fragile to lift. Transfer gently with a thin spatula to a rack and cool completely, allowing about 20 minutes after the final batch. Hot cookies can make the decorating chocolate run.
- Place all 1/4 cup white chocolate chips in a dry microwave-safe bowl. An adult should heat in short intervals at reduced power, stirring each time, until just melted. Allow roughly 1–2 minutes including stirring, and stop before scorching. Follow the chip package if it gives specific melting directions.
- Use small dots of melted white chocolate to attach the 48–72 candy eyes to the cooled cookies. Plan two or three eyes each on average, varying the faces while sharing the chosen eye count across the batch. Use any remaining melted white chocolate for tiny mouths or extra dots.
- Let the decorated cookies stand for about 15 minutes, or longer until the chocolate is firm and the eyes hold in place. Keep them flat during setting. Once fully cool and set, serve or pack in an airtight container with space around raised decorations.
Notes
- Use 18.25 ounces (about 517 grams) dry white cake mix. Weigh from additional identical packages if one box is smaller; do not add the cake-making ingredients from the box directions.
- Makes 24 cookies: divide dough into three colors, then eight equal balls per color. Share 48–72 eyes and the full 1/4 cup melted white chocolate across the batch.
- Allow about 100 minutes: 40 active mixing, rolling, and decorating; 25 for two baking batches plus brief chocolate melting; 20 cooling after the last batch; and 15 setting. Optional sticky-dough chilling adds 15–20 minutes or longer as needed.
- Bake one sheet at a time at 350°F (175°C), 10–12 minutes per batch, until set with no wet raw-dough centers. Cool completely before attaching eyes. Adults handle the hot oven and melted chocolate.
- Do not eat raw dough or let children play with it. Use only edible decorations; check all ingredient labels for allergies. Store cool and airtight for up to 5 days or freeze for up to 2 months; coating appearance may change.