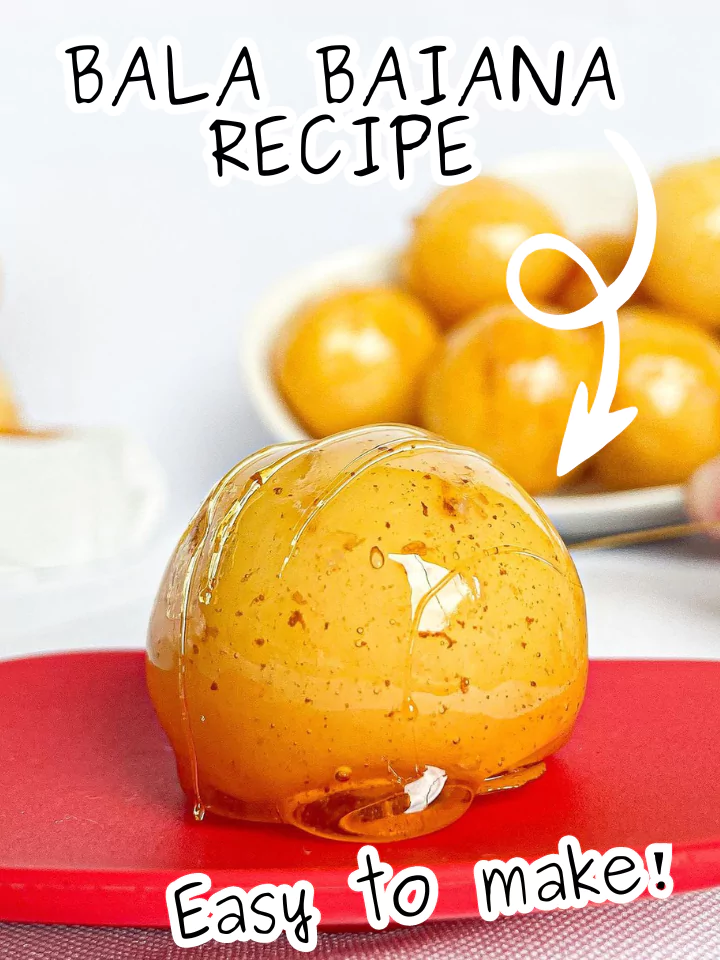
Bala Baiana Recipe
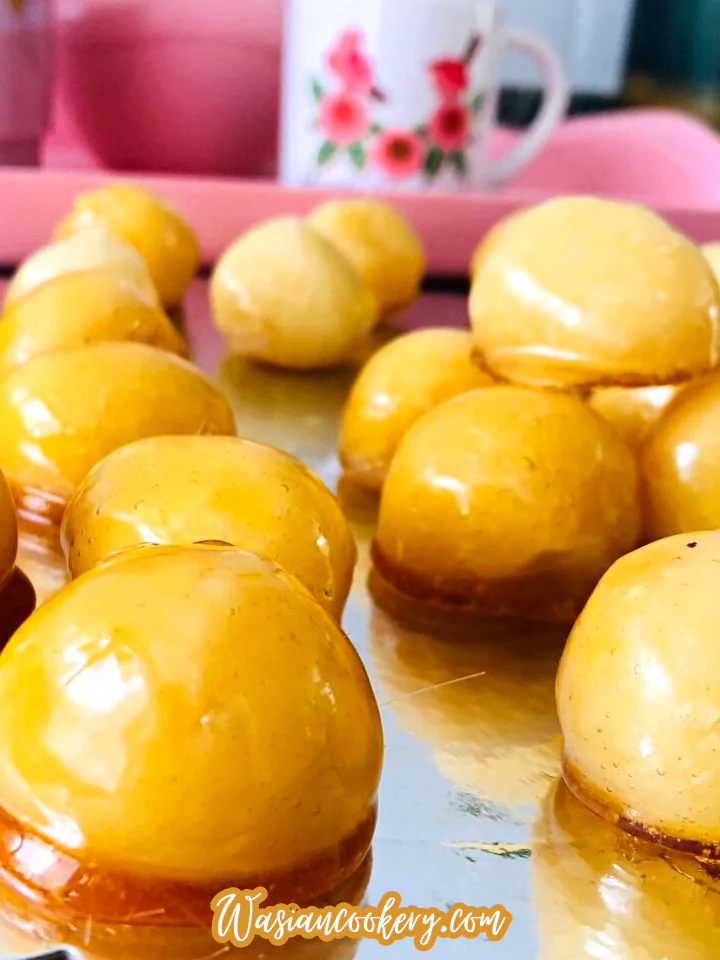
My favorite part of Bala Baiana is the contrast between its soft coconut center and thin, crisp sugar shell. Condensed milk holds the filling together, while sugar syrup gives each candy its shiny coating.
This recipe makes 20 candies using the same six ingredients listed below. The filling needs to cool before you roll it, and the coating needs to harden fully before the candies can be handled.
Allow about 2 hours 5 minutes, including cooling and chilling. Have all your tools ready before cooking the syrup: hot sugar can cause serious burns, and the coating stage needs your full attention.
Kitchen Equipment You Will Need
As an Amazon Associate I earn from qualifying purchases.
- Deep heavy saucepan
- Heatproof spatula
- Candy thermometer
- Candy dipping forks
- Food-safe silicone baking mats
- Dipping tray
Hot-Sugar Safety
Use a deep, heavy saucepan, a heatproof spatula, a candy thermometer, dry candy dipping forks and food-safe silicone baking mats. Check that the mats and thermometer are rated for hot candy. A light pan helps show the syrup color.
Clear children, pets and distractions from the work area before you begin. Keep the saucepan handle turned inward and set the dipping tray beside the stove on a stable, heatproof surface. Use tools to move the candies while the sugar is hot, even after the pan leaves the burner.
Ingredients
- 1 can of sweetened condensed milk
- 1 tablespoon of margarine or butter
- 100 grams of shredded coconut
- 2 cups of sugar
- 1 cup of water
- 2 tablespoons of white vinegar
Choosing the ingredients
Condensed milk: This method assumes one standard 14-ounce can, about 395–397 grams. Check the label: sweetened condensed milk is thick and sweet, while evaporated milk is a different ingredient. A larger catering-size can will not work with the listed quantities.
Coconut: Fine, dried, unsweetened shredded coconut gives small, even pieces throughout the filling. Weigh the 100 grams rather than packing a measuring cup. Large flakes make shaping harder, and fresh coconut adds moisture that can change how long the filling needs to cook.
Butter or margarine: Choose ordinary butter or a baking margarine, rather than a reduced-fat spread with extra water. The full tablespoon goes into the filling. Silicone mats and adequately cooled dough avoid needing extra grease on the plate, tray or hands.
Sugar and vinegar: Use ordinary white granulated sugar and food-grade white vinegar, typically labeled 5% acidity. Cleaning vinegar is not suitable. Measure the listed two tablespoons carefully; do not pour in an extra splash. Vinegar helps discourage crystallization, but too much acid can affect the finished shell.
How to make Bala Baiana
Step 1
Combine the sweetened condensed milk, the full tablespoon of butter or margarine, and shredded coconut in a heavy saucepan. Cook over medium-low heat, stirring constantly and scraping the base, for about 10–15 minutes, until thick and pulling away from the pan. A spoon drawn across the bottom should leave a clear track briefly. Spread on a silicone-lined plate, cool for 10 minutes, then refrigerate for about 35 minutes, or until cool and firm enough to shape.
Step 2
Divide the cooled mixture into 20 equal portions and roll into smooth balls with clean, dry hands. Set them on a silicone-lined tray. If they are too sticky, chill a little longer rather than adding more butter or coconut. Have a second silicone-lined tray, dry dipping forks and a candy thermometer ready before heating the syrup.
Step 3
In a clean, deep, heavy saucepan, combine the 2 cups sugar, 1 cup water and 2 tablespoons white vinegar. Stir over medium heat until the sugar dissolves. Once boiling, stop stirring. Position the candy thermometer in the syrup without touching the bottom and boil steadily, watching closely; allow about 15–20 minutes, but use the temperature rather than the clock.
Step 4
Cook the syrup to the hard-crack range, 300–310°F (149–154°C), then remove the pan from the heat. It may be clear to pale gold; do not keep cooking just to make it dark. For a cold-water check, use a spoon to drop a tiny sample into cold water and let it cool completely before checking that it forms brittle threads that snap. Never touch or taste hot syrup, and never put your fingers into the pan.
Step 5
Let vigorous bubbling settle briefly. Using a dry dipping fork, lower one coconut ball into the syrup, turn gently to coat, lift and let excess syrup drip back into the pan. Slide it onto the prepared tray using a second fork, keeping fingers clear of the coating. Repeat promptly. If the syrup becomes too thick to dip, warm it gently just until fluid; do not add water to hot syrup.
Step 6
Leave the candies undisturbed for at least 15 minutes, until completely cool and the shells are hard, before touching, wrapping or serving. Keep the hot pan and utensils out of reach while they cool. Once the pan is cool, soak it with warm water to dissolve the remaining sugar.
What the filling should look like
The cooked filling should gather into a thick mass when stirred, with no loose milky liquid pooling around it. Keep the heat moderate so it thickens before the bottom scorches. If you see browned flecks from the pan, stop scraping those into the mixture; a burnt flavor cannot be covered by the coating.
Cooling is part of the method, not an optional pause. Warm filling sticks and slumps even if it has cooked enough. Spread it in a shallow layer so the center cools too. Divide into similar portions before rolling so one candy does not end up twice the size of another.
Getting a crisp shell
The hard-crack endpoint matters more than a dark caramel color. A syrup that merely looks thick may still contain enough water to leave a chewy coating. Watch the thermometer near the end because the temperature can rise quickly once most of the water has boiled away.
A thin shell is easier to eat than a thick one. Lift each candy over the pan and allow a short drip before setting it down. Keep the centers dry; visible condensation on cold filling can make the syrup spit. Do not dip wet forks back into the hot pan.
The finished shell is hard candy, so bite carefully. Let every candy cool all the way through before sampling it. A surface that looks set can still cover a warm center, and a freshly dipped candy is not safe to pick up with bare fingers.
Troubleshooting
The filling will not hold a ball: Give it more chilling time first. If the fully cooled mixture remains loose, it may not have cooked far enough. Return the uncoated filling to low heat, stir until it reaches the thick-track stage, then cool it again. This extends the stated time.
The syrup turns grainy: Sugar crystals on the pan or spoon can encourage crystallization. Use a clean pan, dissolve the sugar before boiling and stop stirring once it boils. Do not scrape dried sugar from the sides into the finished syrup. A grainy batch will not give the intended smooth shell.
The coating becomes sticky: Humidity, moisture from the filling or an undercooked syrup can all contribute. Coat close to serving time and avoid a steamy kitchen. This homemade candy is best enjoyed fresh; a glossy shell is not a guarantee of long room-temperature storage.
Serving and keeping the candies
Serve the completely cooled candies in small paper cases, leaving a little space between them. For a mixed dessert plate, try chocolate-covered strawberries, oatmeal peanut butter cookies or chocolate strawberry tarts. Keep juicy fruit from touching the sugar shells.
For make-ahead preparation, cook the coconut filling the day before and refrigerate it covered. Shape and coat the candies on the day you plan to serve them. Making the centers ahead is more reliable for texture than keeping the finished coating in a damp refrigerator overnight.
Refrigerate leftover filled candies in a covered container within 2 hours, or 1 hour above 90°F, and use within 3–4 days. Separate layers to prevent sticking. Refrigeration may soften the shells; food safety takes priority over crispness. This recipe has not established a shelf-stable storage period or suitability for shipping.
Frequently asked questions
Can I skip the thermometer?
A candy thermometer makes the endpoint easier to judge. The cold-water check in the method is a texture test using only a fully cooled sample. Sound alone is unreliable, and touching syrup straight from the pan is never an acceptable test.
Can I change the coconut or reduce the sugar?
Those changes alter the filling or coating rather than simply making it less sweet. Keep the listed proportions for this version. A coconut-free candy or a lower-sugar coating needs its own developed formula.
Why is the total longer than the cooking time?
The estimate includes 30 minutes for measuring, shaping and dipping, about 35 minutes cooking, 45 minutes cooling the filling and at least 15 minutes setting the shells. Extra chilling or a slower syrup boil will add time; always wait for the right texture and safe handling temperature.
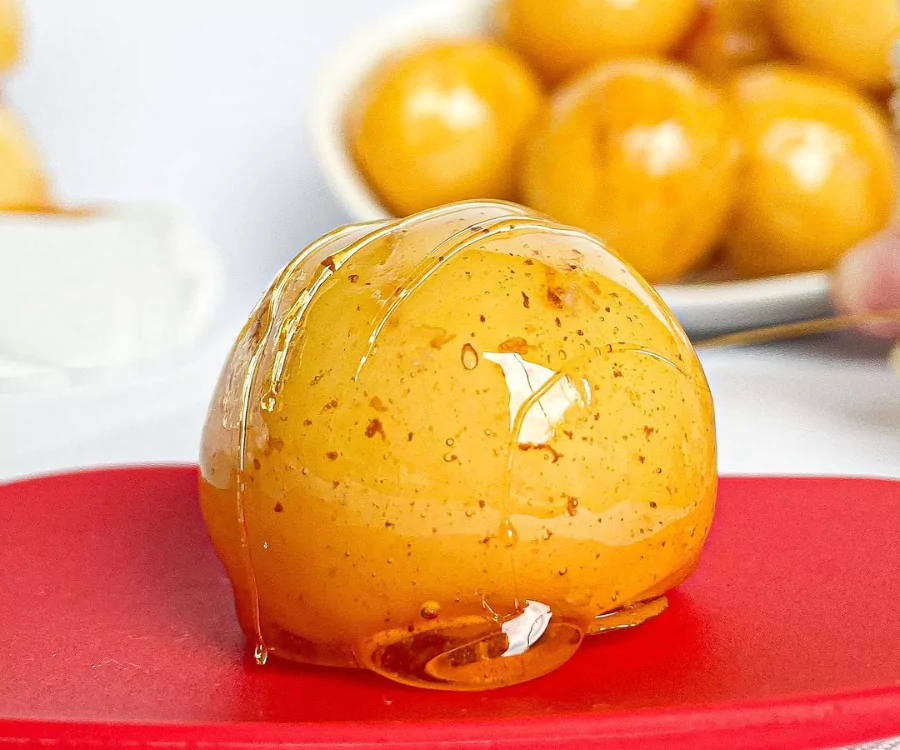
Bala Baiana (Bahian candy)
Course: DessertCuisine: BrazilianDifficulty: Easy20
candies30
minutes35
minutes2
hours5
minutesBala Baiana are coconut and condensed-milk candies with a thin, crisp sugar shell. Cool the coconut centers fully before shaping, then coat them carefully using a candy thermometer.
Ingredients
1 can of sweetened condensed milk
1 tablespoon of margarine or butter
100 grams of shredded coconut
2 cups of sugar
1 cup of water
2 tablespoons of white vinegar
Directions
- Combine the sweetened condensed milk, the full tablespoon of butter or margarine, and shredded coconut in a heavy saucepan. Cook over medium-low heat, stirring constantly and scraping the base, for about 10–15 minutes, until thick and pulling away from the pan. A spoon drawn across the bottom should leave a clear track briefly. Spread on a silicone-lined plate, cool for 10 minutes, then refrigerate for about 35 minutes, or until cool and firm enough to shape.
- Divide the cooled mixture into 20 equal portions and roll into smooth balls with clean, dry hands. Set them on a silicone-lined tray. If they are too sticky, chill a little longer rather than adding more butter or coconut. Have a second silicone-lined tray, dry dipping forks and a candy thermometer ready before heating the syrup.
- In a clean, deep, heavy saucepan, combine the 2 cups sugar, 1 cup water and 2 tablespoons white vinegar. Stir over medium heat until the sugar dissolves. Once boiling, stop stirring. Position the candy thermometer in the syrup without touching the bottom and boil steadily, watching closely; allow about 15–20 minutes, but use the temperature rather than the clock.
- Cook the syrup to the hard-crack range, 300–310°F (149–154°C), then remove the pan from the heat. It may be clear to pale gold; do not keep cooking just to make it dark. For a cold-water check, use a spoon to drop a tiny sample into cold water and let it cool completely before checking that it forms brittle threads that snap. Never touch or taste hot syrup, and never put your fingers into the pan.
- Let vigorous bubbling settle briefly. Using a dry dipping fork, lower one coconut ball into the syrup, turn gently to coat, lift and let excess syrup drip back into the pan. Slide it onto the prepared tray using a second fork, keeping fingers clear of the coating. Repeat promptly. If the syrup becomes too thick to dip, warm it gently just until fluid; do not add water to hot syrup.
- Leave the candies undisturbed for at least 15 minutes, until completely cool and the shells are hard, before touching, wrapping or serving. Keep the hot pan and utensils out of reach while they cool. Once the pan is cool, soak it with warm water to dissolve the remaining sugar.