Publix Fried Chicken Recipe
My favorite fried chicken dinners have a crisp coating, juicy meat, and plenty of good sides. This Publix-inspired recipe uses a seasoned buttermilk soak and a club soda batter for a homemade take on that comforting meal. It needs some planning for the marinade, but the steps are straightforward.
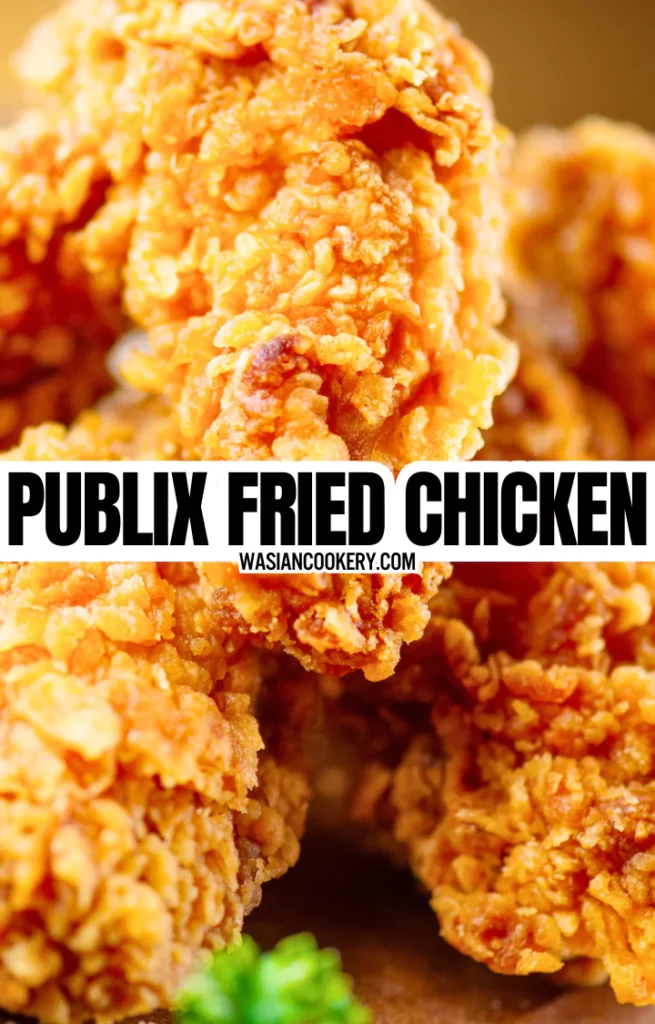
If you like Publix Fried Chicken, this recipe is for you to make at home. The ingredients include buttermilk, Dirty Bird rub, flour, and club soda. It is one of my favorite fried chicken ideas alongside Lee’s Famous Recipe Chicken. This is a home-inspired recipe, not a verified Publix formula.
I like to serve it with creamy mashed potatoes and tangy coleslaw. Ranch or honey mustard makes a lovely dipping sauce, and hot sauce or sriracha adds a spicy kick. Have the sides ready before frying so the chicken can reach the table while its coating is still crisp.
Why This Dish Is Great
- The seasoned buttermilk soak brings flavor to the chicken before the batter is added.
- A little self-rising flour provides lift alongside the all-purpose flour in the coating.
- Club soda makes a pourable batter that reaches the corners of irregular chicken pieces.
- Legs, thighs, breasts, and wings let you choose the cuts your household enjoys most.
- Familiar sides and dipping sauces make it easy to build a full comfort-food dinner around the chicken.
What Is the Best Main Ingredient?
Choose fresh or fully refrigerator-thawed chicken pieces. Similar-sized pieces are easier to fry together; a thick breast and a small wing rarely finish at the same moment. Keep the chicken cold until its turn to cook. Pat away surface moisture before marinating if necessary, and never rinse poultry in the sink, where splashes can spread raw juices.
Dirty Bird rub is the named seasoning in the original recipe, which also permits your favorite chicken seasoning blend. Blends differ in salt, sweetness, and heat. Check the label before choosing one, because this recipe uses a generous 1/2 cup in the marinade plus 2 tablespoons in the batter. No particular secret blend or number of spices is verified here.
Ingredients
- 2 cups buttermilk
- 1/2 cup Dirty Bird rub (or your favorite chicken seasoning blend with 13 herbs and spices)
- 2 cups all-purpose flour
- 1/2 cup self-rising flour
- 2 tablespoons Dirty Bird rub
- Soda water (club soda)
- Peanut oil (enough to submerge the chicken pieces)
- Chicken pieces (legs, thighs, breasts, wings)
Keep the two seasoning amounts separate: the 1/2 cup goes into the buttermilk, and the 2 tablespoons goes into the flour mixture. The original chicken quantity and club soda volume are unspecified, so the card lists one batch rather than a reliable number of servings. Oil quantity depends on the vessel and its safe fill limit; never top up a pot simply to force large pieces under the oil.
Kitchen Equipment You Will Need
As an Amazon Associate I earn from qualifying purchases.
- Deep fryer
- Deep heavy pot with lid
- Mixing bowls
- Measuring cups
- Measuring spoons
- Whisk
- Long metal tongs
- Deep-fry thermometer
- Instant-read food thermometer
- Oven-safe wire rack
- Rimmed baking sheets
- Paper towels
- Oven mitts
- Shallow storage containers
How To Make Publix-Inspired Fried Chicken
The card gives a small-load planning estimate of 5 hours, including the minimum 4-hour refrigerated soak. It allows 25 minutes of frying for one small load, with preparation and draining included separately. The full recipe may need several loads depending on your chicken quantity and pot. Add the actual frying and oil-recovery time for each additional load; never crowd the pot to fit the estimate.
- Start with completely thawed chicken pieces. Do not wash raw poultry; pat surface moisture dry with paper towels if needed. Mix the 2 cups buttermilk with 1/2 cup Dirty Bird rub in a large bowl, add the chicken, cover, and refrigerate at 40°F or below for at least 4 hours or overnight. Wash hands and clean raw-chicken contact surfaces.
- In another bowl, combine the 2 cups all-purpose flour, 1/2 cup self-rising flour, and remaining 2 tablespoons Dirty Bird rub. Mix well to distribute the seasonings. Keep the dry mixture away from the raw chicken until ready to coat.
- Preheat the oven to 350°F so it is ready if a browned piece needs to finish cooking. Use a completely dry deep fryer or deep, heavy pot, with dry utensils and a clear workspace away from water. Follow the fryer’s oil fill marks. For a stovetop pot, never fill more than halfway with oil and leave at least 2 inches of headroom, including room for bubbling and the chicken. Heat the peanut oil to 350°F (175°C), checking with an oil thermometer. Keep watching the oil; do not leave it unattended.
- Away from the hot oil, gradually stir club soda into the flour mixture until it forms a thick, pourable batter that coats a spoon and falls in a slow ribbon. The original recipe does not specify the soda-water amount, so add it a little at a time rather than pouring in a large quantity.
- Take only the chicken for the next small frying load from the refrigerator. Lift it from the buttermilk marinade and let excess liquid drip back into the bowl. Keep the remaining chicken covered and cold. Discard the used marinade after coating; do not use it as a sauce.
- Dip each drained piece in batter until coated, then let excess batter drip off over the bowl. Keep the batter station separate from the oil. Do not splash water or soda water into hot oil, and do not taste batter that contains raw flour or has touched chicken.
- For a stovetop pot, use dry, long metal tongs to lower pieces gently away from you into the oil, leaving space around each piece. With an appliance, follow its instructions for loading battered foods and lowering the basket. Work in small loads, never crowding the pot or exceeding the fryer’s safe capacity.
- Fry until the coating is golden and each piece reaches 165°F (74°C) in its thickest part, away from bone. Begin checking smaller pieces around 12–15 minutes; larger bone-in pieces may need 20–25 minutes or longer. Turn carefully for even browning and keep the oil around 325–350°F. Lift each piece out of the oil before checking with a clean food thermometer. Color and timing alone do not establish doneness.
- Transfer fully cooked pieces with clean tongs to a clean wire rack over a rimmed baking sheet. Let them drain for about 5 minutes without piling or covering. Allow the oil to return to 350°F before adding another load. If a crust browns before the center reaches 165°F, move that piece immediately to an oven-safe rack over a baking sheet in a preheated 350°F oven and continue cooking to 165°F; allow extra time.
- Serve hot and crispy with your favorite sides. The card’s 5-hour schedule includes 30 minutes of preparation, 4 hours of refrigerated marinating, a 25-minute allowance for one small frying load, and 5 minutes of draining. Additional loads, larger pieces, overnight marinating, or an oven finish take longer. Refrigerate leftovers promptly within 2 hours, or within 1 hour above 90°F.
Notes
- Marinate for at least 4 hours, matching the main method. An overnight soak also works, but keep it refrigerated throughout.
- Use the buttermilk only for marinating. Once it touches raw chicken, discard it instead of serving it as a dip.
- Add club soda slowly until the batter coats a spoon. A runny coating slides away; a stiff paste forms heavy patches.
- Keep tools and the outside of bowls dry near the fryer. Never add water to hot oil or use water on an oil fire.
- Cook similar pieces together and remove them individually at 165°F. A batch is not done just because its smallest wing is ready.
- Let the oil recover between loads. Adding cold chicken too quickly lowers the temperature and can leave a greasy coating.
- Drain on a rack without stacking. Trapped steam softens the crust, even when the chicken was beautifully crisp in the pot.
Ingredients You Can Add
- Garlic powder can add savory depth to the flour mixture if your seasoning blend is mild.
- Onion powder brings a rounded flavor without adding wet chopped onion to the batter.
- Paprika adds warmth and color. Use a little at first if your rub already contains it.
- Cayenne gives extra heat. Add cautiously because hot sauce can always be offered at the table.
- Dried thyme adds an herbal note; crush the leaves finely so they blend into the coating.
- Freshly ground black pepper gives a sharper finish. Taste only the dry seasoning blend before it contacts raw ingredients.
What To Serve With This Chicken
My favorite way to enjoy this chicken is with creamy Texas Roadhouse Mashed Potatoes and tangy Dinosaur Barbeque Coleslaw. The smooth potatoes and cool, crunchy slaw give the plate different textures without competing with the seasoned crust.
Fluffy biscuits and sweet corn on the cob make another classic meal. Macaroni and cheese or green beans add variety when you are feeding a larger table. Prepare these before heating the oil so frying gets your full attention.
Potato salad and Captain d’s Honey Mustard are also good accompaniments. Offer sauces in small bowls for dipping; pouring them over the whole platter softens the coating quickly. Keep creamy cold sides refrigerated until the meal is ready.
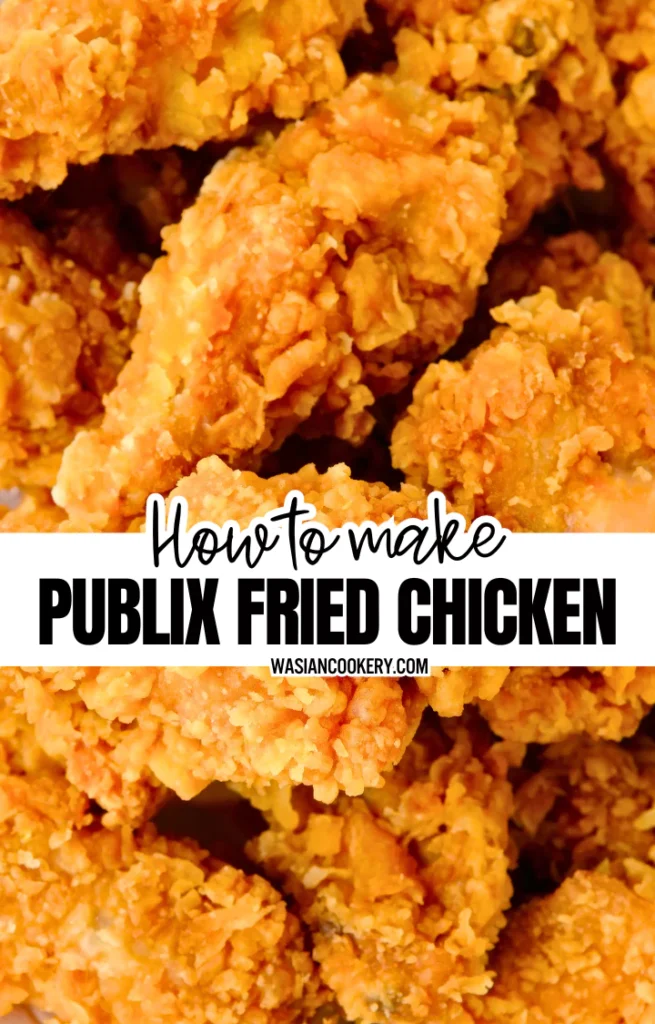
Variations and Swaps
- For darker meat, choose thighs and legs. Check each piece beside the bone without touching it with the probe.
- For white meat, choose breasts and cook similar-sized pieces together. Very thick breasts can need extra time.
- For smaller pieces, use wings and begin temperature checks earlier rather than cooking them as long as large thighs.
- For a milder version, choose a mild chicken seasoning blend and offer spicy sauces separately.
- For more heat, add a little cayenne to the coating or use hot sauce at the table.
- For another frying oil, use a suitable neutral high-heat oil such as canola; consider household allergies when choosing.
- If club soda is unavailable, the original recipe permits plain water in the batter bowl. The coating may be less airy.
- For a different dipping flavor, serve ranch instead of honey mustard. Keep both separate from the raw-chicken workspace.
Storage
Refrigerate cooked chicken in shallow containers within two hours of frying, or within one hour when the surrounding temperature is above 90°F. Keep the refrigerator at 40°F or below and use leftovers within 3–4 days. Do not leave a whole platter out until it is completely cold. For longer storage, freeze cooled, promptly handled portions in airtight containers and use within about three months for best quality.
Reheat on an oven-safe rack over a baking sheet in a preheated 350°F oven. Start checking around 15–20 minutes, but continue until every piece reaches 165°F in the thickest part. Large or very cold pieces take longer. Thaw frozen chicken in the refrigerator first for more even reheating. A microwave is convenient, although it softens the crust; temperature still matters more than a fixed number of minutes.
FAQ
Is this the exact Publix recipe?
No official formula has been established for this homemade version. It is inspired by the idea of crisp, well-seasoned deli fried chicken. The named ingredients and wet-batter method are the recipe shared here, rather than a claim about the store’s production process.
Can I shorten the marinade?
The method here uses at least four hours in the refrigerator. Plan ahead rather than leaving chicken at room temperature to speed the process. An overnight soak increases elapsed time, and raw chicken should still be cooked within its safe refrigerated storage window.
Why is my coating sliding off?
Too much buttermilk clinging to the chicken can thin the batter. Let excess marinade drain, coat evenly, and let loose batter drip back into the bowl. Move each piece carefully into the oil and avoid nudging it repeatedly before the coating sets.
What if the coating is brown but the chicken is underdone?
Check the oil temperature and lower excessive heat. Transfer the piece immediately to a 350°F oven on an oven-safe rack over a tray and continue cooking until its center reaches 165°F. Do not refrigerate partly cooked chicken to finish another day.
Can I make this wet batter in an air fryer?
This method is written for hot oil. A loose wet batter can drip through an air-fryer basket and needs a different coating and tested cooking method. Choose a recipe designed for that appliance rather than carrying over these frying times.
How long does the whole recipe take?
The five-hour card estimate is a small-load plan including the four-hour soak. Chicken quantity is unmeasured, so extra frying loads and large pieces extend the total. Check every piece for 165°F and allow time for the oil to recover between loads.
Short Description
A Publix-inspired homemade fried chicken with seasoned buttermilk and a club soda batter. The small-load schedule includes a 4-hour refrigerated marinade; fry in safe batches and check every piece for 165°F.
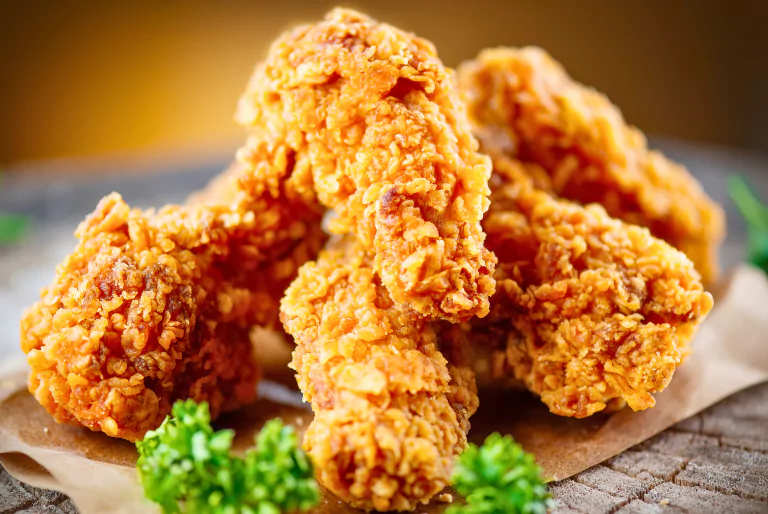
Publix Fried Chicken Recipe
Course: MainCuisine: AmericanDifficulty: Easy1
batch30
minutes25
minutes5
hoursA Publix-inspired homemade fried chicken with seasoned buttermilk and a club soda batter. The small-load schedule includes a 4-hour refrigerated marinade; fry in safe batches and check every piece for 165°F.
Ingredients
2 cups buttermilk
1/2 cup Dirty Bird rub (or your favorite chicken seasoning blend with 13 herbs and spices)
2 cups all-purpose flour
1/2 cup self-rising flour
2 tablespoons Dirty Bird rub
Soda water (club soda)
Peanut oil (enough to submerge the chicken pieces)
Chicken pieces (legs, thighs, breasts, wings)
Directions
- Start with completely thawed chicken pieces. Do not wash raw poultry; pat surface moisture dry with paper towels if needed. Mix the 2 cups buttermilk with 1/2 cup Dirty Bird rub in a large bowl, add the chicken, cover, and refrigerate at 40°F or below for at least 4 hours or overnight. Wash hands and clean raw-chicken contact surfaces.
- In another bowl, combine the 2 cups all-purpose flour, 1/2 cup self-rising flour, and remaining 2 tablespoons Dirty Bird rub. Mix well to distribute the seasonings. Keep the dry mixture away from the raw chicken until ready to coat.
- Preheat the oven to 350°F so it is ready if a browned piece needs to finish cooking. Use a completely dry deep fryer or deep, heavy pot, with dry utensils and a clear workspace away from water. Follow the fryer’s oil fill marks. For a stovetop pot, never fill more than halfway with oil and leave at least 2 inches of headroom, including room for bubbling and the chicken. Heat the peanut oil to 350°F (175°C), checking with an oil thermometer. Keep watching the oil; do not leave it unattended.
- Away from the hot oil, gradually stir club soda into the flour mixture until it forms a thick, pourable batter that coats a spoon and falls in a slow ribbon. The original recipe does not specify the soda-water amount, so add it a little at a time rather than pouring in a large quantity.
- Take only the chicken for the next small frying load from the refrigerator. Lift it from the buttermilk marinade and let excess liquid drip back into the bowl. Keep the remaining chicken covered and cold. Discard the used marinade after coating; do not use it as a sauce.
- Dip each drained piece in batter until coated, then let excess batter drip off over the bowl. Keep the batter station separate from the oil. Do not splash water or soda water into hot oil, and do not taste batter that contains raw flour or has touched chicken.
- For a stovetop pot, use dry, long metal tongs to lower pieces gently away from you into the oil, leaving space around each piece. With an appliance, follow its instructions for loading battered foods and lowering the basket. Work in small loads, never crowding the pot or exceeding the fryer’s safe capacity.
- Fry until the coating is golden and each piece reaches 165°F (74°C) in its thickest part, away from bone. Begin checking smaller pieces around 12–15 minutes; larger bone-in pieces may need 20–25 minutes or longer. Turn carefully for even browning and keep the oil around 325–350°F. Lift each piece out of the oil before checking with a clean food thermometer. Color and timing alone do not establish doneness.
- Transfer fully cooked pieces with clean tongs to a clean wire rack over a rimmed baking sheet. Let them drain for about 5 minutes without piling or covering. Allow the oil to return to 350°F before adding another load. If a crust browns before the center reaches 165°F, move that piece immediately to an oven-safe rack over a baking sheet in a preheated 350°F oven and continue cooking to 165°F; allow extra time.
- Serve hot and crispy with your favorite sides. The card’s 5-hour schedule includes 30 minutes of preparation, 4 hours of refrigerated marinating, a 25-minute allowance for one small frying load, and 5 minutes of draining. Additional loads, larger pieces, overnight marinating, or an oven finish take longer. Refrigerate leftovers promptly within 2 hours, or within 1 hour above 90°F.
Notes
- One batch is flexible because the original chicken quantity is unspecified. The 5-hour card schedule covers 30 minutes prep, 4 hours marinating, 25 minutes for one small frying load, and 5 minutes draining; additional loads and larger pieces take longer.
- Keep raw chicken and marinade refrigerated. Do not wash poultry. Drain excess marinade and batter, and keep tools dry near oil.
- Follow fryer fill marks; for a deep stovetop pot, stay no more than half full with at least 2 inches headroom. Never add water to hot oil. Every chicken piece must reach 165°F, measured outside the oil away from bone.