Orange Chicken Recipe
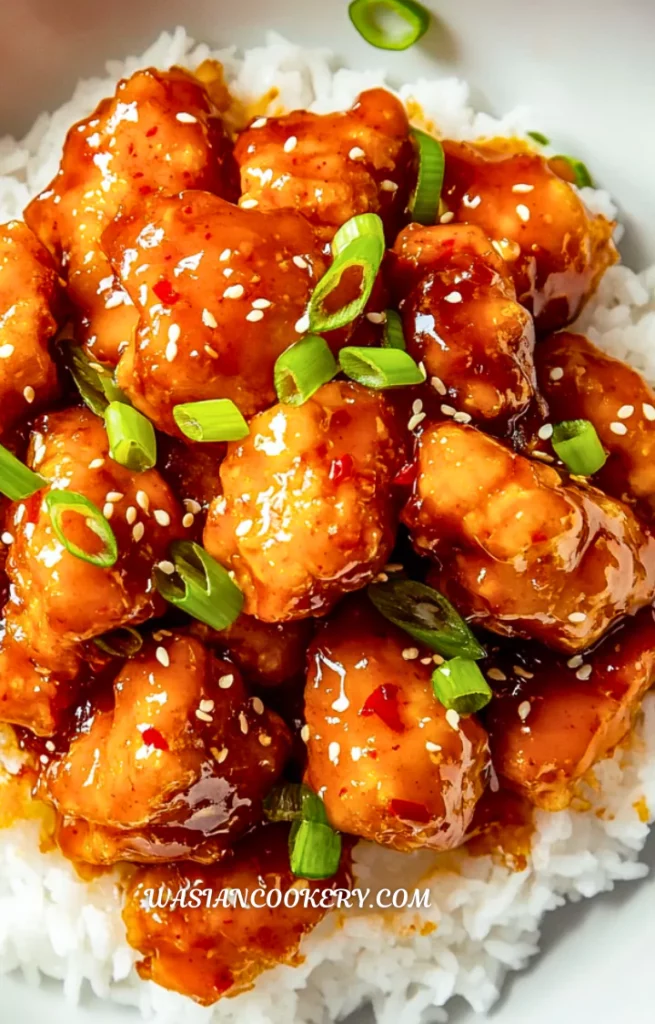
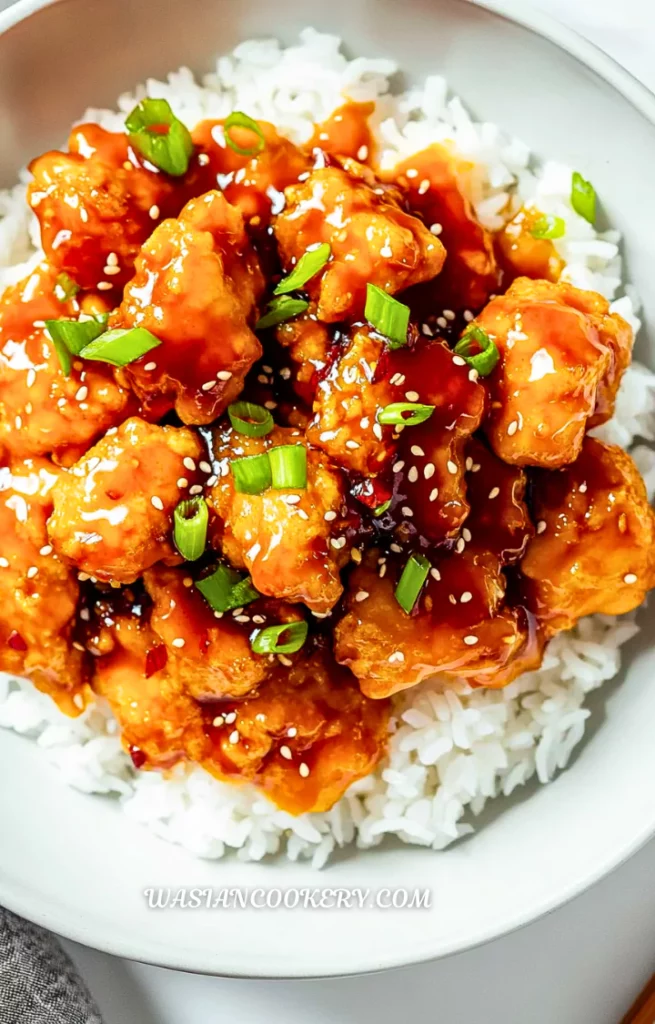
I love the bright orange flavor in this saucy chicken. A light flour-and-cornstarch coating gives the pieces a crisp surface, and the glaze brings sweet, salty, tangy flavors together with fresh ginger and garlic.
The recipe uses separate cornstarch measures for the chicken and sauce. Keeping those bowls organized makes the cooking easier: coat the chicken once, fry it in small batches, then thicken the orange sauce and toss everything just before serving.
Plan on four servings, about 20 minutes of preparation, and 55 minutes of cooking, for roughly 75 minutes total. That allows for heating the oil, frying four batches, returning the oil to temperature, and finishing the sauce. A smaller pan may need more time.
Why This Dish Is Great
- Orange juice and zest give the sauce a clear citrus flavor. Zesting first makes it easier to collect the fragrant peel before squeezing the fruit.
- Both chicken breasts and thighs are original choices. Use one kind in a batch and cut it evenly so the pieces cook at a similar pace.
- The flour and cornstarch coating uses a simple egg dip. A single, even layer helps the measured ingredients cover the full amount of chicken.
- The sauce comes together in its own pan. That makes it easier to watch the thickness and keeps raw-chicken utensils away from the finished glaze.
- Chili flakes are optional. Leave them out for a mild sauce or add them to taste when you want heat with the orange flavor.
- Rice and a vegetable can complete the meal. Prepare those sides before the final toss so the chicken can be served promptly.
Choosing The Best Chicken And Oranges
Choose boneless, skinless chicken and thaw it fully before preparing the coating. Breast is a mild option, while thighs have a richer flavor. Trim away tough bits, then cut the meat into similar pieces. Large chunks take longer and can leave the coating dark before the centers are done.
Use a clean, firm orange for zest and remove only the colored surface, avoiding the bitter white pith. Fresh juice works well, though bottled orange juice is also an option. Choose plain juice without added sweeteners so it fits the sugar or honey already measured for the sauce.
Ingredients
For the chicken
- 1½ lbs boneless, skinless chicken breast (or thighs), cut into bite-sized pieces
- ½ cup cornstarch
- ½ cup all-purpose flour
- 2 eggs, beaten
- Oil for frying (vegetable or canola)
- Salt and pepper, to taste
For the orange sauce
- ½ cup orange juice (fresh is best)
- ¼ cup soy sauce
- ¼ cup sugar (or honey)
- 2 tablespoons rice vinegar
- 1 tablespoon cornstarch + 2 tablespoons water (slurry)
- 2 teaspoons garlic, minced
- 1 teaspoon ginger, grated
- Zest of 1 orange
- Optional: red chili flakes for heat
Kitchen Equipment You Will Need
As an Amazon Associate I earn from qualifying purchases.
- Deep heavy frying pan
- Frying thermometer
- Instant-read food thermometer
- Mixing bowls
- Whisk
- Metal tongs
- Saucepan
- Measuring cups
- Measuring spoons
- Citrus zester
- Chef’s knife
- Cutting board
- Oven-safe rack and baking sheet
- Air fryer
How To Make Orange Chicken
Step 1
Cut the chicken into even, bite-sized pieces about 1 inch across and pat dry. Season with salt and pepper. Combine the ½ cup flour and ½ cup coating cornstarch in one bowl, and beat the 2 eggs in another. Dip each piece in egg, let excess drip off, then coat lightly in the flour mixture. Set on a tray without piling. Reserve the separate 1 tablespoon cornstarch for the sauce. Discard any coating or egg left after handling raw chicken.
Step 2
Heat vegetable or canola oil in a deep, heavy pan to 350°F, using a frying thermometer. Use enough to come partway up the chicken, leaving ample empty space above the oil. Fry in about four uncrowded batches, turning carefully, for 3–4 minutes per side. Lift pieces out before checking their centers with a clean food thermometer; chicken must reach 165°F. Drain on a clean rack set over a baking sheet. Keep cooked batches uncovered in a 200°F oven while the remaining chicken and sauce finish; preheat that oven during the initial oil heating. Let the oil return to 350°F between batches. Allow about 8–10 minutes for initial heating, 24–32 minutes for frying, and additional time for oil recovery; extra batches take longer.
Step 3
In a saucepan, combine the ½ cup orange juice, ¼ cup soy sauce, ¼ cup sugar or honey, 2 tablespoons rice vinegar, garlic, ginger, orange zest, and optional red chili flakes. Bring to a simmer, stirring until the sweetener dissolves. Mix the reserved 1 tablespoon cornstarch with the 2 tablespoons cold water until smooth, stir again if it settles, then whisk all of it into the sauce. Bring to a gentle boil and stir for about 1–2 minutes, until glossy and thick enough to coat a spoon. Allow about 6–8 minutes for the sauce stage altogether.
Step 4
Place the cooked chicken in a large clean bowl. Add the warm orange sauce and toss gently for about 1 minute, just until the pieces are evenly coated. If the sauce has cooled and become too thick, warm it gently before tossing.
Step 5
Serve immediately in four portions, with rice alongside if desired. Optional sesame seeds or sliced green onions can go on top. The coating softens as it sits in the sauce, so bring the finished dish straight to the table.
Notes
- Pat the chicken dry before dipping. Excess water makes coating harder and increases splattering when the pieces meet hot oil.
- Use one hand or utensil for the egg and another for the dry coating. Shake off loose flour before frying to limit burnt crumbs.
- Keep frying utensils dry. Lower pieces carefully into the oil, leave room between them, and stay beside the pan while it is heating and cooking.
- Check oil temperature between batches. A crowded pan cools quickly, while overheating can darken the coating before the chicken reaches a safe center temperature.
- Lift chicken from the oil before checking 165°F. Insert the thermometer into the center of a thicker piece, avoiding the hot coating alone.
- Whisk the slurry immediately before adding it. Cornstarch settles in cold water, and stirring it back together helps the sauce thicken evenly.
- Drain pieces in a single layer instead of a pile. Toss with sauce at the last moment, since trapped steam and sauce soften the coating.
Ingredients You Can Add
- Red chili flakes are the original optional heat. Sriracha or chili paste also changes the heat and seasoning, so add cautiously.
- A few drops of toasted sesame oil can finish the sauce with a nutty aroma. Keep it for flavor rather than frying.
- Cooked broccoli can go alongside the chicken. Drain it well so water does not thin the orange glaze.
- Snap peas can add a crisp vegetable side. Cook them separately and keep their texture slightly firm.
- Sliced green onions make a fresh topping. Add them after tossing so their green color stays bright.
- Sesame seeds add a small crunch at serving. Keep them optional, especially when cooking for someone who avoids sesame.
What To Serve
Plain steamed rice is a simple choice, while pineapple fried rice makes a fruitier plate. Keep portions balanced because both that rice and the orange sauce bring sweetness.
For a noodle side, serve a small portion of easy lo mein. Have it ready before coating the fried chicken with sauce so everything reaches the table together.
A chilled spicy Korean cucumber salad adds a crisp contrast. If using a spicy side, you may prefer to leave the optional chili flakes out of the chicken sauce.
Recipe Variations And Swaps
- Use thighs instead of breasts, keeping the original weight. Both need a 165°F center temperature, even when the coating already looks golden.
- Honey can replace the sugar at the original measured amount. It changes the flavor slightly; stir until it is fully mixed into the sauce.
- For a gluten-free adaptation, choose verified gluten-free tamari and a suitable gluten-free flour blend. Check every packaged ingredient and avoid shared frying oil.
- For the original baked option, arrange coated pieces on an oiled oven-safe rack over a baking sheet at 425°F. Lightly oil exposed coating and bake until the centers reach 165°F; expect a different crust from frying.
- For the air fryer option, lightly oil the coated chicken and arrange in a single layer at 400°F. Turn halfway and begin checking around 10–12 minutes, continuing until 165°F. Allow extra time for batches.
- For a tofu variation, drain and dry firm tofu before crisping it and adding the sauce. The original egg coating is not vegan; this is a separate adaptation.
- Pineapple chunks can join the finished chicken for another fruity note. Drain them well and add at serving so their juice does not dilute the sauce.
- Toasted cashews or almonds can add crunch after tossing. Keep them optional and serve separately when accommodating someone who avoids nuts.
How To Store
Refrigerate leftovers within two hours, or within one hour above 90°F, in shallow airtight containers. Keep chicken and sauce separate when possible and use within three days. If they are already mixed, store them together and expect a softer coating after reheating.
Reheat chicken in the oven or air fryer until its center reaches 165°F, and warm reserved sauce separately. Then toss just before serving. Mixed leftovers can be reheated gently with a splash of water to loosen the glaze; check 165°F throughout rather than relying on hot edges.
FAQ
Can I use bottled orange juice?
Yes. Plain orange juice without added sweeteners works in the measured amount. Fresh zest still brings an orange aroma that juice alone cannot provide.
Why did my coating fall off?
The chicken may have been too wet, heavily coated, or moved before the coating set. Pat it dry, shake off loose flour, and turn gently.
Can I double-dip the chicken?
The listed egg and coating amounts are intended for one coating. A second dip may use them up before all the chicken is covered, so follow the single-coat method.
Why did the sauce turn lumpy?
Dry cornstarch can clump when it touches hot liquid. Mix the separate sauce measure with the cold water first and whisk while adding it.
Can I reduce the sweetness?
The main formula keeps the original sugar or honey amount. Other sweeteners vary in strength and texture, so they are not an automatic equal swap; make changes cautiously.
Why is the chicken no longer crisp?
Sauce softens fried coating over time. Drain the pieces well, keep them separate from the sauce until serving, and toss only when the rest of the meal is ready.
Short Description
Orange Chicken combines crisp-coated chicken with a glossy sauce of orange juice, zest, soy sauce, garlic, and ginger. Fry in small batches, then toss and serve while hot.
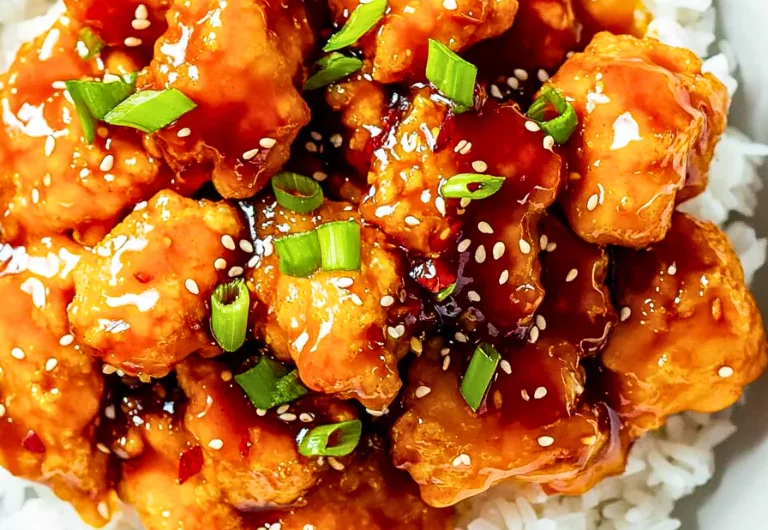
Orange Chicken Recipe
Course: MainCuisine: Asian-InspiredDifficulty: Easy4
servings20
minutes55
minutes1
hour15
minutesOrange Chicken combines crisp-coated chicken with a glossy sauce of orange juice, zest, soy sauce, garlic, and ginger. Fry in small batches, then toss and serve while hot.
Ingredients
- For the chicken:
1½ lbs boneless, skinless chicken breast (or thighs), cut into bite-sized pieces
½ cup cornstarch
½ cup all-purpose flour
2 eggs, beaten
Oil for frying (vegetable or canola)
Salt and pepper, to taste
- For the orange sauce:
½ cup orange juice (fresh is best)
¼ cup soy sauce
¼ cup sugar (or honey)
2 tablespoons rice vinegar
1 tablespoon cornstarch + 2 tablespoons water (slurry)
2 teaspoons garlic, minced
1 teaspoon ginger, grated
Zest of 1 orange
Optional: red chili flakes for heat
Directions
- Cut the chicken into even, bite-sized pieces about 1 inch across and pat dry. Season with salt and pepper. Combine the ½ cup flour and ½ cup coating cornstarch in one bowl, and beat the 2 eggs in another. Dip each piece in egg, let excess drip off, then coat lightly in the flour mixture. Set on a tray without piling. Reserve the separate 1 tablespoon cornstarch for the sauce. Discard any coating or egg left after handling raw chicken.
- Heat vegetable or canola oil in a deep, heavy pan to 350°F, using a frying thermometer. Use enough to come partway up the chicken, leaving ample empty space above the oil. Fry in about four uncrowded batches, turning carefully, for 3–4 minutes per side. Lift pieces out before checking their centers with a clean food thermometer; chicken must reach 165°F. Drain on a clean rack set over a baking sheet. Keep cooked batches uncovered in a 200°F oven while the remaining chicken and sauce finish; preheat that oven during the initial oil heating. Let the oil return to 350°F between batches. Allow about 8–10 minutes for initial heating, 24–32 minutes for frying, and additional time for oil recovery; extra batches take longer.
- In a saucepan, combine the ½ cup orange juice, ¼ cup soy sauce, ¼ cup sugar or honey, 2 tablespoons rice vinegar, garlic, ginger, orange zest, and optional red chili flakes. Bring to a simmer, stirring until the sweetener dissolves. Mix the reserved 1 tablespoon cornstarch with the 2 tablespoons cold water until smooth, stir again if it settles, then whisk all of it into the sauce. Bring to a gentle boil and stir for about 1–2 minutes, until glossy and thick enough to coat a spoon. Allow about 6–8 minutes for the sauce stage altogether.
- Place the cooked chicken in a large clean bowl. Add the warm orange sauce and toss gently for about 1 minute, just until the pieces are evenly coated. If the sauce has cooled and become too thick, warm it gently before tossing.
- Serve immediately in four portions, with rice alongside if desired. Optional sesame seeds or sliced green onions can go on top. The coating softens as it sits in the sauce, so bring the finished dish straight to the table.
Notes
- The ½ cup cornstarch coats the chicken; the separate 1 tablespoon cornstarch and 2 tablespoons cold water thicken the sauce. Use a single coating with the original amounts.
- Timing allows about four frying batches. Heat oil to 350°F and let it recover between batches; check chicken outside the oil for a 165°F center. More batches or larger pieces need more time.
- Toss with warm sauce just before serving. Refrigerate shallow portions within 2 hours, use within 3 days, and reheat chicken to 165°F.