Hibachi Fried Rice Recipe
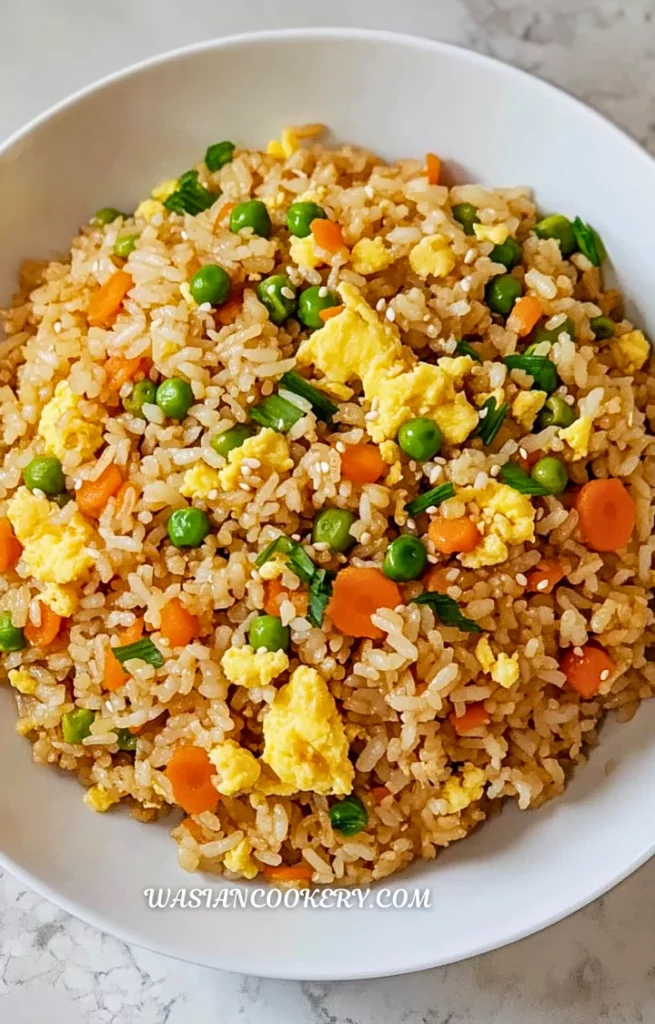
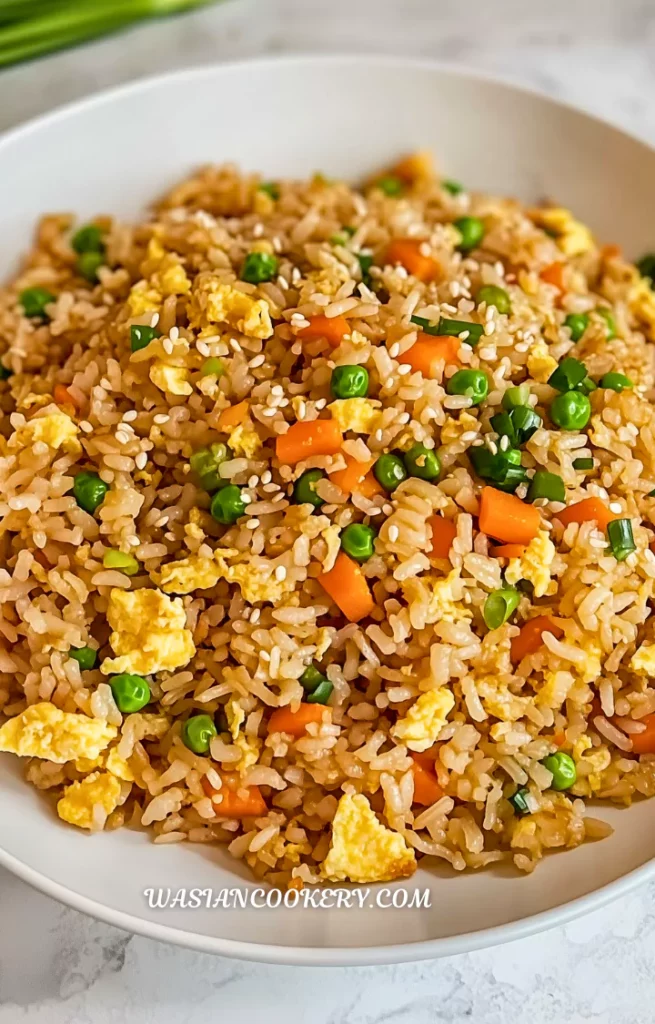
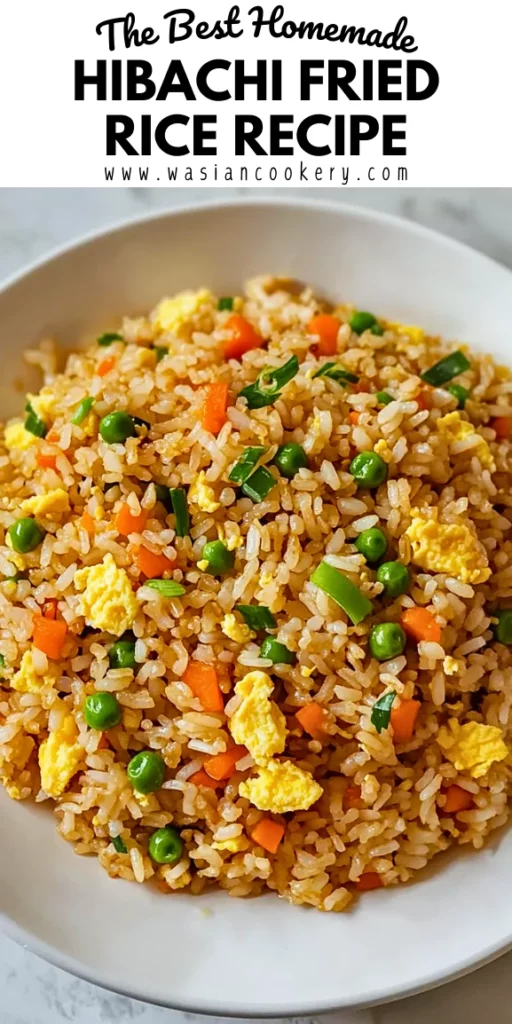
I love the buttery flavor of Hibachi Fried Rice, especially when the rice stays separate and the vegetables keep a little bite. Eggs, garlic, soy sauce, and a small splash of sesame oil turn a simple pan of rice into a savory side for an easy dinner.
This Japanese-steakhouse-inspired version uses a wide skillet and everyday ingredients. Cooking the eggs separately keeps them tender, while adding the sauce near the end coats the grains without making the pan too wet. It is a practical home method with no special grill needed.
Start with properly chilled cooked rice, and allow about 25 minutes for chopping and frying. The original four servings work well as side portions alongside chicken, shrimp, or vegetables. If you need to cook rice first, plan that cooking and chilling time separately before starting this recipe.
Why This Dish Is Great
- Butter gives the rice a rich finish, while the measured vegetable oil helps cook the vegetables evenly.
- The eggs cook first, so you can stop them at tender, fully set curds instead of leaving them in the pan throughout.
- Peas and a finely diced carrot add color and gentle sweetness without needing a long list of fresh vegetables.
- Optional teriyaki sauce lets you choose a slightly sweeter result while keeping the soy sauce as the main seasoning.
- A large skillet is enough for this small batch. A wok is optional, so the recipe fits an ordinary stovetop.
- It is easy to serve as part of a larger meal, with separately cooked proteins or a crisp vegetable side.
What Is the Best Rice?
Cold long-grain white rice is a good starting point because the grains separate easily. Jasmine gives a gentle fragrance, and basmati is another option. The amount here is 2 cups after cooking and cooling, not 2 cups from the dry bag. Wet, freshly cooked rice tends to mash when stirred, so wait until it is chilled before frying.
For rice cooked ahead, spread it in shallow containers and refrigerate promptly while still warm instead of leaving it on the counter to cool completely. Never use rice left out overnight. Keep track of its original cooking date; stir-frying does not make old or poorly stored rice safe. If you are uncertain how it was stored, start a fresh batch.
Ingredients
- 2 cups cooked and cooled white rice (preferably day-old)
- 2 tablespoons butter
- 1 tablespoon vegetable oil
- 2 eggs, lightly beaten
- ½ small onion, finely chopped
- 1 carrot, finely diced
- ½ cup frozen peas
- 2 cloves garlic, minced
- 2 tablespoons soy sauce
- 1 tablespoon teriyaki sauce (optional)
- 1 teaspoon sesame oil
- ½ teaspoon salt (or to taste)
- ¼ teaspoon black pepper
- 1 green onion, chopped (for garnish)
- 1 teaspoon sesame seeds (optional)
Saltiness varies between soy sauces, butter, and teriyaki sauces. The ingredient list already allows salt to taste, so season after the sauces are mixed through. Keep the optional teriyaki to its measured tablespoon rather than adding it freely. Sesame oil goes in with the seasonings for flavor; it is separate from the vegetable oil used for frying.
Kitchen Equipment You Will Need
As an Amazon Associate I earn from qualifying purchases.
- 12-inch skillet
- Spatula
- Cutting board
- Chef knife
- Measuring cups
- Measuring spoons
- Small mixing bowl
- Fork
- Plate
- Instant-read food thermometer
- Shallow food storage containers
- Microwave-safe dish with vented lid
- Freezer bags
- Saucepan with lid
- Fine-mesh strainer
- Oven mitts
How To Make Hibachi Fried Rice
Step 1
Measure 2 cups of already cooked, refrigerated white rice, not dry rice. Break up clumps with a fork. Finely dice the carrot, chop the onion, mince the garlic, and beat the eggs in a bowl. Have the sauces measured before heating the pan. The 25-minute timing starts with cold cooked rice; cooking and chilling a new batch takes additional time.
Step 2
Heat a wide 12-inch skillet over medium heat. Melt 1 tablespoon of the butter, add the eggs, and gently scramble for 1–2 minutes until set with no wet patches. Transfer to a clean plate. Keep the remaining tablespoon of butter for the rice.
Step 3
Add the entire tablespoon of vegetable oil to the skillet and raise the heat to medium-high. Cook the onion and finely diced carrot for 3–4 minutes, stirring, until starting to soften. Add the frozen peas and cook for about 1 minute, then add the garlic and stir for 30 seconds. Reduce the heat if the garlic begins to darken.
Step 4
Add the remaining 1 tablespoon butter and the cold rice. Spread across the pan, breaking apart clumps gently. Stir-fry for 3–4 minutes, letting the rice contact the hot surface between turns. Keep a lively sizzle without smoking the butter. If your pan is smaller, work with half the vegetable mixture and half the rice at a time, dividing the butter and seasonings between those batches.
Step 5
Add the 2 tablespoons soy sauce, optional 1 tablespoon teriyaki sauce, 1 teaspoon sesame oil, and black pepper. Return the eggs and toss for 1–2 minutes, or until the rice is steaming throughout and reaches 165°F. Taste carefully, then use the listed salt to taste. Do not add extra sauce simply to loosen a clump; break it apart with the spatula.
Step 6
Turn off the heat. Scatter the chopped green onion and optional sesame seeds over the rice, then serve promptly. This makes four side portions. If cooking in batches, divide the eggs and garnishes evenly and serve each batch hot; allow extra cooking time for the second batch.
Notes
- Chop the carrot into small, even pieces. Large chunks can remain hard after the onions and peas are ready.
- Break up cold rice before heating the pan. A fork is gentler than pressing firmly on the grains with a spatula.
- Keep the eggs separate until the last toss. Their soft pieces should stay visible among the rice and vegetables.
- Let the rice touch the skillet between turns, but do not leave it unattended. Browned bits are pleasant; scorched garlic tastes bitter.
- Lower the heat if the butter smokes. More heat is not always better, especially with a thin pan or a powerful burner.
- Use a wider pan or smaller batches if liquid pools. Crowded rice steams, and prolonged stirring will not restore a dry surface.
- Measure the sauces before cooking. The final stage moves quickly, and having everything nearby helps keep the eggs from overcooking.
Ingredients You Can Add
- Cooked shrimp: Fold through at the end until hot; cook raw shrimp separately to 145°F, with opaque, pearly flesh, before adding.
- Cooked chicken: Add bite-size pieces for a fuller meal. Cook raw chicken separately to 165°F, then combine with the rice.
- Mushrooms: Cook separately until their released moisture evaporates, then add near the end so the rice stays dry.
- Fresh ginger: Finely mince a little and cook with the garlic for a brighter, gently warm flavor.
- Pineapple: Drain diced pineapple well and add a small amount at the end for a sweet contrast.
- Yum yum sauce: Serve a little alongside the finished rice rather than stirring a creamy sauce through the frying pan.
What To Serve With Hibachi Fried Rice
For a fuller dinner, pair the rice with teriyaki chicken. Keep the chicken and its sauce alongside the rice so everyone can choose how much sauce to add without softening the whole batch.
A chilled spicy Korean cucumber salad gives a crisp contrast to the warm, buttery grains. Serve a small helping beside the rice, especially when the rest of the meal includes a rich protein.
For a simpler vegetable pairing, try tomato cucumber salad. Steamed zucchini, mushrooms, or green beans also work well. Prepare any extra sides first so the fried rice can go directly from the pan to the table.
Variations and Swaps
- Spicy rice: Stir in a little chili sauce at the table, where each person can control the heat.
- Brown rice: Use the same measured amount of already cooked, chilled brown rice. Expect a chewier texture.
- Egg-free rice: Omit the eggs and add separately cooked crumbled firm tofu. The butter still contains dairy.
- Extra vegetables: Add cooked broccoli or peppers, keeping additions modest so they do not crowd the skillet.
- Teriyaki finish: Include the original optional tablespoon of teriyaki sauce for gentle sweetness. Keep the soy sauce measurement unchanged.
- Garlic butter finish: For stronger garlic flavor, mince the original cloves very finely so they spread evenly through the butter.
- Sesame finish: Use the optional sesame seeds with the chopped green onion for a little contrast in texture.
- Simpler garnish: Leave out the optional seeds and keep the fresh green onion. The rice still has sesame flavor from the measured oil.
Storage
Transfer leftovers promptly to shallow covered containers and refrigerate at 40°F or below within 2 hours, or within 1 hour when the room or outdoor temperature is above 90°F. Do not wait for the rice to become completely cold on the counter. Use within 3 days of the rice’s original cooking date, including time before frying, or freeze promptly in small portions for up to 3 months for best quality.
Thaw frozen portions in the refrigerator. Reheat only the amount you need in a covered, vented microwave-safe dish, with a small splash of water added before heating. Stir partway through, let it stand briefly, and check several places for 165°F. Avoid adding extra soy sauce simply for moisture, since it can make the leftovers too salty. Discard rice that was left out beyond the safe limits.
FAQ
Can I use rice cooked today?
Yes, once it has been cooled promptly in shallow containers in the refrigerator and is thoroughly chilled. Do not leave it spread on the counter for an extended period. Cooking and chilling are extra preparation beyond the listed time.
Do I need a wok?
No. A wide 12-inch skillet suits this amount. If your pan is smaller, divide the rice, vegetables, fats, eggs, and seasonings between batches instead of piling everything together. Extra batches add cooking time.
Why is my rice mushy?
It may have started too wet, been stirred too firmly, or become crowded in the pan. Use chilled grains, break clumps apart before cooking, and keep the liquid to the listed amounts. More cooking will not fully repair crushed grains.
Can I use frozen peas directly?
Yes. Add them after the carrot and onion begin to soften, then cook until hot before adding the garlic and rice. Break apart any large frozen clump first so the peas distribute evenly.
How do I keep the eggs tender?
Scramble them only until fully set, then remove them to a clean plate. Return them near the end and toss gently. Leaving them in the skillet throughout the vegetable and rice stages makes them firmer.
Can this be a main dish?
The four servings are side portions. Add separately cooked chicken, shrimp, or tofu and vegetables for a fuller plate, or serve larger helpings. Keep extra ingredients from crowding the pan, and cook poultry to 165°F before combining.
Short Description
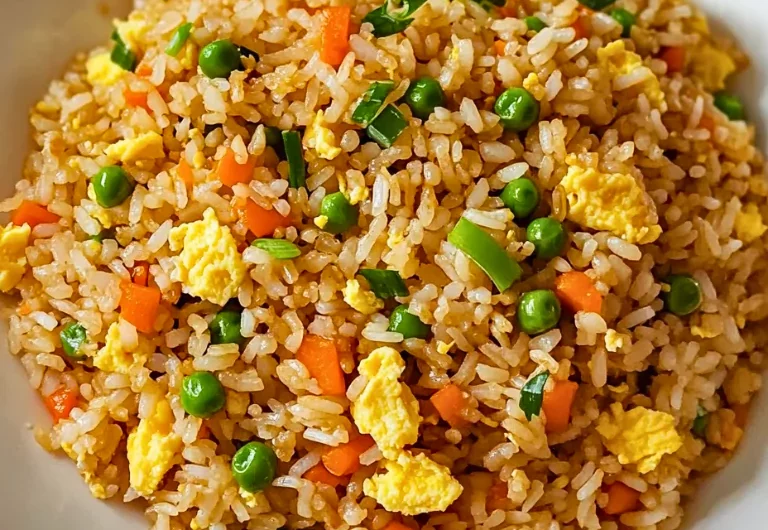
Buttery hibachi-style fried rice with eggs, peas, carrot, garlic, and soy sauce. Start with safely chilled cooked rice for a quick skillet side with separate grains and savory flavor.
Hibachi Fried Rice
Course: SidesCuisine: JapaneseDifficulty: Easy4
servings10
minutes15
minutes25
minutesButtery hibachi-style fried rice with eggs, peas, carrot, garlic, and soy sauce. Start with safely chilled cooked rice for a quick skillet side with separate grains and savory flavor.
Ingredients
2 cups cooked and cooled white rice (preferably day-old)
2 tablespoons butter
1 tablespoon vegetable oil
2 eggs, lightly beaten
½ small onion, finely chopped
1 carrot, finely diced
½ cup frozen peas
2 cloves garlic, minced
2 tablespoons soy sauce
1 tablespoon teriyaki sauce (optional)
1 teaspoon sesame oil
½ teaspoon salt (or to taste)
¼ teaspoon black pepper
1 green onion, chopped (for garnish)
1 teaspoon sesame seeds (optional)
Directions
- Measure 2 cups of already cooked, refrigerated white rice, not dry rice. Break up clumps with a fork. Finely dice the carrot, chop the onion, mince the garlic, and beat the eggs in a bowl. Have the sauces measured before heating the pan. The 25-minute timing starts with cold cooked rice; cooking and chilling a new batch takes additional time.
- Heat a wide 12-inch skillet over medium heat. Melt 1 tablespoon of the butter, add the eggs, and gently scramble for 1–2 minutes until set with no wet patches. Transfer to a clean plate. Keep the remaining tablespoon of butter for the rice.
- Add the entire tablespoon of vegetable oil to the skillet and raise the heat to medium-high. Cook the onion and finely diced carrot for 3–4 minutes, stirring, until starting to soften. Add the frozen peas and cook for about 1 minute, then add the garlic and stir for 30 seconds. Reduce the heat if the garlic begins to darken.
- Add the remaining 1 tablespoon butter and the cold rice. Spread across the pan, breaking apart clumps gently. Stir-fry for 3–4 minutes, letting the rice contact the hot surface between turns. Keep a lively sizzle without smoking the butter. If your pan is smaller, work with half the vegetable mixture and half the rice at a time, dividing the butter and seasonings between those batches.
- Add the 2 tablespoons soy sauce, optional 1 tablespoon teriyaki sauce, 1 teaspoon sesame oil, and black pepper. Return the eggs and toss for 1–2 minutes, or until the rice is steaming throughout and reaches 165°F. Taste carefully, then use the listed salt to taste. Do not add extra sauce simply to loosen a clump; break it apart with the spatula.
- Turn off the heat. Scatter the chopped green onion and optional sesame seeds over the rice, then serve promptly. This makes four side portions. If cooking in batches, divide the eggs and garnishes evenly and serve each batch hot; allow extra cooking time for the second batch.
Notes
- The 25-minute timing begins with cold cooked rice. Cooking and chilling new rice, or frying extra batches, takes additional time.
- Use 1 tablespoon butter for eggs, 1 tablespoon butter for rice, 1 tablespoon vegetable oil for vegetables, and 1 teaspoon sesame oil with the sauce.
- Reheat the cold rice to 165°F during stir-frying. Refrigerate promptly in shallow containers; use within 3 days of the original rice cooking date.