Easy Patti LaBelle Banana Pudding Recipe
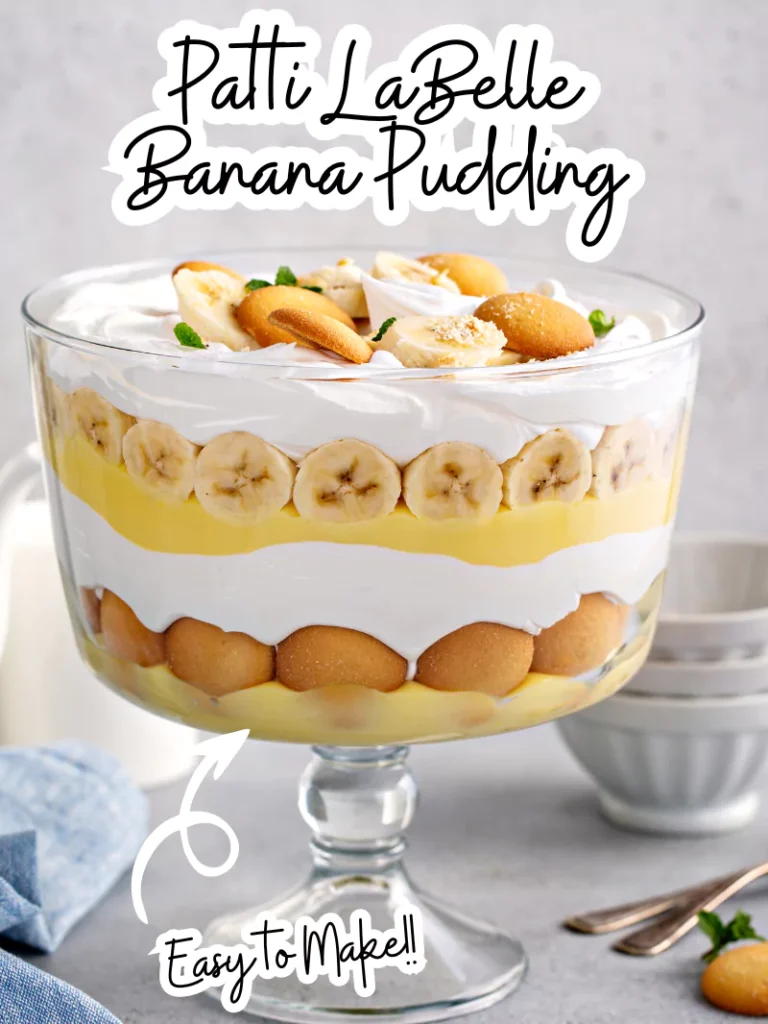
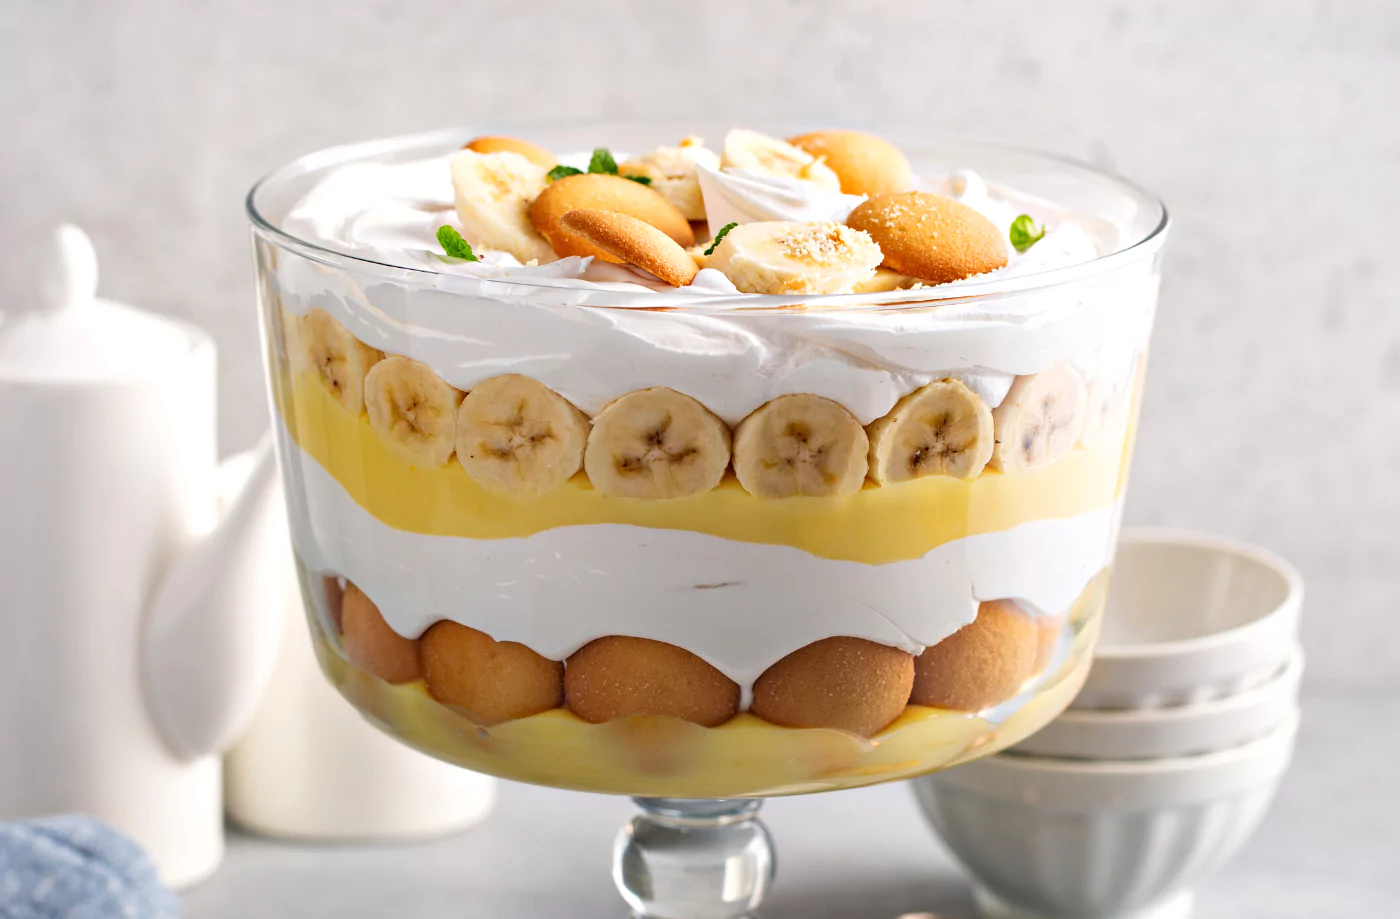
My favorite part of banana pudding is the spoonful that brings together soft wafers, sweet banana, and fluffy vanilla cream. This Patti LaBelle-inspired version has all three in lovely layers.
After sharing Publix banana pudding, I wanted to share another easy homemade option. This one uses instant vanilla pudding, sweetened condensed milk, and freshly whipped cream, with no stovetop cooking.
The hands-on work takes about 15 minutes, but the assembled dessert needs at least four hours in the refrigerator. That quiet chilling time softens the wafers and helps the creamy layers settle before serving.
Why This Dish Is Great
- No cooking required: Instant pudding thickens in cold liquid, and this formula contains no raw eggs to cook. It is especially useful when the oven is busy with dinner.
- A light, creamy texture: Whipped heavy cream softens the sweetness of the condensed milk and gives the pudding an airy finish. Gentle folding keeps that texture intact.
- Simple layers: Vanilla wafers, sliced bananas, and pudding are easy to divide among a large serving dish or roomy individual bowls. The layers do not have to look perfect to taste good.
- A make-ahead dessert: Chilling is part of the method, so you can assemble the dessert well before guests arrive. Save any crisp garnish for the last moment.
- Familiar flavors: Vanilla, cream, and ripe banana make a comforting combination. Optional toppings can add contrast while the original six-ingredient base stays simple.
What Are the Best Bananas for This Pudding?
Choose ripe bananas with yellow skins and a few brown speckles. They should smell sweet and feel firm enough to slice cleanly. Green bananas have a firmer, less sweet center that will stand out against the soft pudding. Very dark, collapsing bananas are better suited to baking than neat dessert layers.
Slice the bananas just before assembling the pudding. Aim for even rounds about one-quarter inch thick so each spoonful has a pleasant piece of fruit. Spread pudding over the banana layers to reduce their exposure to air. Some browning over time is natural and does not mean the recipe needs extra sugar or coloring.
Ingredients
- 1 can (14 ounces) sweetened condensed milk
- 1 1/2 cups ice cold water
- 1 package (3.4 ounces) instant vanilla pudding mix
- 3 cups heavy cream
- 1 box (11 ounces) vanilla wafers
- 4 ripe bananas, sliced
Use the entire 3.4-ounce package of instant vanilla pudding mix. Cook-and-serve pudding works differently and is not suitable for this cold method. Add the dry powder directly to the condensed milk and water; do not prepare it with the package’s additional milk first. Sweetened condensed milk is thick and sugary, while evaporated milk is a different product.
Keep the heavy cream cold until you are ready to whip it. The full 3 cups are used before whipping, not measured after whipping. The original six servings are generous; for a dessert spread, offer smaller scoops. Choose a large serving dish of about 4 quarts or several roomy bowls rather than trying to fit the entire batch into a small cup.
Kitchen Equipment You Will Need
As an Amazon Associate I earn from qualifying purchases.
- Large mixing bowls
- Whisk
- Electric hand mixer
- Flexible spatula
- Liquid measuring cup
- Knife
- Cutting board
- 4-quart serving dish
- Serving spoon
- Food storage wrap
- Can opener
How To Make Patti LaBelle Banana Pudding
- Mix the milk and water: In a large bowl, whisk the sweetened condensed milk with all 1 1/2 cups ice cold water until smooth. Scrape the bottom and sides so no thick milk remains underneath the liquid. Measure the water without including unmelted ice cubes.
- Set the pudding base: Add the dry instant vanilla pudding mix and whisk for about 2 minutes. Refrigerate for about 5 minutes while you whip the cream, until the base thickens. It should look like soft pudding rather than thin milk before you combine the two mixtures.
- Whip the cream: In a separate large bowl, beat all 3 cups cold heavy cream until it holds stiff peaks. Lift the beaters to check: the peak should stand up while the cream still looks smooth. Stop before it becomes grainy or starts separating.
- Fold gently: Stir a small portion of whipped cream into the thickened base to lighten it. Fold in the rest with a flexible spatula, sweeping down the side and lifting from the bottom. Turn the bowl as you work and stop once there are no obvious white streaks.
- Build the layers: Slice the bananas. Arrange wafers in the serving dish, add a layer of banana slices, and cover with pudding. Repeat until the ingredients are used, finishing with pudding over the fruit. If you want a crunchy wafer garnish, reserve a few from the measured box before layering.
- Chill completely: Cover and refrigerate at 40°F or below for at least 4 hours, or overnight. The base’s short rest overlaps the cream preparation, so allow about 4 hours 15 minutes from starting to serving, and longer for an overnight chill.
- Finish and serve: Add the reserved wafers just before serving. Spoon down through the layers so each portion includes banana, wafers, and cream. Keep the remaining pudding refrigerated between servings.
Notes
- Use cold ingredients. Warm cream takes longer to whip, and keeping the base cool helps the finished pudding hold its light texture.
- Check the pudding label before starting. Instant and cook-and-serve boxes can look similar, but only the instant product belongs in this no-cook formula.
- Give the base its short setting time. Folding whipped cream into a watery mixture makes it harder to keep the dessert fluffy.
- Watch the cream closely near the end. Stiff peaks should be smooth and glossy, not dry, clumpy, or surrounded by liquid.
- Make balanced layers. Spread the fruit and wafers across the dish instead of leaving a deep pile in the center.
- Cover the bananas with pudding. This limits direct contact with air and helps the layers hold together when you scoop.
- Expect the wafers inside to soften. That cake-like texture is part of the dessert; use a few reserved dry wafers on top if you enjoy extra crunch.
Ingredients You Can Add
These are optional finishing ideas; the ingredient list above makes the base recipe.
- Mini chocolate chips: Scatter a small spoonful over individual portions for little bites of chocolate without weighing down the whole bowl.
- Toasted coconut: Add a light sprinkle just before serving so the coconut keeps its crisp texture.
- Chopped nuts: Pecans or walnuts add crunch. Serve them separately when guests have different tastes or food allergies.
- Crushed pineapple: Drain it very thoroughly and add a little to a serving, since its juice can loosen the pudding.
- Caramel sauce: A thin drizzle is enough. The condensed milk already makes the base sweet and creamy.
- Crushed vanilla wafers: Reserve some from the original box and crush them for a simple finish that echoes the layers underneath.
What To Serve
Serve this pudding cold in bowls with a small spoon and a crisp wafer on top. Fresh berries and unsweetened coffee are pleasant alongside the creamy sweetness. Keep toppings on a separate plate when you want the pudding itself to look simple.
For a relaxed dessert spread, add chocolate chip cookies. Offer modest pudding portions so guests can enjoy both. Put out a small bowl of pudding at a time and keep the rest cold until needed.
If you bought more bananas than the pudding needs, save the very soft ones for banana bread. A slice can be served at another meal, while the firmer ripe bananas give this chilled dessert its best texture.
Variations and Swaps
- Individual bowls: Divide the same ingredients among roomy dessert bowls. Make sure each has wafers, fruit, and enough pudding to cover the banana slices.
- A family serving dish: Layer the full batch in one large dish and scoop from the bottom upward to include every component.
- More visible layers: Use a clear glass dish and place a few neat banana rounds near the sides. Do not pack the fruit so tightly that pudding cannot settle between it.
- A crunchy finish: Keep a few measured wafers dry until serving. Wafers buried in pudding will naturally soften during refrigeration.
- A chocolate topping: Use the optional mini chips on individual portions so everyone can decide whether they want them.
- A coconut finish: Sprinkle cooled toasted coconut over the top just before serving, keeping the original pudding mixture unchanged.
- A caramel finish: Drizzle a little sauce over each bowl after scooping. Mixing a large amount into the batch can make it overly sweet.
- Gluten-free wafers: If needed, use a suitable vanilla wafer and check the pudding mix and all other labels. Different cookies may soften at a different rate.
Storage
Cover the pudding tightly and keep it refrigerated at 40°F or below. It is best within 2–3 days, as the bananas gradually darken and the wafers become softer. Return leftovers to the refrigerator promptly, within two hours of serving or within one hour when the temperature is above 90°F. Discard pudding left out beyond those limits.
Keep the garnish separate whenever possible and use a clean spoon for each serving. Freezing is not recommended for the best texture because thawed bananas and whipped cream can become watery. For a picnic or potluck, transport the covered pudding in an insulated cooler with ice packs and keep it cold until serving.
FAQ
Is this Patti LaBelle’s official formula?
This is a homemade pudding inspired by the dessert, using the ingredients listed here. It is not presented as an official recipe or an exact copy of a packaged product.
Does the pudding need to be cooked?
No. The specified instant mix thickens cold, and no raw eggs are added. A cook-and-serve mix requires a different method and cannot simply be stirred into this recipe in place of the instant powder.
Why is my pudding runny?
Check that you used instant mix and measured the water correctly. The base should thicken before the cream is folded in. Underwhipped cream or watery fruit additions can also make the final mixture too loose.
Can I make it the night before?
Yes. Assemble and refrigerate it overnight, keeping banana slices covered by pudding. The wafers become softer as they sit. Add any dry wafer garnish just before serving for contrast.
Can I use evaporated milk?
It is not a direct replacement for the sweetened condensed milk here. The two products differ in sweetness and thickness, so using evaporated milk would change both flavor and the balance of the pudding.
Can I leave out the wafers?
You can serve the cream and banana together, but the wafers normally absorb moisture and provide the soft layered texture. Keep them for the intended result, or use an appropriate vanilla wafer that meets your dietary needs.
Short Description
A homemade Patti LaBelle-inspired banana pudding with instant vanilla pudding, sweetened condensed milk, whipped cream, bananas, and vanilla wafers. No cooking is needed; chill the assembled layers for at least four hours.
Patti LaBelle Banana Pudding Recipe
Course: DessertCuisine: AmericanDifficulty: Easy6
servings15
minutes4
hours15
minutesA homemade Patti LaBelle-inspired banana pudding with instant vanilla pudding, sweetened condensed milk, whipped cream, bananas, and vanilla wafers. No cooking is needed; chill the assembled layers for at least four hours.
Ingredients
1 can (14 ounces) sweetened condensed milk
1 1/2 cups ice cold water
1 package (3.4 ounces) instant vanilla pudding mix
3 cups heavy cream
1 box (11 ounces) vanilla wafers
4 ripe bananas, sliced
Directions
- Whisk the sweetened condensed milk with all 1 1/2 cups ice cold water in a large bowl until smooth. Measure liquid water without unmelted ice cubes.
- Add the dry 3.4-ounce instant vanilla pudding mix and whisk for about 2 minutes. Refrigerate for about 5 minutes while whipping the cream, until thickened. Do not add the milk called for on the pudding box and do not use cook-and-serve mix.
- In a separate large bowl, whip all 3 cups cold heavy cream to smooth stiff peaks. Stop before it becomes grainy.
- Stir a small portion of the whipped cream into the thickened pudding base, then gently fold in the rest until evenly combined.
- Slice the bananas. In a large serving dish of about 4 quarts or roomy individual bowls, layer vanilla wafers, banana slices, and pudding. Repeat, ending with pudding covering the fruit. Reserve a few wafers from the measured box if desired for garnish. The original six servings are generous.
- Cover and refrigerate at 40°F or below for at least 4 hours or overnight. Allow about 4 hours 15 minutes total with the short base rest overlapping cream preparation.
- Garnish with reserved wafers just before serving. Refrigerate leftovers promptly within 2 hours, or within 1 hour above 90°F, and use within 2–3 days for best texture. Do not leave the dairy dessert at room temperature beyond those limits.
Notes
- Choose bananas that are ripe but not overly mushy. Ripe bananas will have a sweeter flavor and creamy texture that complements the pudding perfectly.