Pilipit Recipe (Twisted Filipino doughnuts)
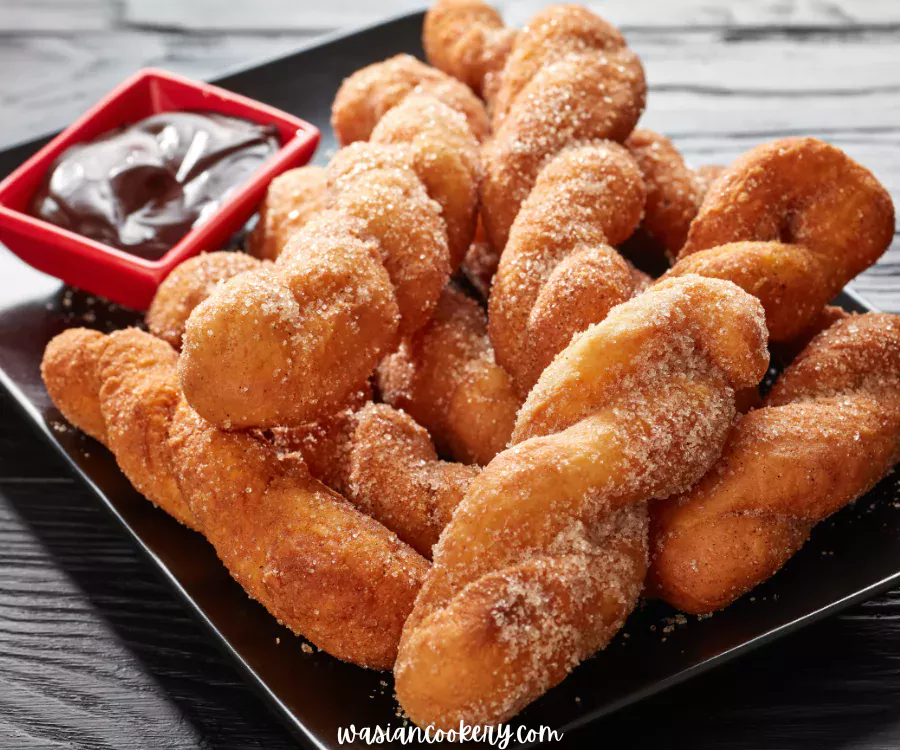
In my kitchen, pilipit are small, twisted doughnuts made with glutinous rice flour, coconut milk, and sugar. They have a chewy center and a lightly crisp surface when freshly fried.
This version uses no yeast or baking powder. The dough is shaped into slim ropes, twisted, and fried in small batches, with optional grated coconut in the dough and a light sugar coating afterward.
Plan on about 1 hour 10 minutes for 20 pieces, including a short dough rest and cooling time. A frying thermometer and one test piece help you check the oil temperature and the center before cooking the full batch.

About This Rice-Flour Version
Pilipit recipes vary. Here, glutinous rice flour is essential to the chewy texture, and the coconut milk supplies the liquid and coconut flavor. Regular rice flour and all-purpose flour behave differently, so they are not direct substitutes in this formula.
Ingredients
- 2 cups glutinous rice flour
- 1 cup coconut milk
- 1/2 cup granulated sugar
- 1/2 cup grated coconut (optional)
- Oil for deep-frying
- Sprinkle of granulated sugar for coating (optional)
Use a neutral oil suitable for deep-frying. Spoon the rice flour into the measuring cup and level it rather than packing it down. Stir separated coconut milk together before measuring so the cup contains both the cream and liquid.
Mix and Portion the Dough Evenly
A mixing bowl, frying thermometer, and long-handled slotted spoon are useful here. Also set out a deep heavy pot, a tray with a wire rack, parchment, and a clean bamboo skewer.
Read the flour label before measuring. The bag should say glutinous rice flour, matching the ingredient list. Two white powders can look very similar in a bowl while producing different doughs. Measure with a dry measuring cup and a straight edge, and break up any visible flour lumps before adding the coconut milk.
Work around the bottom and sides of the bowl while mixing. A dough that looks combined on top may still hide dry flour underneath. Scrape that flour into the damp dough and press the mixture together before deciding how it feels. Let the full resting time pass before shaping; judging immediately after pouring in the milk gives the flour less time to absorb it evenly.
To divide the dough without a scale, split it into four similar portions and then divide each portion into five pieces. Line the pieces up briefly so you can compare their size. Taking a little dough from an oversized piece is easier now than shortening a finished twist. Keeping all twenty pieces close in size also makes the first-piece doneness check more useful.
Kitchen Equipment You Will Need
As an Amazon Associate I earn from qualifying purchases.
- Mixing bowl
- Frying thermometer
- Long-handled slotted spoon
- Deep heavy pot
- Rimmed tray
- Wire rack
- Parchment paper
- Bamboo skewer
How to Make Pilipit
Step 1
Stir the coconut milk until uniform before measuring. In a mixing bowl, combine the 2 cups glutinous rice flour and 1/2 cup sugar. Gradually work in the 1 cup coconut milk, mixing thoroughly until no dry flour remains.
Step 2
If using the optional 1/2 cup grated coconut, work it evenly into the dough. Cover and rest for 10 minutes to let the flour hydrate, then knead briefly until the dough is smooth and holds together.
Step 3
Divide the dough into 20 equal pieces. Keep the pieces covered while shaping. Roll each piece into a rope about 6 inches long and roughly 3/8 to 1/2 inch thick, with an even thickness along its length.
Step 4
Fold each rope into a U, gently twist the two sides around each other, and pinch the open ends together. Keep the twist loose and avoid thick, tightly packed knots.
Step 5
Set the shaped pieces on a parchment-lined tray. Use a clean bamboo skewer to make a small hole through the thickest joined part of each twist to provide a steam vent. Do not fry dough that is too soft to hold its shape.
Step 6
Pour about 2 inches of neutral frying oil into a deep, heavy pot, keeping the pot no more than half full. Heat to 350°F (175°C), checking with a frying thermometer. Set a wire rack over a tray for draining.
Step 7
Lower one twist into the oil carefully with a long-handled slotted spoon. Fry this first piece as a doneness check, then cook the rest in small batches with room between them. Keep the oil close to 350°F and do not lean over the pot.
Step 8
Turn the twists as they cook until lightly golden and crisp outside, about 3 to 5 minutes per batch. Let the first piece cool enough to cut; the center should be cooked and chewy, with no dry flour or wet paste. If it colors before the center cooks, check the oil temperature and make the remaining twists thinner.
Step 9
Lift out each batch with the slotted spoon and drain on the rack. Let the oil return to 350°F before adding more dough. Allow about 35 minutes for heating the oil and frying the full batch, depending on pot size.
Step 10
If desired, sprinkle the warm twists with the optional coating sugar. The 1/2 cup sugar already mixed into the dough stays in the dough; the coating is separate and optional.
Step 11
Cool for at least 5 minutes before eating because the centers can stay very hot. Serve warm with coffee or tea. Allow about 1 hour 10 minutes total, including mixing, the 10-minute dough rest, shaping, frying, and cooling.
Shaping and Frying Tips
Keep the thickness even: A large knot can remain undercooked after the outside browns. Loosely twist the ropes and flatten any bulky join slightly before making the vent hole.
Check the first piece: Glutinous rice dough is meant to stay chewy. Look for an evenly cooked interior rather than the airy crumb of a yeast doughnut. The listed frying time is an estimate, so judge both the outside and center.
Handle hot oil carefully: Use dry utensils and keep water away from the pot. Rice-flour dough can split or splatter as steam builds, so use the vent holes, avoid overcrowding, and keep your face and hands back. A hole reduces risk but does not guarantee splatter-free frying.
Serving Ideas
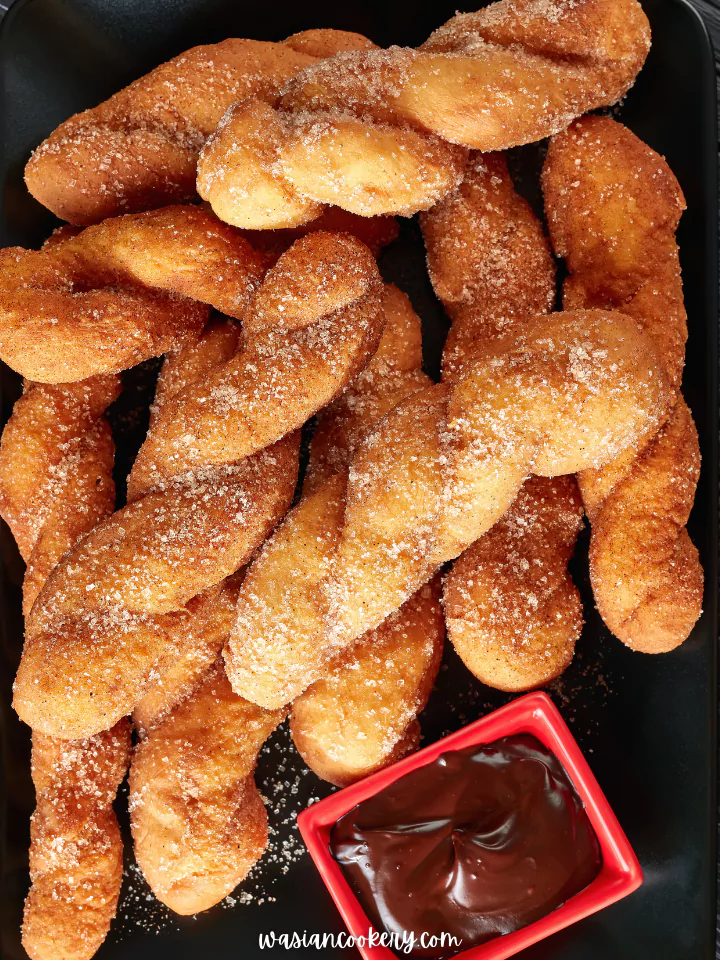
Serve the twists warm with coffee or tea, or let them cool before pairing them with Mango Sticky Rice Ice Cream. For another fried sweet, try Yakgwa. Small pieces of Panocha can round out a mixed dessert tray.
Storage
Pilipit are best freshly fried. Refrigerate leftovers within 2 hours in a covered container and use within 3 days; this is a cautious home-storage limit for this coconut-milk dough. They will firm up in the refrigerator. Reheat only the portion you plan to eat until hot throughout, then let it cool to a comfortable eating temperature.
Get Comfortable with the Twist
Roll from the middle of each piece toward the ends with light, even pressure. If you press hard at one end, you can create a skinny tail beside a thick center. Pause and smooth those uneven spots before folding the rope. Work on one piece at a time while the rest stay covered, so you are not rushing to shape dough with a dry surface.
Aim for a simple, open twist with a visible line between the two strands. An elaborate braid is unnecessary and can make the middle much bulkier than the ends. Pinch the join just firmly enough to hold, then check its thickness and make the vent described in the method. The shape should be neat enough to lift without stretching apart.
The optional coating is easiest to distribute while the twists are warm. Put the rack over a tray before sprinkling so loose sugar is caught underneath. Add a light layer rather than repeatedly rolling the pieces in sugar. The dough already contains its measured sweetness, so leaving the outer coating off is a reasonable choice when serving with a sweet dessert.
FAQ
Why are these chewy?
That texture comes from the glutinous rice flour. The recipe contains no yeast or other raising agent, so the inside will be compact and chewy rather than fluffy.
Can I leave out the grated coconut?
Yes. The 1/2 cup grated coconut is optional. Keep the rice flour, coconut milk, and sugar quantities as listed.
Why do the twists break while shaping?
Make sure the flour is fully mixed in and allow the 10-minute rest before rolling. Keep unshaped dough covered so the surface does not dry out, and avoid pulling the ropes sharply when twisting.
Can I bake or air-fry this dough?
This method is written for frying in oil. A baked or air-fried version would need separate development; using the same timing is unlikely to produce the same surface or texture.
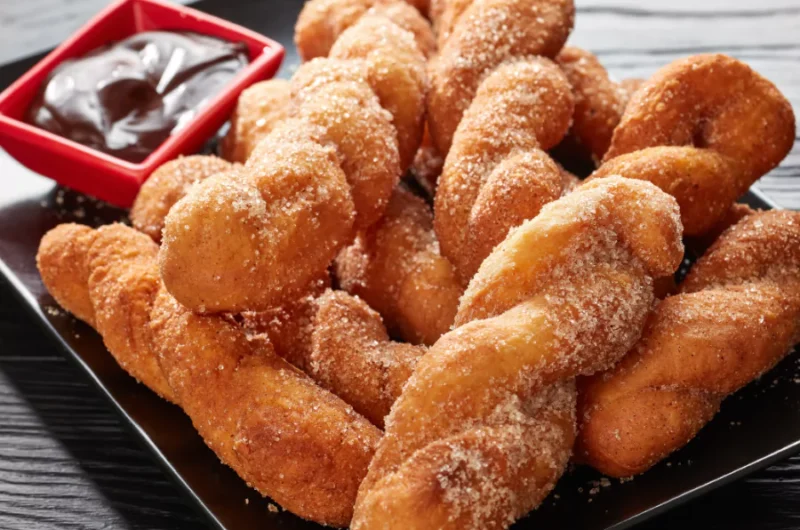
Pilipit Recipe
Course: Snacks, DessertCuisine: FilipinoDifficulty: Easy20
pieces30
minutes35
minutes1
hour10
minutesTry this beloved snack, Pilipit, with its simple ingredients and versatile nature, bringing joy to any occasion.
Ingredients
2 cups glutinous rice flour
1 cup coconut milk
1/2 cup granulated sugar
1/2 cup grated coconut (optional)
Oil for deep-frying
Sprinkle of granulated sugar for coating (optional)
Directions
- Stir the coconut milk until uniform before measuring. In a mixing bowl, combine the 2 cups glutinous rice flour and 1/2 cup sugar. Gradually work in the 1 cup coconut milk, mixing thoroughly until no dry flour remains.
- If using the optional 1/2 cup grated coconut, work it evenly into the dough. Cover and rest for 10 minutes to let the flour hydrate, then knead briefly until the dough is smooth and holds together.
- Divide the dough into 20 equal pieces. Keep the pieces covered while shaping. Roll each piece into a rope about 6 inches long and roughly 3/8 to 1/2 inch thick, with an even thickness along its length.
- Fold each rope into a U, gently twist the two sides around each other, and pinch the open ends together. Keep the twist loose and avoid thick, tightly packed knots.
- Set the shaped pieces on a parchment-lined tray. Use a clean bamboo skewer to make a small hole through the thickest joined part of each twist to provide a steam vent. Do not fry dough that is too soft to hold its shape.
- Pour about 2 inches of neutral frying oil into a deep, heavy pot, keeping the pot no more than half full. Heat to 350°F (175°C), checking with a frying thermometer. Set a wire rack over a tray for draining.
- Lower one twist into the oil carefully with a long-handled slotted spoon. Fry this first piece as a doneness check, then cook the rest in small batches with room between them. Keep the oil close to 350°F and do not lean over the pot.
- Turn the twists as they cook until lightly golden and crisp outside, about 3 to 5 minutes per batch. Let the first piece cool enough to cut; the center should be cooked and chewy, with no dry flour or wet paste. If it colors before the center cooks, check the oil temperature and make the remaining twists thinner.
- Lift out each batch with the slotted spoon and drain on the rack. Let the oil return to 350°F before adding more dough. Allow about 35 minutes for heating the oil and frying the full batch, depending on pot size.
- If desired, sprinkle the warm twists with the optional coating sugar. The 1/2 cup sugar already mixed into the dough stays in the dough; the coating is separate and optional.
- Cool for at least 5 minutes before eating because the centers can stay very hot. Serve warm with coffee or tea. Allow about 1 hour 10 minutes total, including mixing, the 10-minute dough rest, shaping, frying, and cooling.
Notes
- Best served freshly fried. Refrigerate leftovers within 2 hours in a covered container and use within 3 days. The chewy texture firms up when cold.