Christmas Oreo Balls Recipe
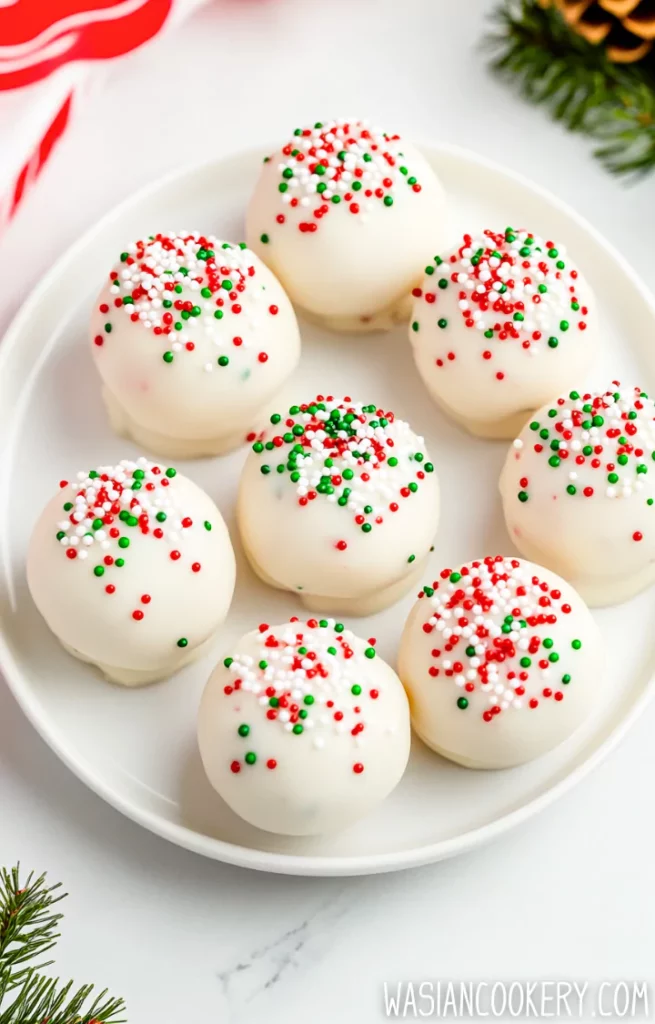
My kids love Christmas Oreo Balls, and I’m not going to lie, they are one of my favorite holiday treats too. The combination of crushed Oreos, rich cream cheese, and a sweet chocolate coating makes a small dessert feel special without turning on the oven.
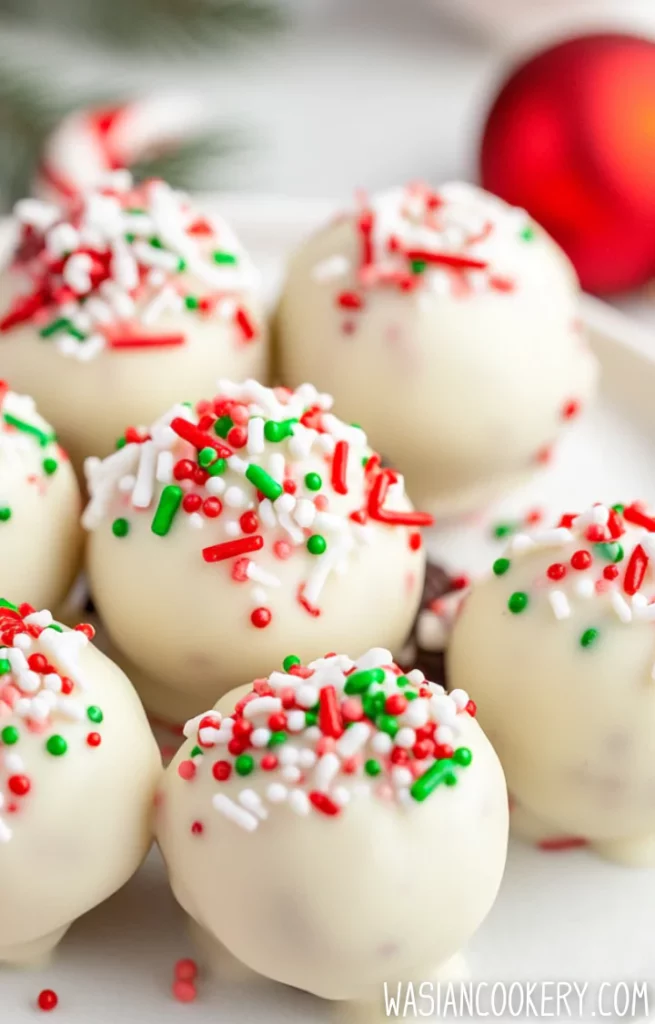
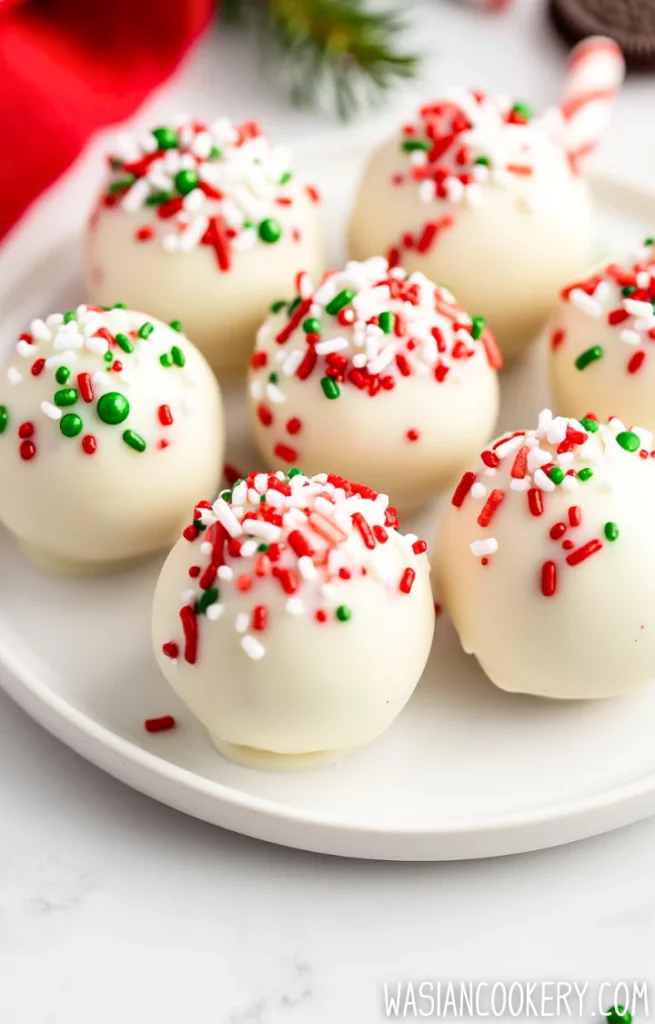
You only need a few simple ingredients, and festive sprinkles or crushed candy canes make the finished balls look ready for Christmas. The filling is soft and creamy, while the chilled coating gives a gentle snap. Keep the cookie filling in the crumbs; it is part of what brings this mixture together.
I love making these for holiday parties or as a sweet treat for family. They are also lovely to share as a chilled homemade gift, with a clear reminder to keep them refrigerated. Plan on about 1 hour 55 minutes, including both chilling stages, so they have time to firm up before serving.
Why This Dish Is Great
- Three main ingredients make the filling and coating, with vanilla and decorations available for a little extra flavor.
- The oven stays free for other holiday dishes because these cookie balls only need mixing, dipping, and chilling.
- Fine cookie crumbs give a smooth center that contrasts with the firm chocolate coating.
- Sprinkles and crushed candy canes make a simple batch look festive without detailed decorating skills.
- You can make the balls in advance and keep them cold until it is time to put out a small serving plate.
- The batch makes 24 portions, which is handy for sharing without cutting a cake or pie.
What Are the Best Cookies and Cream Cheese?
Use the stated 14.3 oz amount of regular Oreo sandwich cookies, with the cream filling included. Package sizes can change, so read the weight instead of assuming that every package is the same. A kitchen scale helps when your package is larger. Extra-filled cookies change the balance of crumbs and filling and can make the mixture softer.
Plain brick-style cream cheese gives the filling more body than whipped or spreadable cream cheese from a tub. Soften it only enough to mix smoothly, keeping the time out of the refrigerator brief. Full-fat cream cheese gives a rich texture; a lower-fat block may work, but its firmness can differ. Do not add more cookies or cream cheese before checking whether the mixture simply needs chilling.
Ingredients
- 1 package (14.3 oz) Oreo cookies
- 8 oz cream cheese, softened
- 12 oz white chocolate (or chocolate coating of your choice)
- 1 teaspoon vanilla extract (optional)
- Sprinkles or crushed candy canes (for decoration)
Kitchen Equipment You Will Need
As an Amazon Associate I earn from qualifying purchases.
- Food processor
- Food-storage bags
- Rolling pin
- Kitchen scale
- Mixing bowl
- Sturdy mixing spoon
- Measuring spoons
- Rimmed baking sheet
- Parchment paper
- Microwave-safe bowl
- Silicone spatula
- Dipping fork
- Chef knife
- Cutting board
- Serving plate
- Airtight storage containers
- Insulated cooler
- Ice packs
How To Make Christmas Oreo Balls
Step 1: Crush the cookies
Line a baking sheet with parchment paper and make space in the freezer and refrigerator. Crush all the Oreo cookies, including their cream filling, into fine crumbs in a food processor. Alternatively, seal them in a sturdy food-storage bag and crush with a rolling pin until no large pieces remain.
Step 2: Mix the filling
In a large bowl, mix the crumbs with all 8 oz softened cream cheese and the optional 1 teaspoon vanilla. Use a sturdy spoon to work the mixture into a smooth, evenly dark dough without white streaks. Keep cream cheese refrigerated until preparation and soften only enough to mix; small cubes soften faster. If additional softening time is needed, add it to the recipe time.
Step 3: Shape 24 balls
Divide the filling into 24 equal portions and roll each portion between clean hands into a ball. Set them apart on the lined baking sheet. Aim for equal portions so the centers chill at a similar rate. This makes 24 moderately sized cookie balls.
Step 4: Chill until firm
Freeze the shaped balls for about 20 minutes, until firm enough to lift and dip without bending. Do not skip this step. If the filling is still soft, chill a little longer and add that time to the total. Keep the balls cold until you are ready to coat them.
Step 5: Melt and coat
After the initial chill, chop the white chocolate if needed and place it in a completely dry microwave-safe bowl. Microwave at 50% power in 20-second bursts, stirring well after every burst. Stop heating when only a few small pieces remain and stir until smooth; follow package directions if using candy coating. Let it cool briefly until fluid but not hot. Dip the firm balls one at a time using a fork, let excess drip back into the bowl, and return them to the parchment. Work with a few balls at a time and keep the rest refrigerated.
Step 6: Decorate each ball
Immediately after dipping each ball, add sprinkles or crushed candy canes while the coating is wet. Repeat with the remaining balls, using the measured 12 oz coating for the whole batch. If the chocolate starts to thicken, warm it very briefly at half power and stir; do not add water or liquid vanilla to the coating.
Step 7: Chill again and keep cold
Refrigerate the coated balls for at least 1 hour, until the coating is firm and the centers are chilled. Keep refrigerated at 40°F (4°C) or below until serving. Allow about 35 minutes hands-on preparation and coating, 20 minutes initial chilling, and 60 minutes final chilling, for about 1 hour 55 minutes total. No baking is required; chocolate melting is included in the preparation time.
Notes
- Crush the cookies finely. Large chunks create rough spots that can show through the coating and make the balls harder to roll neatly.
- Mix until the dough has an even color. White streaks show that some cream cheese still needs to be worked into the crumbs.
- Portion all the filling before rolling. It is easier to adjust the 24 mounds while they are still on the tray than after they have been coated.
- Keep your chocolate bowl, spatula, and fork dry. A splash of water can make melted chocolate turn thick and grainy.
- Use gentle heat and stir often. White chocolate can scorch before it looks completely melted, so let the last few pieces melt with stirring.
- Tap the dipping fork lightly against the bowl to let excess coating drain away. A heavy puddle around each ball uses more of the measured chocolate.
- Add decorations right after dipping each ball. Waiting until the entire batch is coated can leave the first few too firm for sprinkles to stick.
Ingredients You Can Add
- Festive sprinkles bring color and a little crunch. Small sprinkles cling more easily than large, heavy decorations.
- Crushed candy canes add peppermint flavor. Break them into fine pieces so the topping stays pleasant to bite.
- Mini chocolate chips make a simple topping when you want more chocolate flavor without a bright holiday color.
- Finely chopped nuts add crunch; let anyone sharing the treats know that nuts have been added.
- A little shredded coconut makes a snowy-looking finish on the wet coating.
- The optional teaspoon of vanilla belongs in the cream cheese filling. Keep liquid flavorings out of the melted chocolate.
What To Serve With Christmas Oreo Balls
These Oreo balls go nicely with a warm cup of hot chocolate, coffee, or a festive drink. For a cookie tray, add white chocolate raspberry cookies for a fruity flavor alongside the rich cookie centers. Put out a few Oreo balls at a time and keep the rest chilled.
If you enjoy a softer cookie with your holiday sweets, try pumpkin chocolate chip cookies. Their warm flavor gives the plate some variety. Serve the chilled Oreo balls on their own small plate so you can return any untouched portions to the refrigerator promptly.
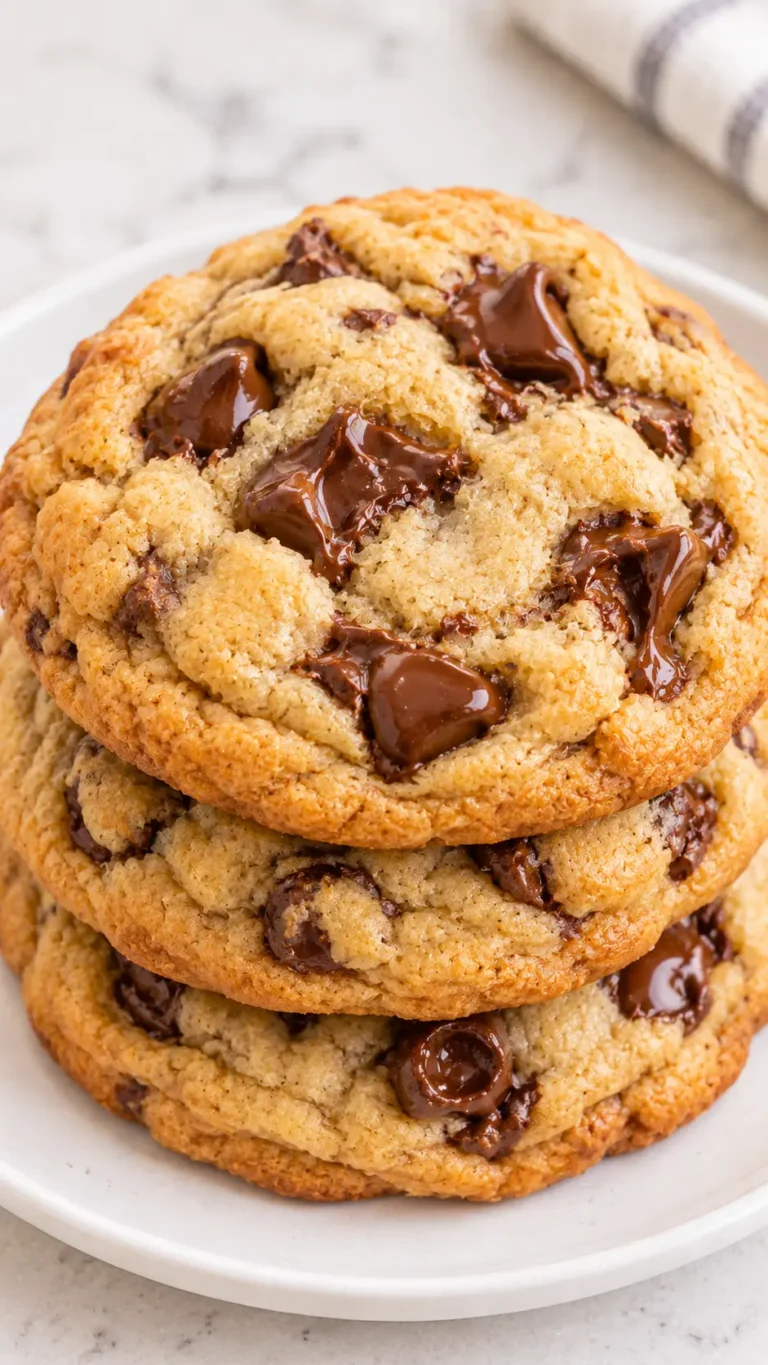
Classic chocolate chip cookies are another easy pairing. Smaller portions of several sweets make a pleasant dessert plate. For a gathering, bring out fresh chilled balls as needed instead of leaving the whole batch beside warm dishes for the afternoon.
Variations and Swaps
- Milk chocolate: use the same measured weight of milk chocolate instead of white chocolate, melting it gently according to its package.
- Dark chocolate: a dark coating gives a less sweet contrast to the Oreo filling. Keep the centers and chilling method the same.
- Candy coating: use the listed coating option in place of white chocolate and follow its own melting instructions. Do not assume all brands heat at the same rate.
- Peppermint finish: use crushed candy canes on top. This gives mint flavor without changing the moisture in the filling.
- Plain vanilla filling: include the original optional teaspoon of vanilla for a softer background flavor, or leave it out for a more direct cookie taste.
- Simple sprinkles: change the sprinkle colors for another celebration. The same refrigerated filling works beyond Christmas.
- Chocolate drizzle: reserve a little of the measured melted coating for a thin drizzle after dipping. Keep the base coating thin so the batch stays within the listed amount.
- Undecorated balls: leave off the optional topping for a simple smooth shell. Chill and store them exactly like the decorated batch.
Storage
Keep the Oreo balls in an airtight container in the refrigerator at 40°F (4°C) or below, separating layers with parchment after the coating has set. Plan to enjoy them within three to four days. Cream cheese makes them perishable even under a firm chocolate shell. Limit their combined time out during preparation, transport, and serving to two hours, or one hour when the surroundings are above 90°F (32°C).
Freeze fully set balls in a freezer-safe container with parchment between layers for up to three months for best quality. Thaw covered in the refrigerator, not on the counter; the coating may lose some shine or collect moisture. For gifting or taking to a party, transport them cold in an insulated cooler with ice packs, then refrigerate on arrival. Include a keep-refrigerated note with each gift.

FAQ
Can I make these without a food processor?
Yes. Put the cookies in a sturdy sealed food-storage bag and crush them with a rolling pin. Work over all the crumbs until they are fine, then transfer them to the mixing bowl. A few stubborn large pieces can make the filling lumpy.
Why are my Oreo balls too soft to dip?
They may need more chilling, or the cream cheese may have become too warm. Return them to the refrigerator or freezer until firm. A spreadable cream cheese or extra-filled cookie can also change the texture, which is why the stated ingredients matter.
Why is my melted chocolate thick or grainy?
It may have overheated or met a little moisture. Stop heating and stir first. If it is scorched or has seized, extra heat will not make a smooth dipping coating. Use a clean, dry bowl for a fresh portion and avoid adding water.
Can I use another kind of cookie?
Another regular chocolate sandwich cookie of the same total weight is the closest option, although sweetness and firmness may differ. Graham crackers and extra-filled cookies are not direct replacements because they change the balance of dry crumbs and filling.
Can I make them ahead as gifts?
Yes, if you can keep them refrigerated. Pack them only after the coating is firm, transport them with ice packs, and tell the recipient to refrigerate them. They are not a shelf-stable sweet for an unrefrigerated gift basket or ordinary mailing.
Do these have to stay in the refrigerator?
Yes. The cream cheese filling needs refrigeration before and after coating. Serve small portions and replenish them from the refrigerator. If the balls have exceeded the two-hour room-temperature limit, or one hour above 90°F, discard them rather than chilling them again.
Short Description
Christmas Oreo Balls combine crushed sandwich cookies and cream cheese in a chilled filling, coated with white chocolate and finished with festive sprinkles or crushed candy canes.

Christmas Oreo Balls
Course: DessertCuisine: AmericanDifficulty: Easy24
balls35
minutes1
hour55
minutesChristmas Oreo Balls combine crushed sandwich cookies and cream cheese in a chilled filling, coated with white chocolate and finished with festive sprinkles or crushed candy canes.
Ingredients
1 package (14.3 oz) Oreo cookies
8 oz cream cheese, softened
12 oz white chocolate (or chocolate coating of your choice)
1 teaspoon vanilla extract (optional)
Sprinkles or crushed candy canes (for decoration)
Directions
- Crush the Oreos:
- Line a baking sheet with parchment paper and make space in the freezer and refrigerator. Crush all the Oreo cookies, including their cream filling, into fine crumbs in a food processor. Alternatively, seal them in a sturdy food-storage bag and crush with a rolling pin until no large pieces remain.
- Mix with Cream Cheese:
- In a large bowl, mix the crumbs with all 8 oz softened cream cheese and the optional 1 teaspoon vanilla. Use a sturdy spoon to work the mixture into a smooth, evenly dark dough without white streaks. Keep cream cheese refrigerated until preparation and soften only enough to mix; small cubes soften faster. If additional softening time is needed, add it to the recipe time.
- Form the Balls:
- Divide the filling into 24 equal portions and roll each portion between clean hands into a ball. Set them apart on the lined baking sheet. Aim for equal portions so the centers chill at a similar rate. This makes 24 moderately sized cookie balls.
- Chill the Balls:
- Freeze the shaped balls for about 20 minutes, until firm enough to lift and dip without bending. Do not skip this step. If the filling is still soft, chill a little longer and add that time to the total. Keep the balls cold until you are ready to coat them.
- Coat with Chocolate:
- After the initial chill, chop the white chocolate if needed and place it in a completely dry microwave-safe bowl. Microwave at 50% power in 20-second bursts, stirring well after every burst. Stop heating when only a few small pieces remain and stir until smooth; follow package directions if using candy coating. Let it cool briefly until fluid but not hot. Dip the firm balls one at a time using a fork, let excess drip back into the bowl, and return them to the parchment. Work with a few balls at a time and keep the rest refrigerated.
- Decorate:
- Immediately after dipping each ball, add sprinkles or crushed candy canes while the coating is wet. Repeat with the remaining balls, using the measured 12 oz coating for the whole batch. If the chocolate starts to thicken, warm it very briefly at half power and stir; do not add water or liquid vanilla to the coating.
- Chill Again:
- Refrigerate the coated balls for at least 1 hour, until the coating is firm and the centers are chilled. Keep refrigerated at 40°F (4°C) or below until serving. Allow about 35 minutes hands-on preparation and coating, 20 minutes initial chilling, and 60 minutes final chilling, for about 1 hour 55 minutes total. No baking is required; chocolate melting is included in the preparation time.
Notes
- Keep cream cheese refrigerated until preparation; soften only enough to mix. Use the listed 14.3 oz cookie weight, including filling. Divide into 24 equal portions rather than relying on a one-inch size cue.
- Allow 35 minutes hands-on preparation and coating, 20 minutes initial freezer chilling, and 60 minutes final refrigeration: about 115 minutes total. Extra softening or chilling extends that time. No baking is required; melting is included in preparation.
- Melt chocolate in a dry microwave-safe bowl at 50% power in 20-second bursts, stirring each time; stop before all pieces melt and stir smooth. Follow package directions for candy coating. Add liquid vanilla only to the filling.
- Keep refrigerated at 40°F (4°C) or below and enjoy within 3–4 days. Keep cumulative time out during preparation, transport, and serving below 2 hours, or 1 hour above 90°F. Transport in an insulated cooler with ice packs. Freeze up to 3 months for best quality and thaw in the refrigerator.