15 Christmas Cookie Recipes
Every December, my kitchen turns into a little cookie factory, and I would not have it any other way. The butter sits out on the counter, there is flour on my apron, Christmas songs play on the radio, and tray after tray comes out of the oven. For me, the smell of cookies baking — cinnamon, ginger, vanilla, and chocolate — is the true smell of Christmas.
That is what I love most about Christmas cookies: no two are the same. On one big tray you can have spicy gingerbread men next to buttery shortbread, jam-filled thumbprints, snowy white snowballs, and chocolate crinkles that look like they were dusted with fresh snow. A cookie tray is like a little rainbow of the season, and everyone, young or old, finds a favorite on it.
This list has the 15 cookies I bake again and again for cookie trays, cookie exchanges, and little gift boxes tied with ribbon. Some are quick and easy for busy days, and some are perfect for a slow afternoon of decorating with the family. Pick three or four to start, put on your apron, and let the baking begin — and remember, most of these doughs can be made a day ahead, which makes Christmas week so much easier.
Classic Gingerbread Cookies
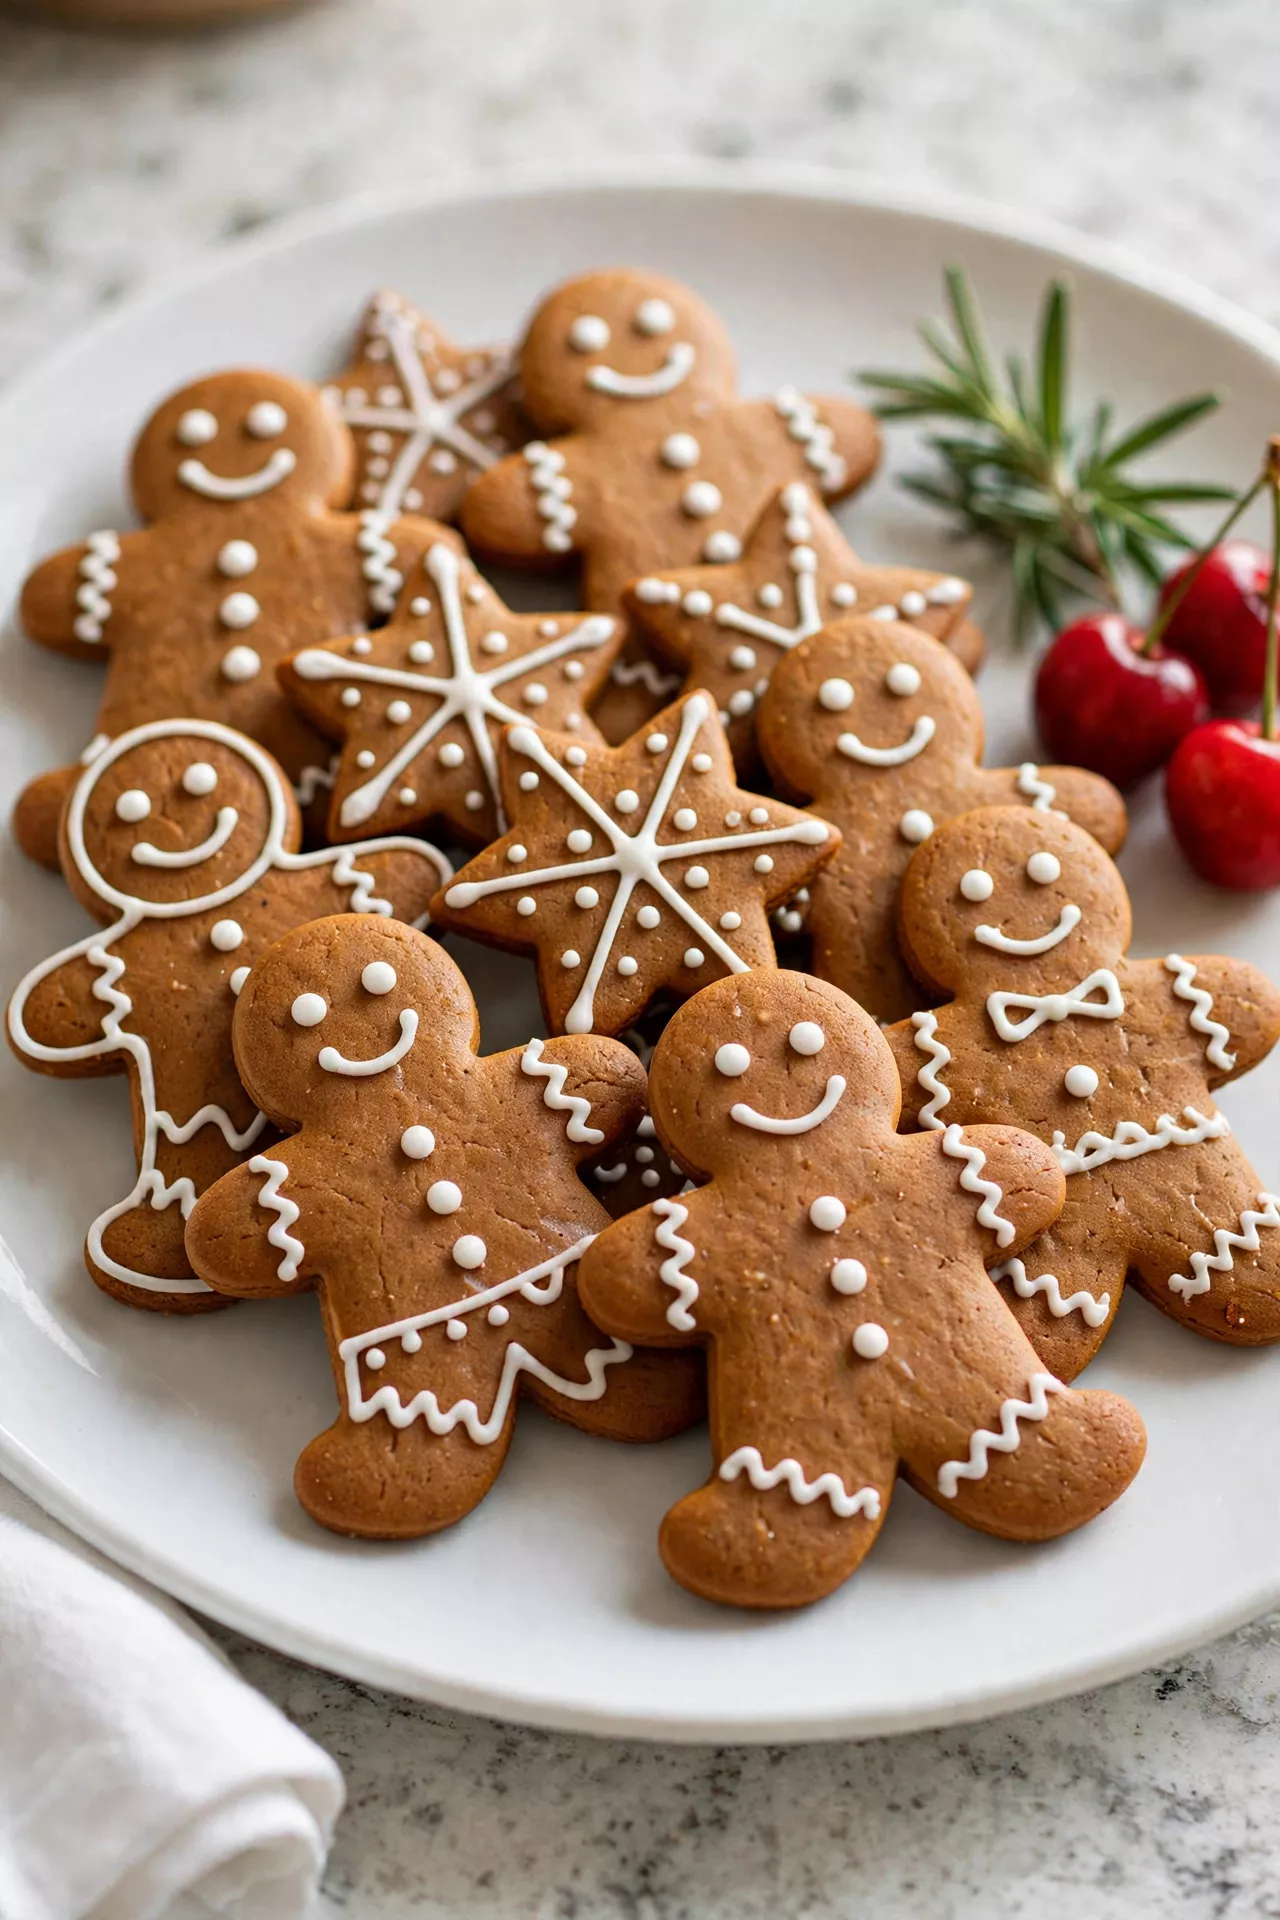
No cookie says Christmas like a gingerbread cookie, with its deep molasses flavor and warm spices in every bite. The dough rolls out beautifully and holds its shape, so your little men, stars, and trees come out of the oven looking sharp and cute. Decorate them with simple white icing and they become the stars of any cookie tray.
Prep Time: 30 minutes | Cook Time: 10 minutes | Servings: 24
Ingredients
- 3 1/4 cups all-purpose flour, plus extra for rolling
- 1 teaspoon baking soda
- 1 tablespoon ground ginger
- 1 1/2 teaspoons ground cinnamon
- 1/2 teaspoon ground cloves
- 1/4 teaspoon ground nutmeg
- 1/4 teaspoon salt
- 3/4 cup unsalted butter, softened
- 3/4 cup brown sugar, firmly packed
- 2/3 cup molasses
- 1 large egg
- 1 teaspoon vanilla extract
Instructions
- Mix the dry ingredients by whisking the flour, baking soda, ginger, cinnamon, cloves, nutmeg, and salt together in a medium bowl. Set the bowl aside so the spices are ready and evenly mixed.
- Cream the butter and sugar in a large bowl with an electric mixer for about 2 minutes, until light and fluffy. This step puts air into the dough and helps the cookies bake up tender.
- Add the molasses and egg and beat until smooth and dark and glossy, then mix in the vanilla. Scrape down the sides of the bowl so everything is mixed in well.
- Make the dough by adding the dry ingredients to the wet mixture a little at a time, mixing on low just until a soft dough forms. Do not overmix, or the cookies can turn tough.
- Chill the dough by dividing it in half, flattening each half into a disk, wrapping it, and putting it in the fridge for at least 2 hours or overnight. Cold dough is much easier to roll and cut.
- Roll and cut the dough on a lightly floured surface to about 1/4 inch thick. Cut out shapes with cookie cutters and place them on parchment-lined baking sheets, about 1 inch apart.
- Bake the cookies in a preheated oven at 350°F (175°C) for 9 to 11 minutes, until the edges are firm and the centers look just set. They will firm up more as they cool.
- Cool and decorate on the pan for 5 minutes, then move them to a wire rack to cool completely. Decorate with royal icing or a simple powdered sugar icing once they are fully cold.
Christmas Sugar Cookies with Royal Icing

These are the cookies everyone reaches for first at a cookie exchange — soft, buttery sugar cookies dressed up in smooth, shiny royal icing. Cut them into trees, stars, snowflakes, and stockings, then paint them red, green, and white. Decorating them is half the fun, so call the family to the table and make an afternoon of it.
Prep Time: 40 minutes | Cook Time: 10 minutes | Servings: 30
Ingredients
- 3 cups all-purpose flour, plus extra for rolling
- 1 teaspoon baking powder
- 1/2 teaspoon salt
- 1 cup unsalted butter, softened
- 1 cup granulated sugar
- 1 large egg
- 1 teaspoon vanilla extract
- 1/2 teaspoon almond extract (optional)
- 3 cups powdered sugar, for the icing
- 3 tablespoons meringue powder
- 4 to 5 tablespoons warm water
- Gel food coloring and sprinkles, for decorating
Instructions
- Mix the dry ingredients by whisking the flour, baking powder, and salt in a medium bowl, then set it aside. This keeps the cookies light and helps them rise evenly.
- Cream the butter and sugar in a large bowl for 2 to 3 minutes until pale and fluffy. Add the egg, vanilla, and almond extract and beat until smooth and well combined.
- Make and chill the dough by mixing in the dry ingredients on low speed just until a soft dough forms. Divide it in half, flatten into disks, wrap, and chill for at least 1 hour so the shapes hold in the oven.
- Roll and cut the chilled dough on a floured surface to about 1/4 inch thick. Cut out Christmas shapes and place them on parchment-lined baking sheets, 1 inch apart.
- Bake the cookies at 350°F (175°C) for 9 to 11 minutes, until the edges are just barely golden. The centers should still look soft and pale, which keeps them tender after cooling.
- Cool completely on a wire rack before icing. Warm cookies will melt the royal icing and make a mess, so a little patience here really helps.
- Make the royal icing by beating the powdered sugar, meringue powder, and warm water for 4 to 5 minutes until smooth and glossy. Divide it into bowls, tint with food coloring, and thin with a few drops of water until it flows slowly off a spoon.
- Decorate and let dry by outlining each cookie, flooding the center with icing, and adding sprinkles while it is wet. Let the cookies dry uncovered for at least 4 hours, or overnight, before stacking them on a tray.
Classic Snickerdoodles
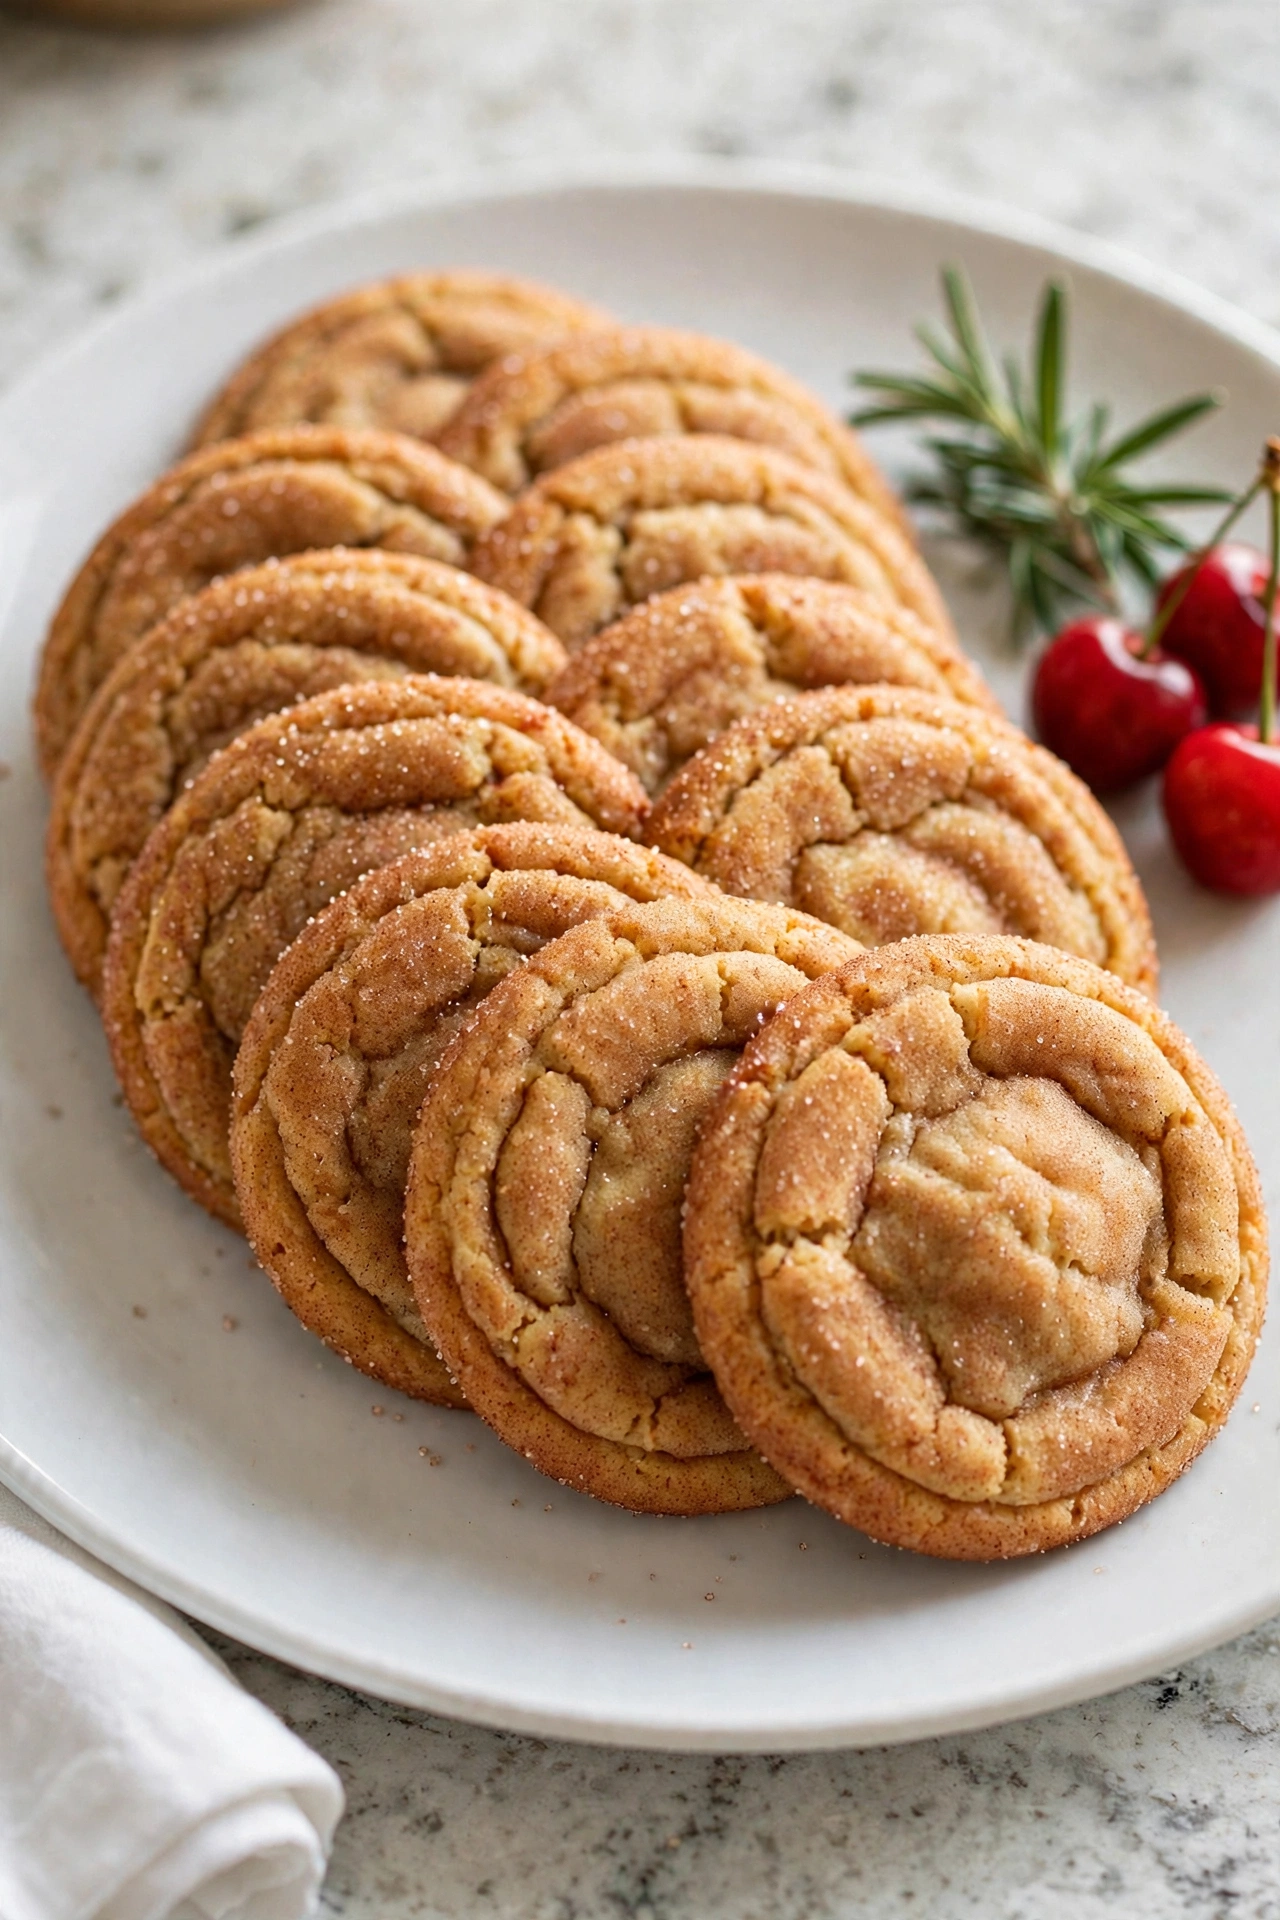
Snickerdoodles are pure comfort — soft, pillowy cookies rolled in cinnamon sugar so every bite is sweet, warm, and a little tangy. They puff up in the oven and settle into beautiful crackly tops as they cool. They are simple, quick, and always one of the first cookies to disappear from my Christmas tray.
Prep Time: 20 minutes | Cook Time: 10 minutes | Servings: 24
Ingredients
- 2 3/4 cups all-purpose flour
- 2 teaspoons cream of tartar
- 1 teaspoon baking soda
- 1/2 teaspoon salt
- 1 cup unsalted butter, softened
- 1 1/2 cups granulated sugar
- 2 large eggs
- 1 teaspoon vanilla extract
- 1/4 cup granulated sugar, for rolling
- 1 tablespoon ground cinnamon, for rolling
Instructions
- Mix the dry ingredients by whisking the flour, cream of tartar, baking soda, and salt in a medium bowl. The cream of tartar is the secret ingredient — it gives snickerdoodles their soft chew and gentle tang.
- Cream the butter and sugar in a large bowl for about 2 minutes, until light in color and fluffy. This helps the cookies puff up nicely in the oven.
- Add the eggs and vanilla one egg at a time, beating well after each one, until the mixture is smooth and creamy. Scrape the bowl once so nothing is left behind.
- Make the dough by stirring the dry ingredients into the butter mixture on low speed, just until no flour streaks remain. The dough will be soft but not sticky.
- Mix the cinnamon sugar in a small shallow bowl by stirring the 1/4 cup sugar and the tablespoon of cinnamon together until evenly blended and fragrant.
- Roll the balls by scooping about 2 tablespoons of dough, rolling it smooth between your palms, and rolling it generously in the cinnamon sugar until fully coated. Place the balls on parchment-lined baking sheets, about 2 inches apart.
- Bake the cookies at 350°F (175°C) for 9 to 11 minutes, until the edges are set and the tops are puffed and crackled. The centers should still look a little soft.
- Cool and serve on the pan for 5 minutes, then move to a wire rack. They are wonderful warm with a glass of milk, and they stay soft for days in a sealed tin.
Buttery Shortbread Cookies
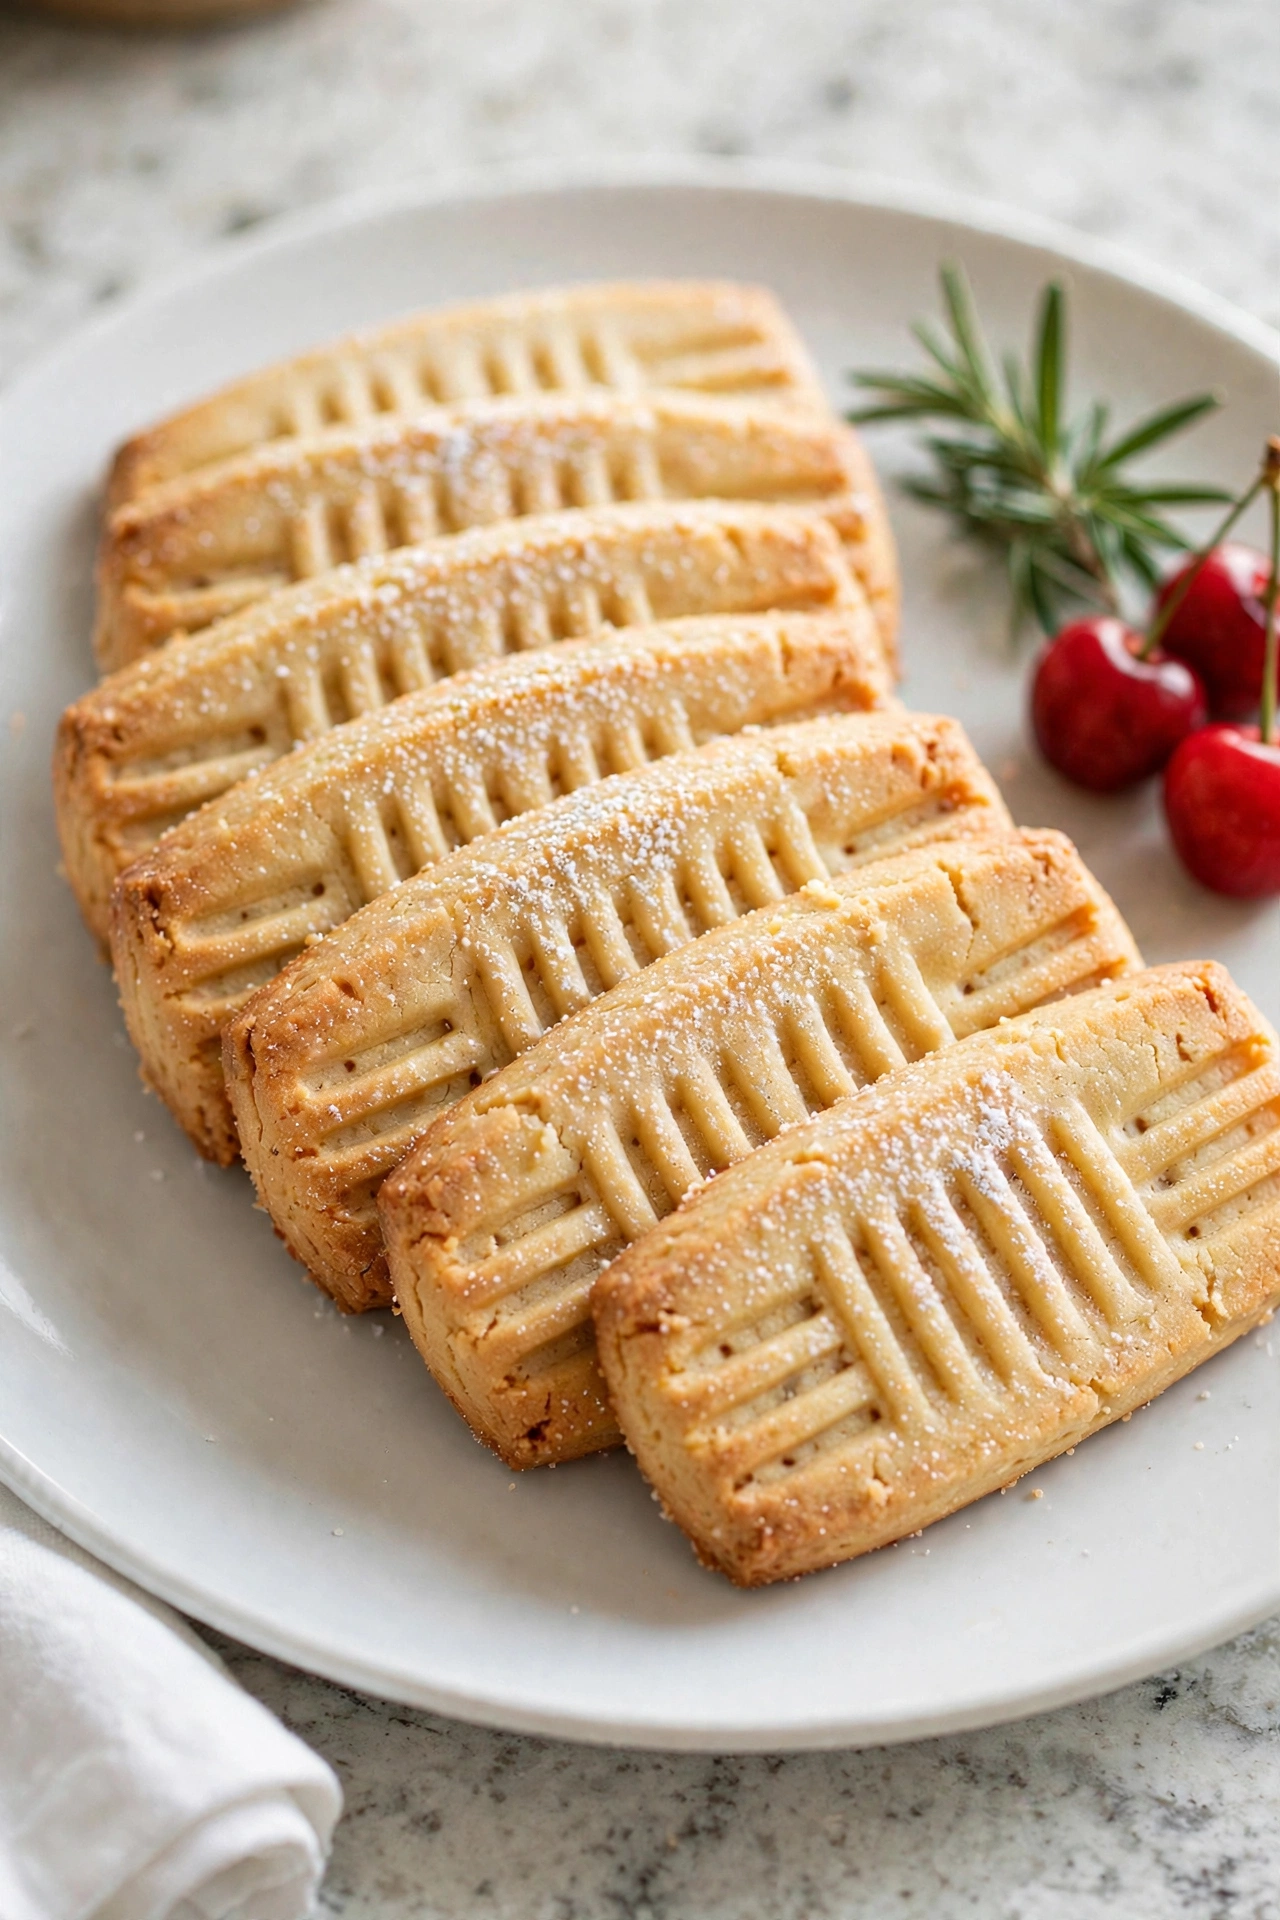
Real shortbread needs only a few simple ingredients, but the flavor tastes rich and special — all butter, gentle sweetness, and a tender crumb that melts in your mouth. These are my favorite cookies to make for gift boxes because they keep well and travel beautifully. A little dip in melted chocolate makes them extra festive for Christmas.
Prep Time: 20 minutes | Cook Time: 25 minutes | Servings: 24
Ingredients
- 1 cup unsalted butter, softened
- 1/2 cup powdered sugar
- 1 teaspoon vanilla extract
- 1 teaspoon lemon zest (optional)
- 2 cups all-purpose flour
- 1/4 cup cornstarch
- 1/4 teaspoon salt
- 1 tablespoon granulated sugar, for sprinkling
- 4 ounces dark or milk chocolate, melted, for dipping (optional)
- Christmas sprinkles, for decorating (optional)
Instructions
- Prepare the oven and pan by preheating the oven to 325°F (160°C) and lining a baking sheet with parchment paper. A lower, slower bake keeps shortbread pale and tender.
- Cream the butter and sugar in a large bowl just until smooth and combined, about 1 minute. Do not beat too much air into it, or the cookies may spread and lose their neat shape.
- Add the vanilla and lemon zest if using, and mix until the dough smells sweet and fragrant. The little bit of lemon makes the butter flavor shine.
- Add the dry ingredients — the flour, cornstarch, and salt — and mix on low until a soft, crumbly dough forms. Press it together gently with your hands until it holds in one smooth piece.
- Chill the dough by flattening it into a disk, wrapping it, and refrigerating for 30 minutes. This firms up the butter and makes the dough easy to roll without sticking.
- Roll and cut the dough on a lightly floured surface to about 1/3 inch thick, and cut into rounds, fingers, or Christmas shapes. Place them on the prepared sheet and prick each cookie once or twice with a fork.
- Bake low and slow for 22 to 26 minutes, until the edges are set and the bottoms are just barely golden. The tops should stay nice and pale.
- Cool and finish completely on a wire rack. If you like, dip one end of each cookie in melted chocolate, add sprinkles, and let the chocolate set before packing them into tins.
Raspberry Thumbprint Cookies
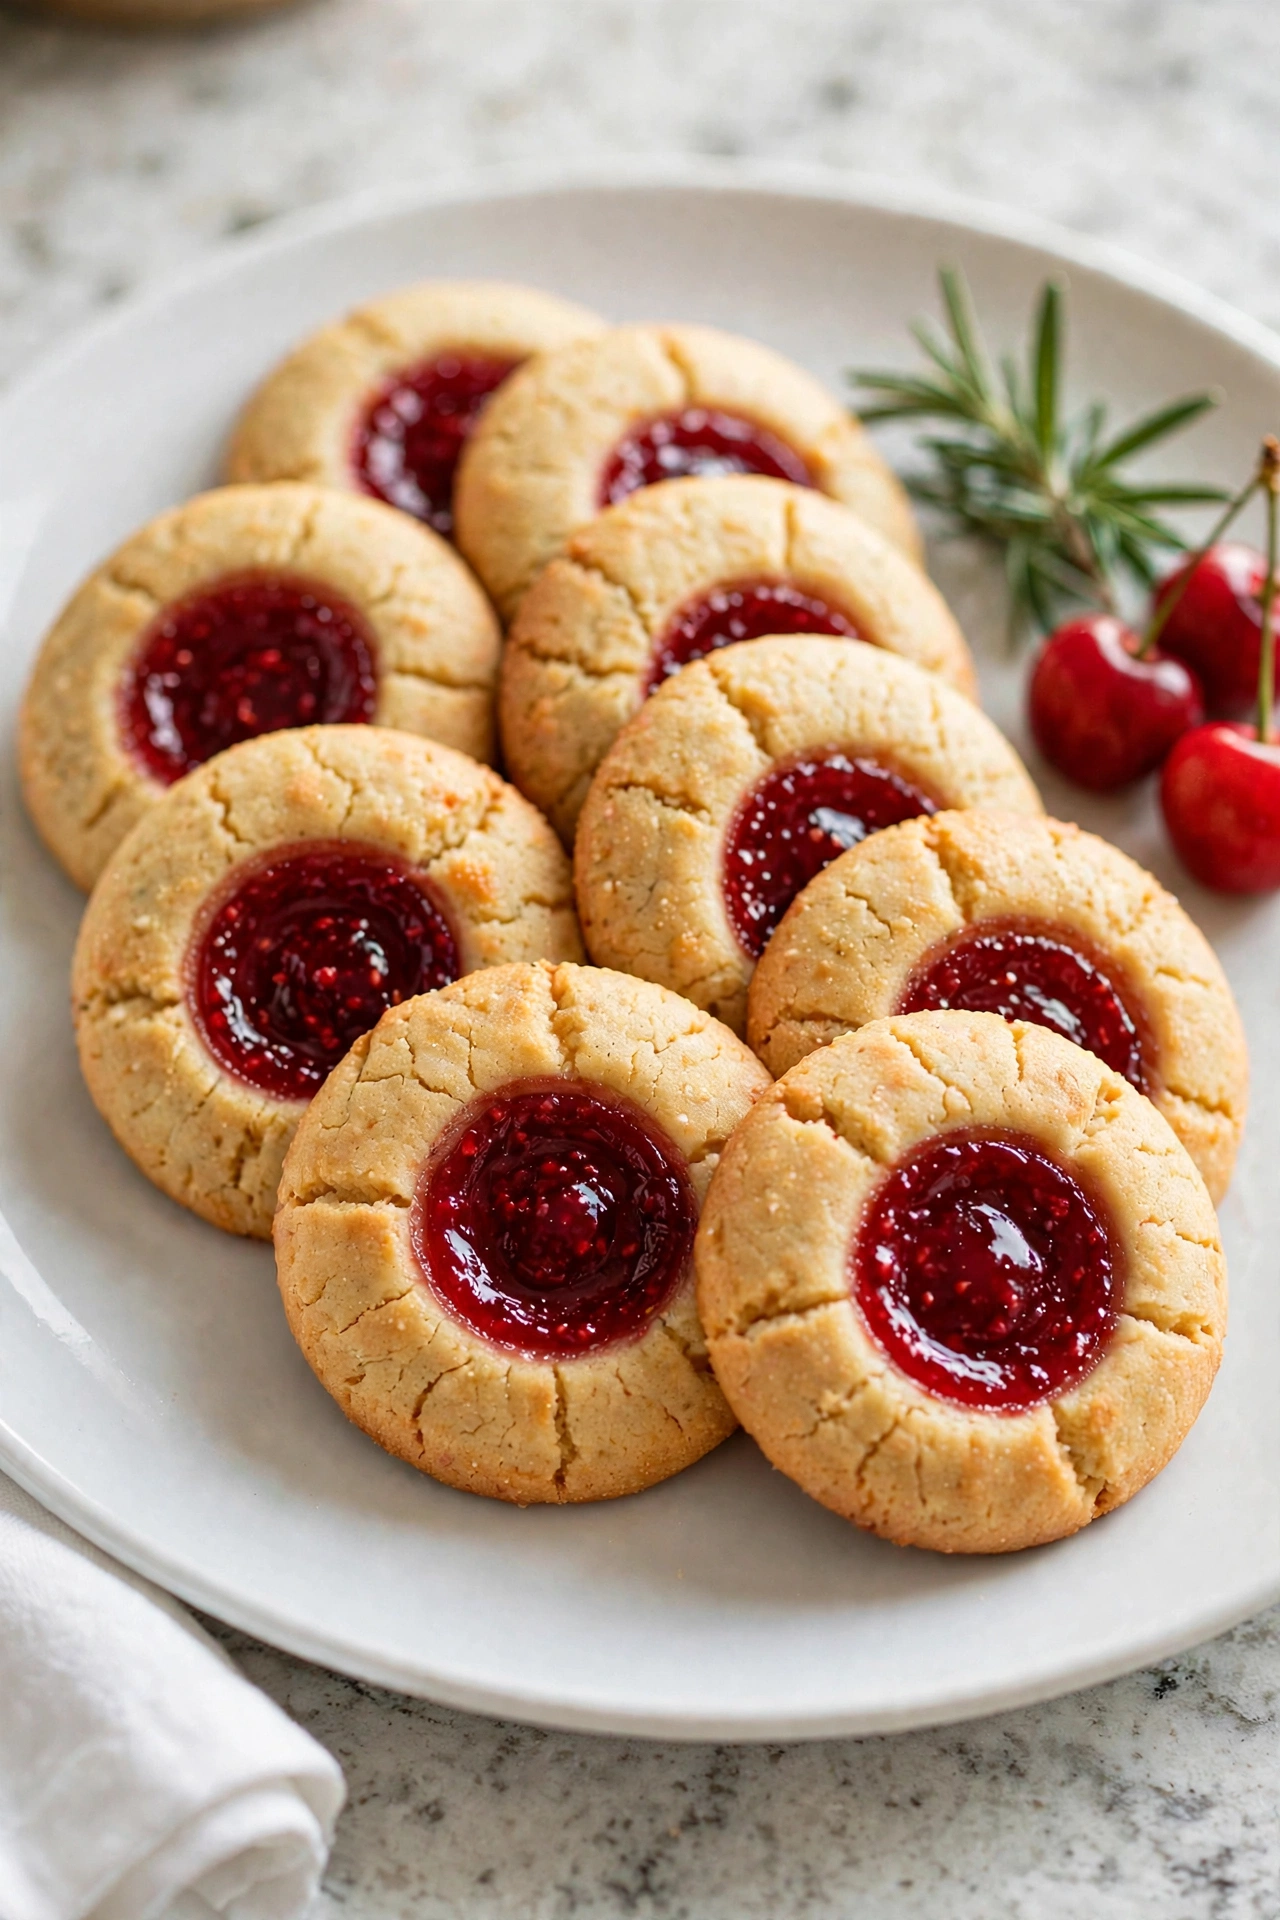
Thumbprints are the little jewels of the cookie tray — buttery, tender cookies with a sweet spoonful of raspberry jam shining in the middle. Their name comes from the fun way you press the center with your thumb before filling. They look so pretty lined up in a box, and the mix of butter and tart jam is hard to beat.
Prep Time: 25 minutes | Cook Time: 15 minutes | Servings: 24
Ingredients
- 1 cup unsalted butter, softened
- 2/3 cup granulated sugar
- 1 large egg yolk
- 1 teaspoon vanilla extract
- 2 cups all-purpose flour
- 1/4 teaspoon salt
- 1/2 cup seedless raspberry jam
- 1/2 cup finely chopped pecans or walnuts (optional)
- Powdered sugar, for dusting (optional)
Instructions
- Cream the butter and sugar in a large bowl for about 2 minutes until light and fluffy. A well-creamed base makes these cookies extra tender.
- Add the yolk and vanilla and beat until smooth and glossy, scraping down the sides of the bowl so everything is evenly mixed.
- Make the dough by adding the flour and salt and mixing on low just until a soft dough comes together. Press it together gently with your hands if it looks crumbly at first.
- Chill the dough in the fridge for 30 minutes. Chilled dough cracks less when you press the centers, so the cookies keep a neat, round shape.
- Roll the balls by scooping about 1 tablespoon of dough and rolling it smooth between your palms. If you like, roll the balls in the finely chopped nuts. Place them on parchment-lined baking sheets, about 2 inches apart.
- Make the thumbprints by pressing your thumb, or the round end of a wooden spoon, gently into the center of each ball to make a deep little well. If the edges crack, just pinch them back together.
- Fill and bake by spooning about 1/2 teaspoon of raspberry jam into each well. Bake at 350°F (175°C) for 13 to 15 minutes, until the edges are lightly golden and the jam is set and shiny.
- Cool and dust the cookies on a wire rack until fully cool, then dust lightly with powdered sugar if you like. Keep them in a single layer at first so the jam tops stay pretty.
Chocolate Crinkle Cookies
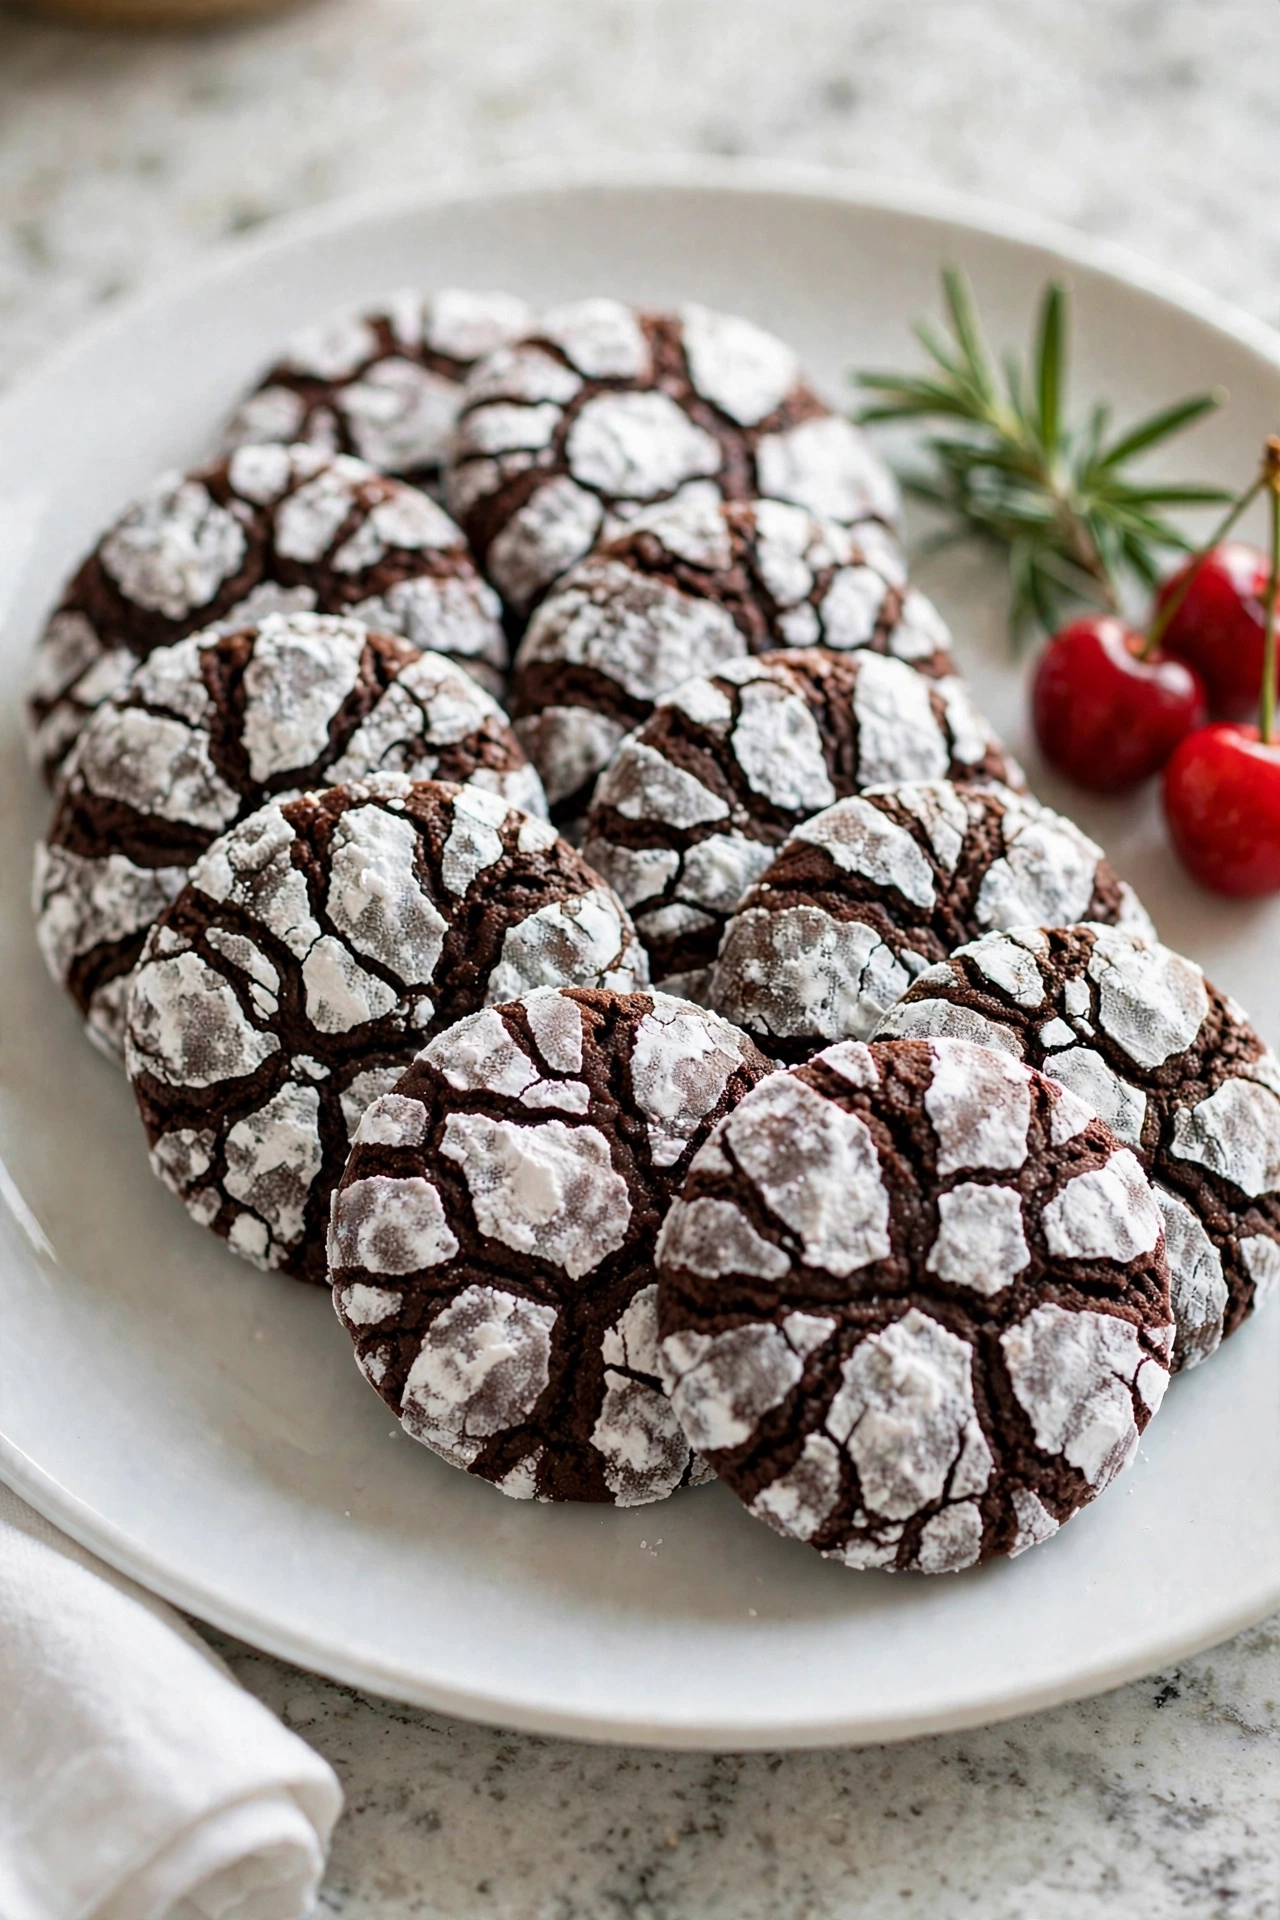
These rich chocolate cookies bake up with the prettiest crackled tops, like dark earth under fresh snow. The secret is rolling the dough balls in plenty of powdered sugar before baking, so the cracks show as the cookies spread. Inside they stay soft and fudgy, almost like a brownie in cookie form.
Prep Time: 20 minutes | Cook Time: 12 minutes | Servings: 24
Ingredients
- 1 cup unsweetened cocoa powder
- 2 cups granulated sugar
- 1/2 cup vegetable oil
- 4 large eggs
- 2 teaspoons vanilla extract
- 2 cups all-purpose flour
- 2 teaspoons baking powder
- 1/2 teaspoon salt
- 1/2 cup powdered sugar, for rolling
Instructions
- Mix the cocoa base by beating the cocoa powder, granulated sugar, and oil together in a large bowl until it looks like wet, dark sand. This shiny mixture is the start of the fudgy flavor.
- Add the eggs and vanilla one egg at a time, beating well after each, until the batter is smooth, thick, and glossy. It will look almost like brownie batter.
- Add the dry ingredients — the flour, baking powder, and salt — and stir on low just until combined. The dough will be very soft and sticky, and that is exactly right.
- Chill the dough by covering the bowl and refrigerating for at least 3 hours, or overnight. Do not skip this step, because warm dough is too sticky to roll and will spread too much.
- Roll in powdered sugar by scooping about 1 1/2 tablespoons of cold dough, rolling it into a ball, and rolling it generously in the powdered sugar until it is thickly coated white on all sides.
- Bake the cookies at 350°F (175°C) for 10 to 12 minutes, placing the balls 2 inches apart on parchment-lined sheets. They will puff, spread, and crack open into that classic crinkle pattern.
- Cool and serve on the pan for 5 minutes, then move to a wire rack. The centers stay soft and fudgy, and the snowy tops make them perfect for a Christmas tray.
Peanut Butter Blossoms
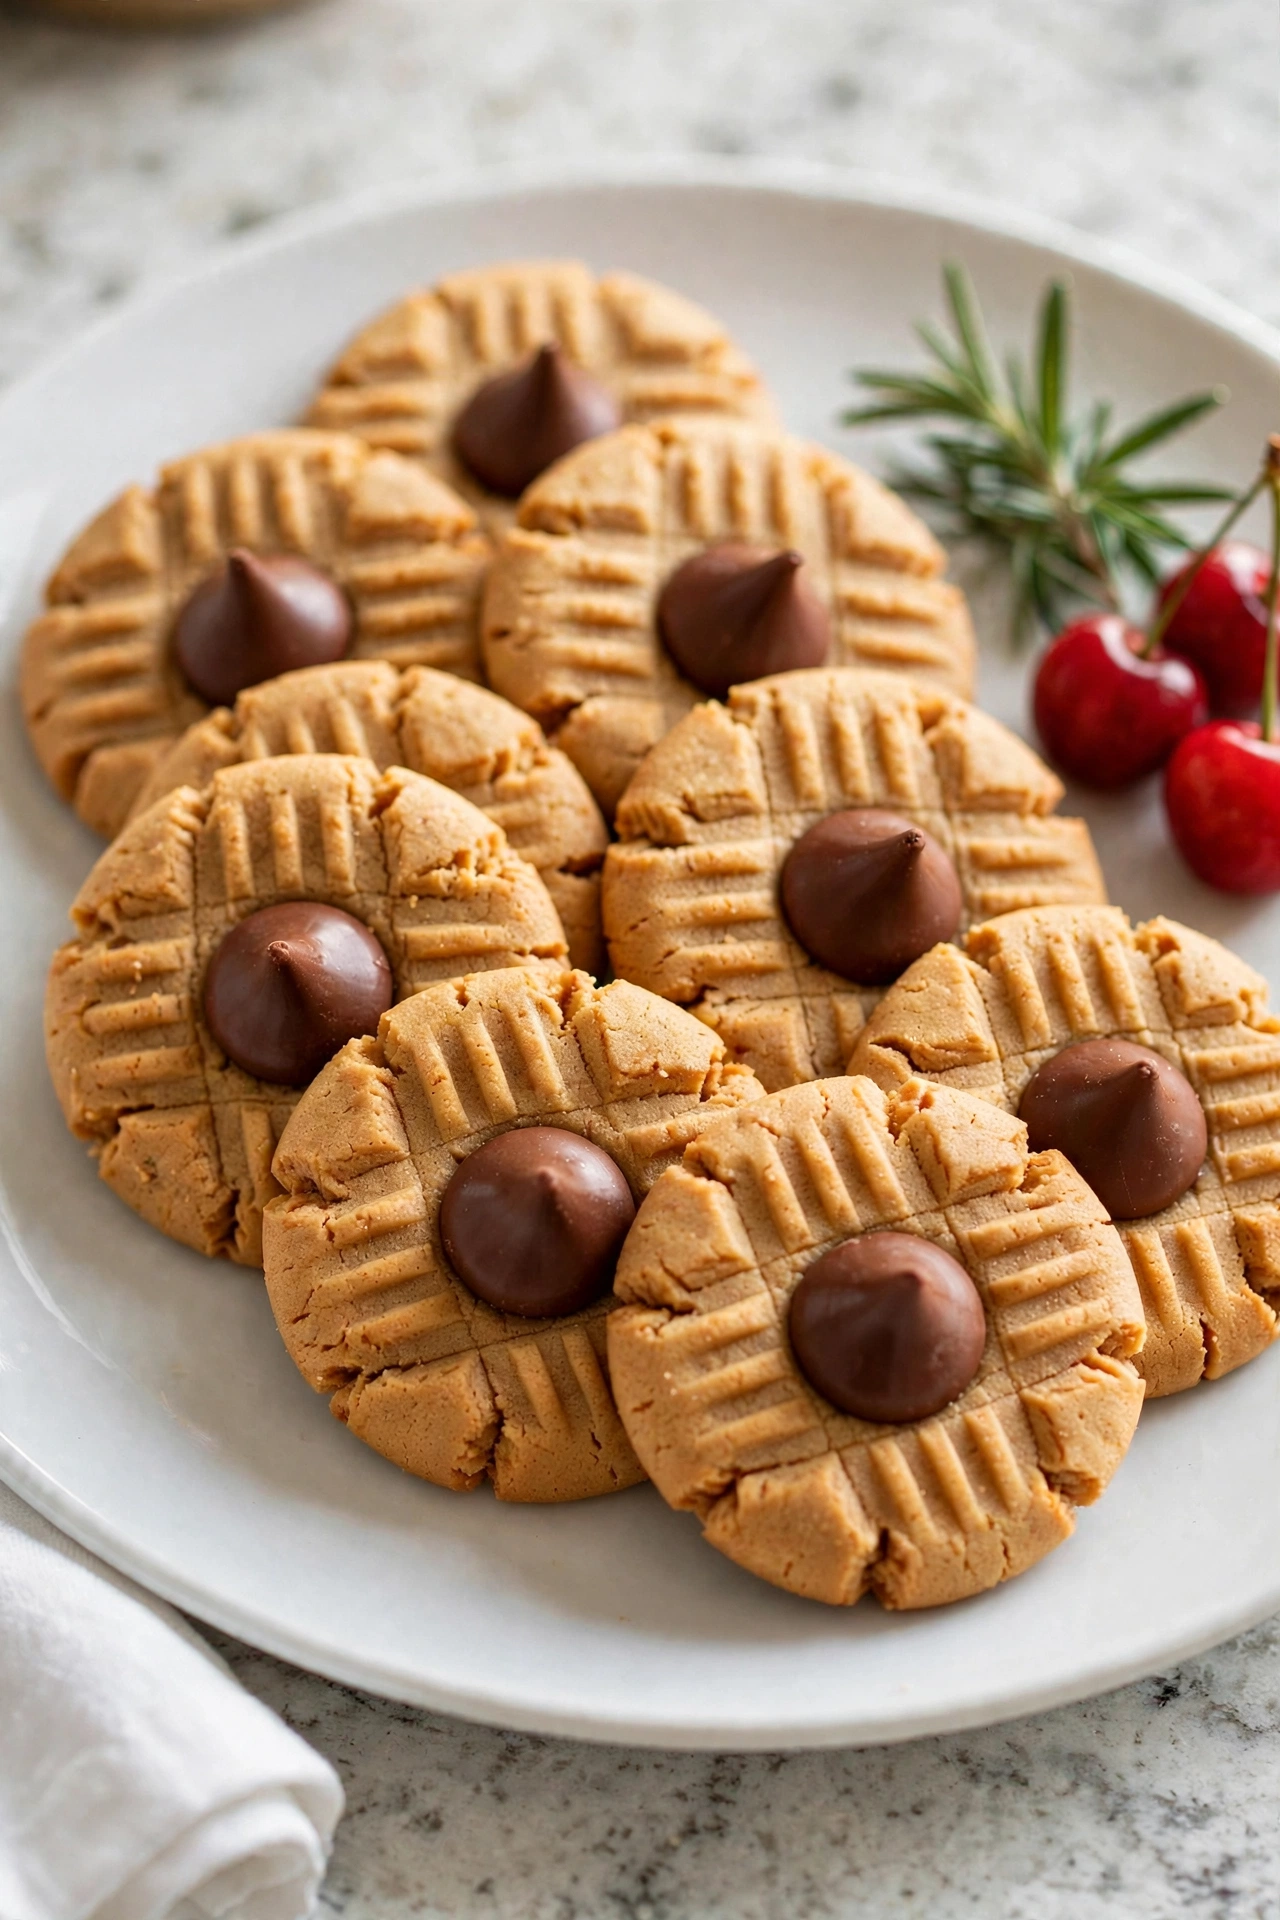
Peanut butter blossoms are a true Christmas classic — soft, crackly peanut butter cookies with a chocolate kiss pressed right in the middle. They look like little gifts on the tray, and the sweet-salty mix is loved by kids and grown-ups alike. Have your chocolates unwrapped and ready, because the magic moment happens while the cookies are still hot.
Prep Time: 20 minutes | Cook Time: 10 minutes | Servings: 36
Ingredients
- 1 3/4 cups all-purpose flour
- 1 teaspoon baking soda
- 1/2 teaspoon salt
- 1/2 cup unsalted butter, softened
- 1/2 cup creamy peanut butter
- 1/2 cup granulated sugar, plus extra for rolling
- 1/2 cup brown sugar, firmly packed
- 1 large egg
- 2 tablespoons milk
- 1 teaspoon vanilla extract
- About 36 milk chocolate kisses, unwrapped
Instructions
- Mix the dry ingredients by whisking the flour, baking soda, and salt in a medium bowl, then set it aside. Unwrap all the chocolate kisses now and keep them in a bowl nearby.
- Cream the butter, peanut butter, and sugars in a large bowl for about 2 minutes, until light, smooth, and fluffy. The two sugars together give the cookies soft centers and lightly crisp edges.
- Add the egg, milk, and vanilla and beat until everything is well combined and the mixture looks creamy. Scrape the bowl once to catch any peanut butter hiding at the bottom.
- Make the dough by mixing in the dry ingredients on low speed just until a soft dough forms. If the dough feels very soft, chill it for 20 to 30 minutes so the balls roll neatly.
- Roll in sugar by shaping the dough into 1-inch balls and rolling each one in granulated sugar until lightly coated. Place them on parchment-lined baking sheets, about 2 inches apart.
- Bake the cookies at 350°F (175°C) for 8 to 10 minutes, until they are puffed, lightly golden, and starting to crack on top. Do not overbake, or they will lose their soft centers.
- Press the kisses gently into the center of each cookie the moment the pan comes out of the oven. The edges will crack a little around the chocolate, which is exactly the classic blossom look.
- Cool until set on the pan for a few minutes, then move the cookies to a wire rack. Let the chocolate firm up before stacking — a short rest in a cool spot helps it set with a nice shine.
Linzer Cookies
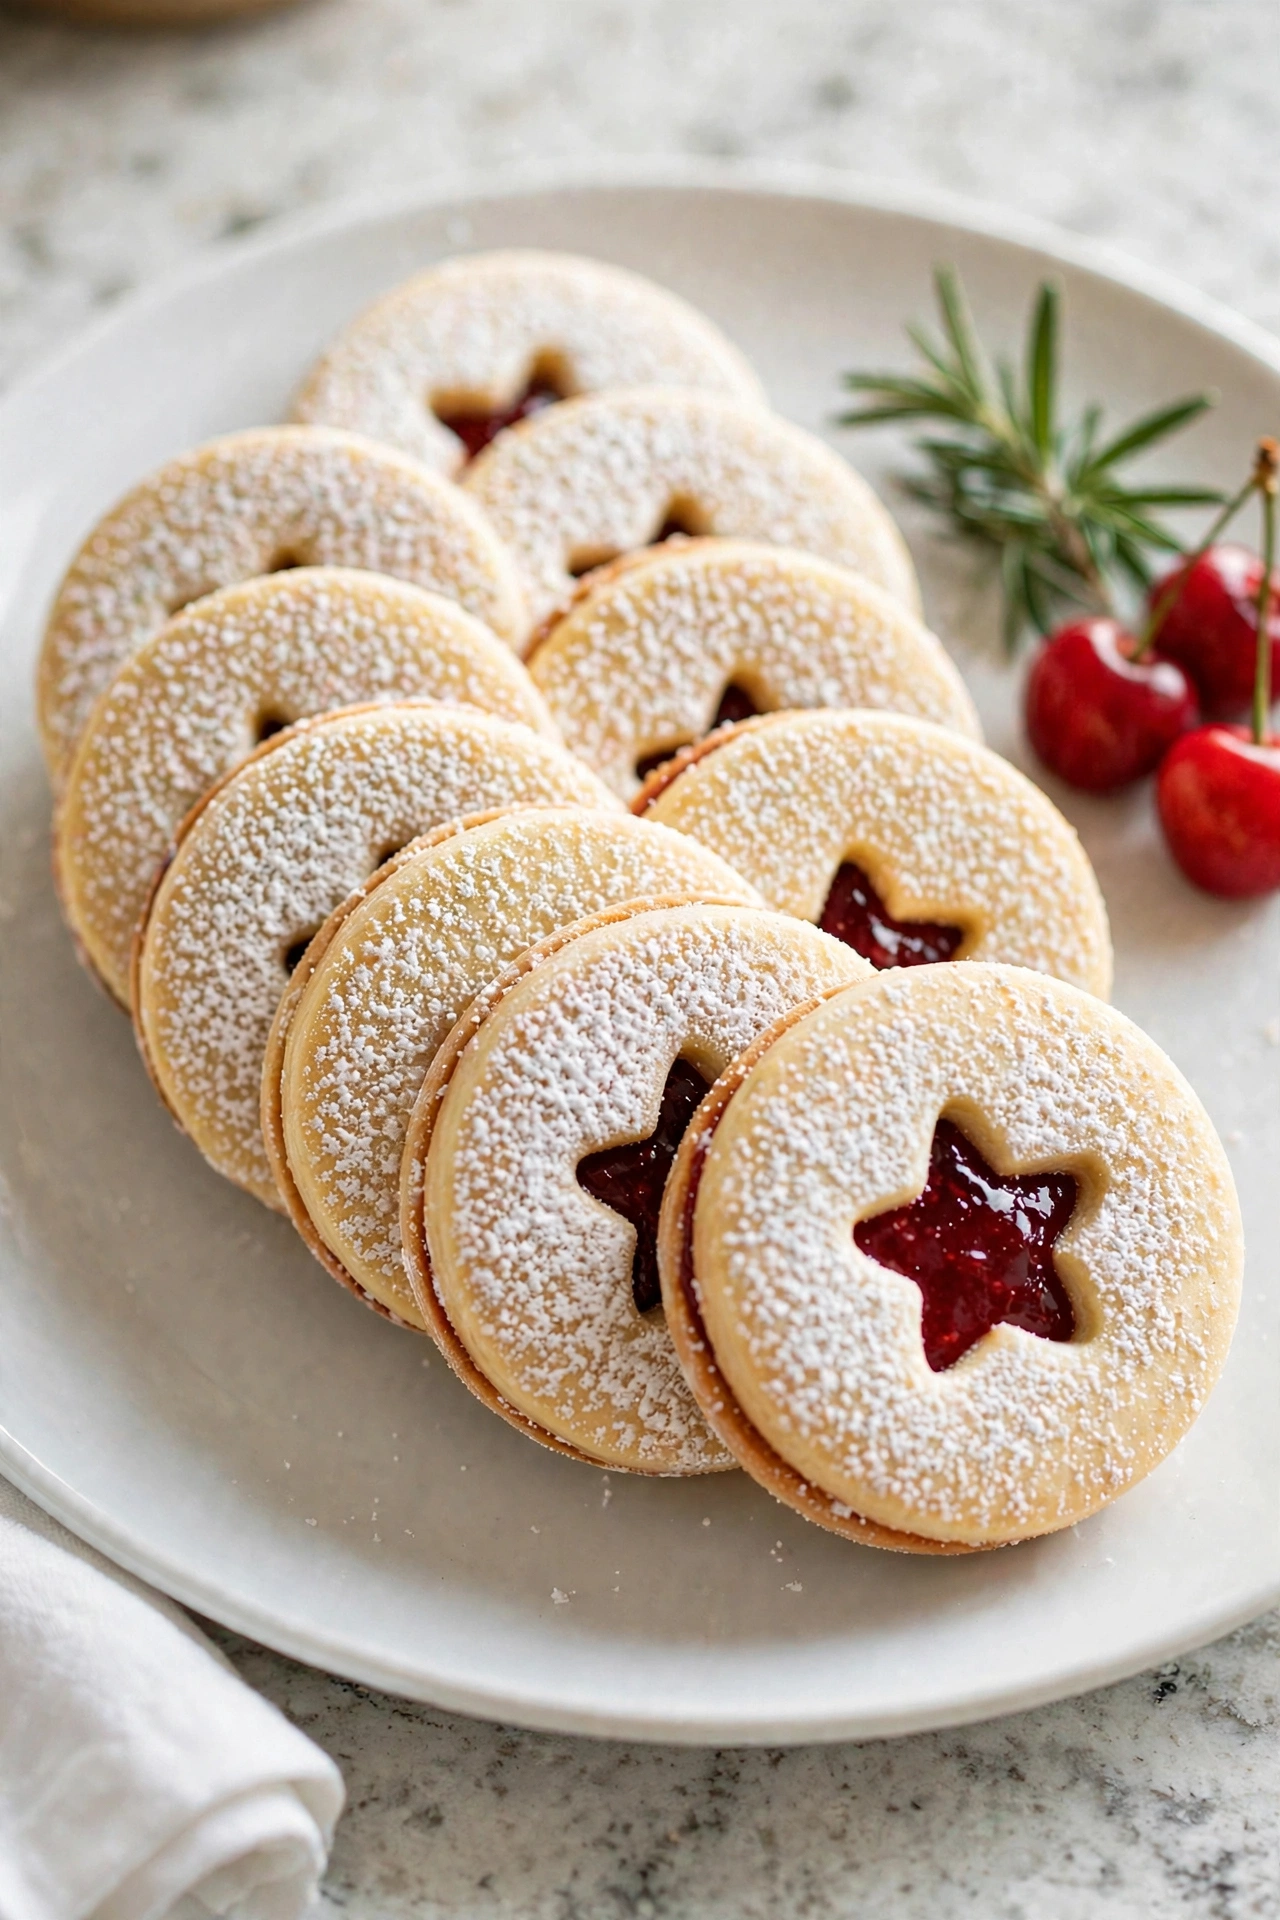
Linzer cookies are the elegant ladies of the cookie tray — delicate almond sandwich cookies with a little window of red jam peeking through and a snowfall of powdered sugar on top. They come from Austria, where the famous Linzer torte inspired these smaller, sweeter versions. They take a little more time, but the result is so pretty that everyone thinks you worked all day.
Prep Time: 40 minutes | Cook Time: 12 minutes | Servings: 18
Ingredients
- 1 cup almond flour
- 2 cups all-purpose flour, plus extra for rolling
- 1 teaspoon ground cinnamon
- 1/4 teaspoon salt
- 1 cup unsalted butter, softened
- 3/4 cup granulated sugar
- 2 large egg yolks
- 1 teaspoon vanilla extract
- 1 teaspoon lemon zest
- 3/4 cup seedless raspberry jam
- Powdered sugar, for dusting
Instructions
- Mix the dry ingredients by whisking the almond flour, all-purpose flour, cinnamon, and salt together in a medium bowl. The almond flour gives these cookies their tender, nutty crumb.
- Cream the butter and sugar in a large bowl for about 2 minutes until pale and fluffy. This light base keeps the cookies delicate instead of heavy.
- Add the yolks, vanilla, and lemon zest and beat until smooth and fragrant. The lemon zest is a small touch that makes the almond and jam flavors taste brighter.
- Make and chill the dough by mixing in the dry ingredients on low just until combined, then dividing the dough in half, flattening into disks, and chilling for at least 1 hour. Cold dough rolls cleanly and holds the pretty cut-out shapes.
- Roll and cut the dough on a floured surface to about 1/8 inch thick. Cut out an even number of rounds or shapes, then cut a small window in the center of half of them with a tiny cutter.
- Bake the cookies at 350°F (175°C) for 10 to 12 minutes, until the edges are just lightly golden. Cool them completely on a wire rack, because warm cookies will break when you fill them.
- Dust the tops — the window cookies only — by laying them out and sprinkling them generously with powdered sugar. Doing this before filling keeps the jam windows clean and bright red.
- Fill and sandwich by spreading about 1 teaspoon of raspberry jam on each whole cookie, then gently pressing a sugared top over it. Let them rest for an hour so the jam sets, and the flavors will soften together beautifully by the next day.
Ginger Snap Cookies
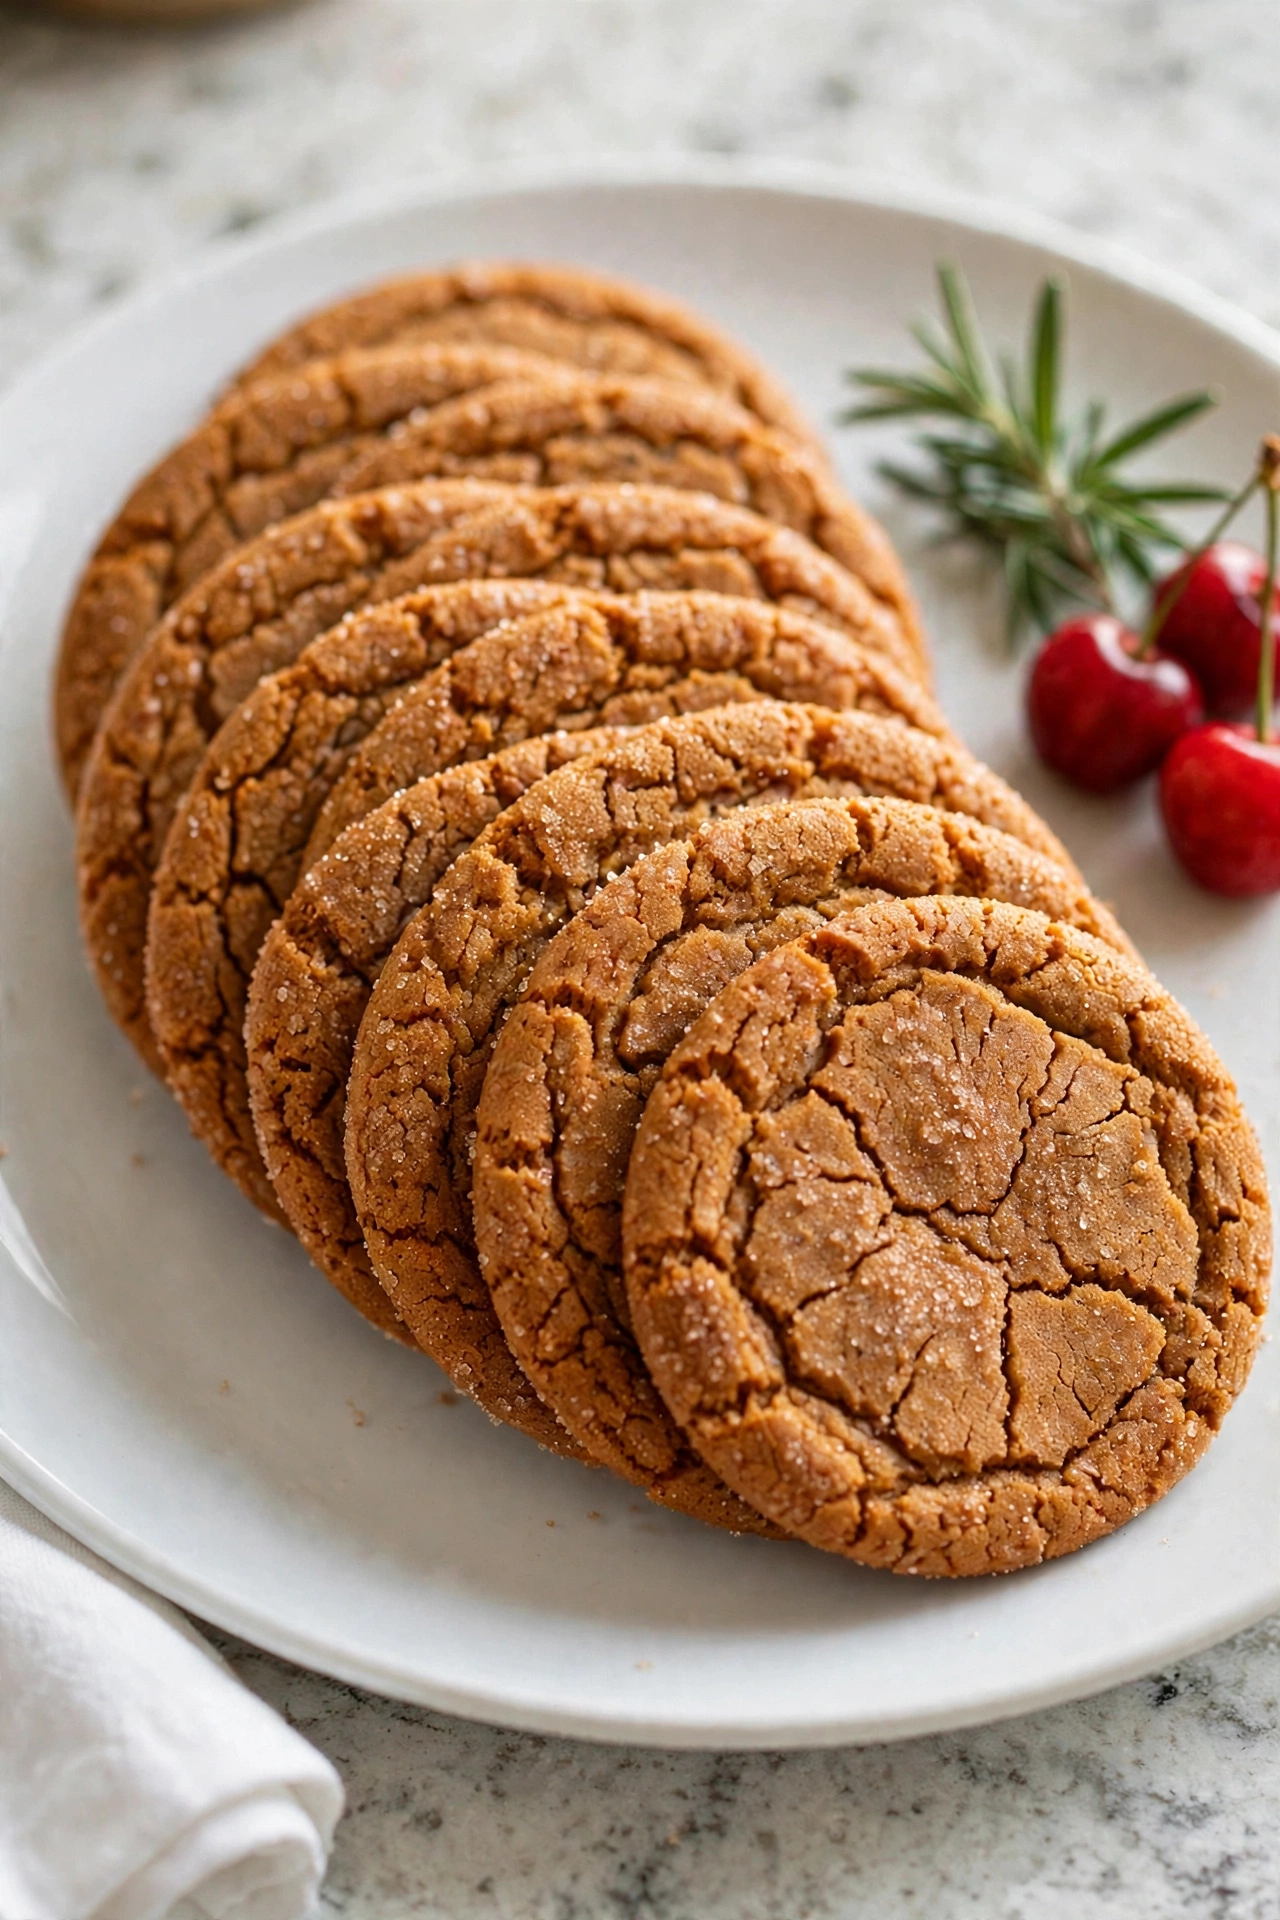
Ginger snaps are bold little cookies with a real snap — crisp edges, deep molasses color, and a good kick of ginger that warms you right up. I love them with a cup of hot tea on a cold evening, and they make the whole house smell wonderful while they bake. If you like yours extra crisp, just give them one or two more minutes in the oven.
Prep Time: 20 minutes | Cook Time: 12 minutes | Servings: 30
Ingredients
- 2 1/4 cups all-purpose flour
- 2 teaspoons baking soda
- 2 teaspoons ground ginger
- 1 teaspoon ground cinnamon
- 1/2 teaspoon ground cloves
- 1/4 teaspoon salt
- 3/4 cup unsalted butter, softened
- 1 cup granulated sugar, plus extra for rolling
- 1 large egg
- 1/4 cup molasses
Instructions
- Mix the dry ingredients by whisking the flour, baking soda, ginger, cinnamon, cloves, and salt in a medium bowl. This spice mix is what gives ginger snaps their warm, bold flavor.
- Cream the butter and sugar in a large bowl for about 2 minutes, until light and fluffy. Good creaming helps the cookies bake up with crackly, sparkling tops.
- Add the egg and molasses and beat until the mixture is smooth and deep brown. The molasses brings the rich color and that old-fashioned flavor everyone loves.
- Make the dough by stirring in the dry ingredients on low speed until a soft dough forms. It should be easy to roll and not sticky.
- Chill the dough for 30 minutes in the fridge. A short chill firms up the butter, so the balls roll neatly and the cookies bake with a nice crackle.
- Roll in sugar by shaping the dough into 1-inch balls and rolling them in granulated sugar until well coated. Place them on parchment-lined baking sheets, about 2 inches apart, because they will spread.
- Bake the cookies at 350°F (175°C) for 10 to 12 minutes, until they are puffed, crackled on top, and set around the edges. For a harder, snappier cookie, bake 1 to 2 minutes longer.
- Cool and serve on a wire rack, where the cookies will crisp up as they cool. They keep well in a tin for two weeks, and the flavor gets even deeper after a day or two.
White Chocolate Cranberry Cookies
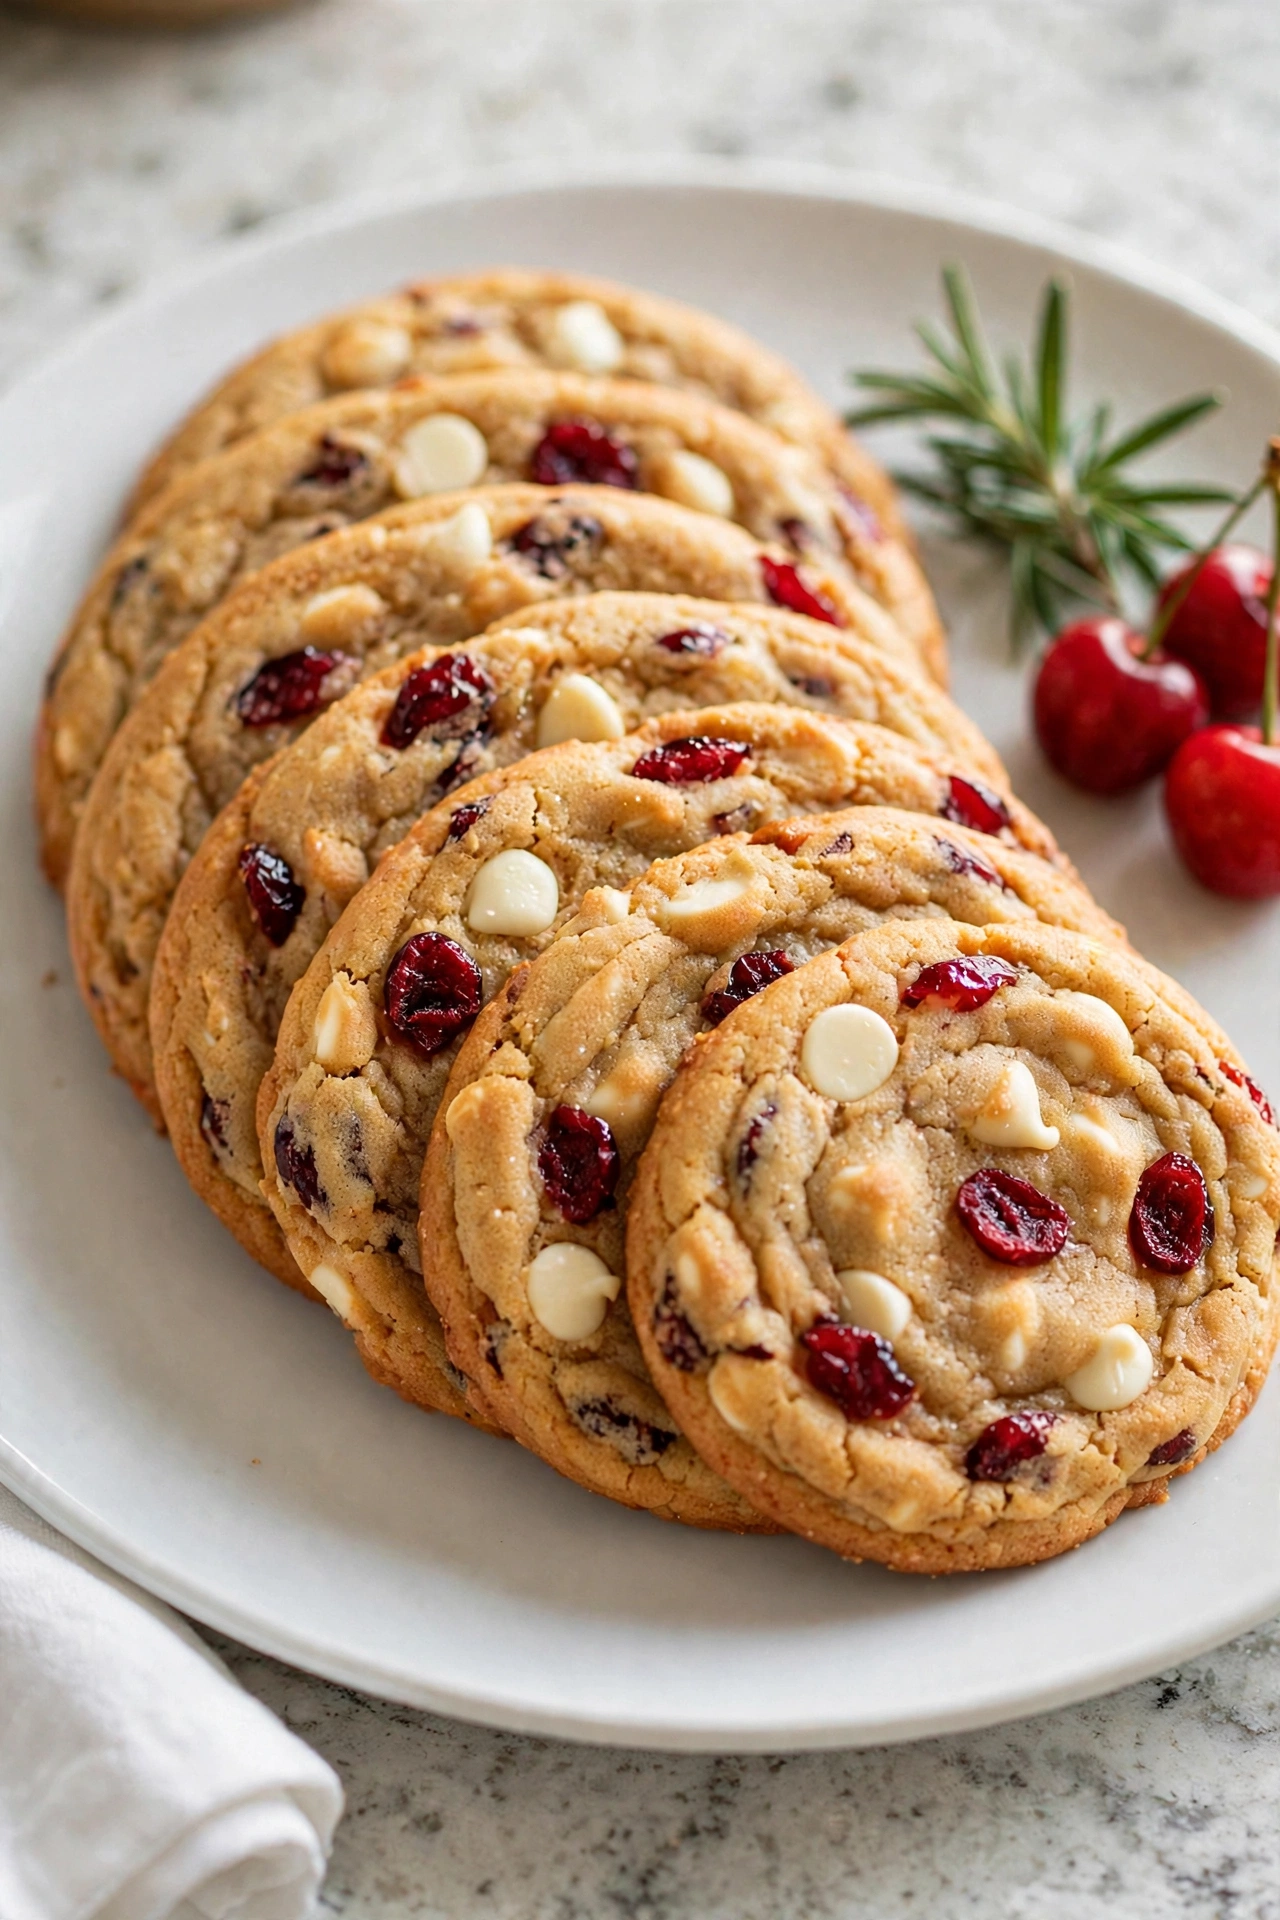
These soft, chewy cookies are full of Christmas color — snowy white chocolate chips and ruby-red cranberries in every bite. A little orange zest makes them taste bright and fresh, and the edges bake up golden while the centers stay tender. They are a lovely change from the usual chocolate chip cookie on a holiday tray.
Prep Time: 20 minutes | Cook Time: 12 minutes | Servings: 24
Ingredients
- 2 1/4 cups all-purpose flour
- 1 teaspoon baking soda
- 1/2 teaspoon salt
- 3/4 cup unsalted butter, softened
- 3/4 cup brown sugar, firmly packed
- 1/4 cup granulated sugar
- 1 large egg
- 1 teaspoon vanilla extract
- 1 teaspoon orange zest
- 1 cup white chocolate chips
- 3/4 cup dried cranberries
Instructions
- Mix the dry ingredients by whisking the flour, baking soda, and salt in a medium bowl, then set it aside. Even mixing now means every cookie rises the same way.
- Cream the butter and sugars in a large bowl for about 2 minutes until light and fluffy. The brown sugar is what keeps these cookies soft and chewy in the middle.
- Add the egg, vanilla, and orange zest and beat until smooth and fragrant. The orange zest may be small, but it makes the cranberries taste brighter and fresher.
- Make the dough by stirring the dry ingredients into the butter mixture on low speed, just until no flour streaks remain. Stop as soon as it comes together so the cookies stay tender.
- Fold in the good things — the white chocolate chips and dried cranberries — with a spatula, mixing until they are spread evenly through the dough so every cookie gets some of both.
- Scoop the dough into balls of about 2 tablespoons each and place them on parchment-lined baking sheets, about 2 inches apart. For prettier cookies, press a few extra chips and cranberries on top of each ball.
- Bake the cookies at 350°F (175°C) for 10 to 12 minutes, until the edges are lightly golden and the centers still look soft. They will finish setting as they rest on the hot pan.
- Cool and serve on the pan for 5 minutes, then move to a wire rack. These keep soft for several days in a sealed container, with a slice of bread tucked in if you like them extra chewy.
Pfeffernüsse (German Spice Cookies)
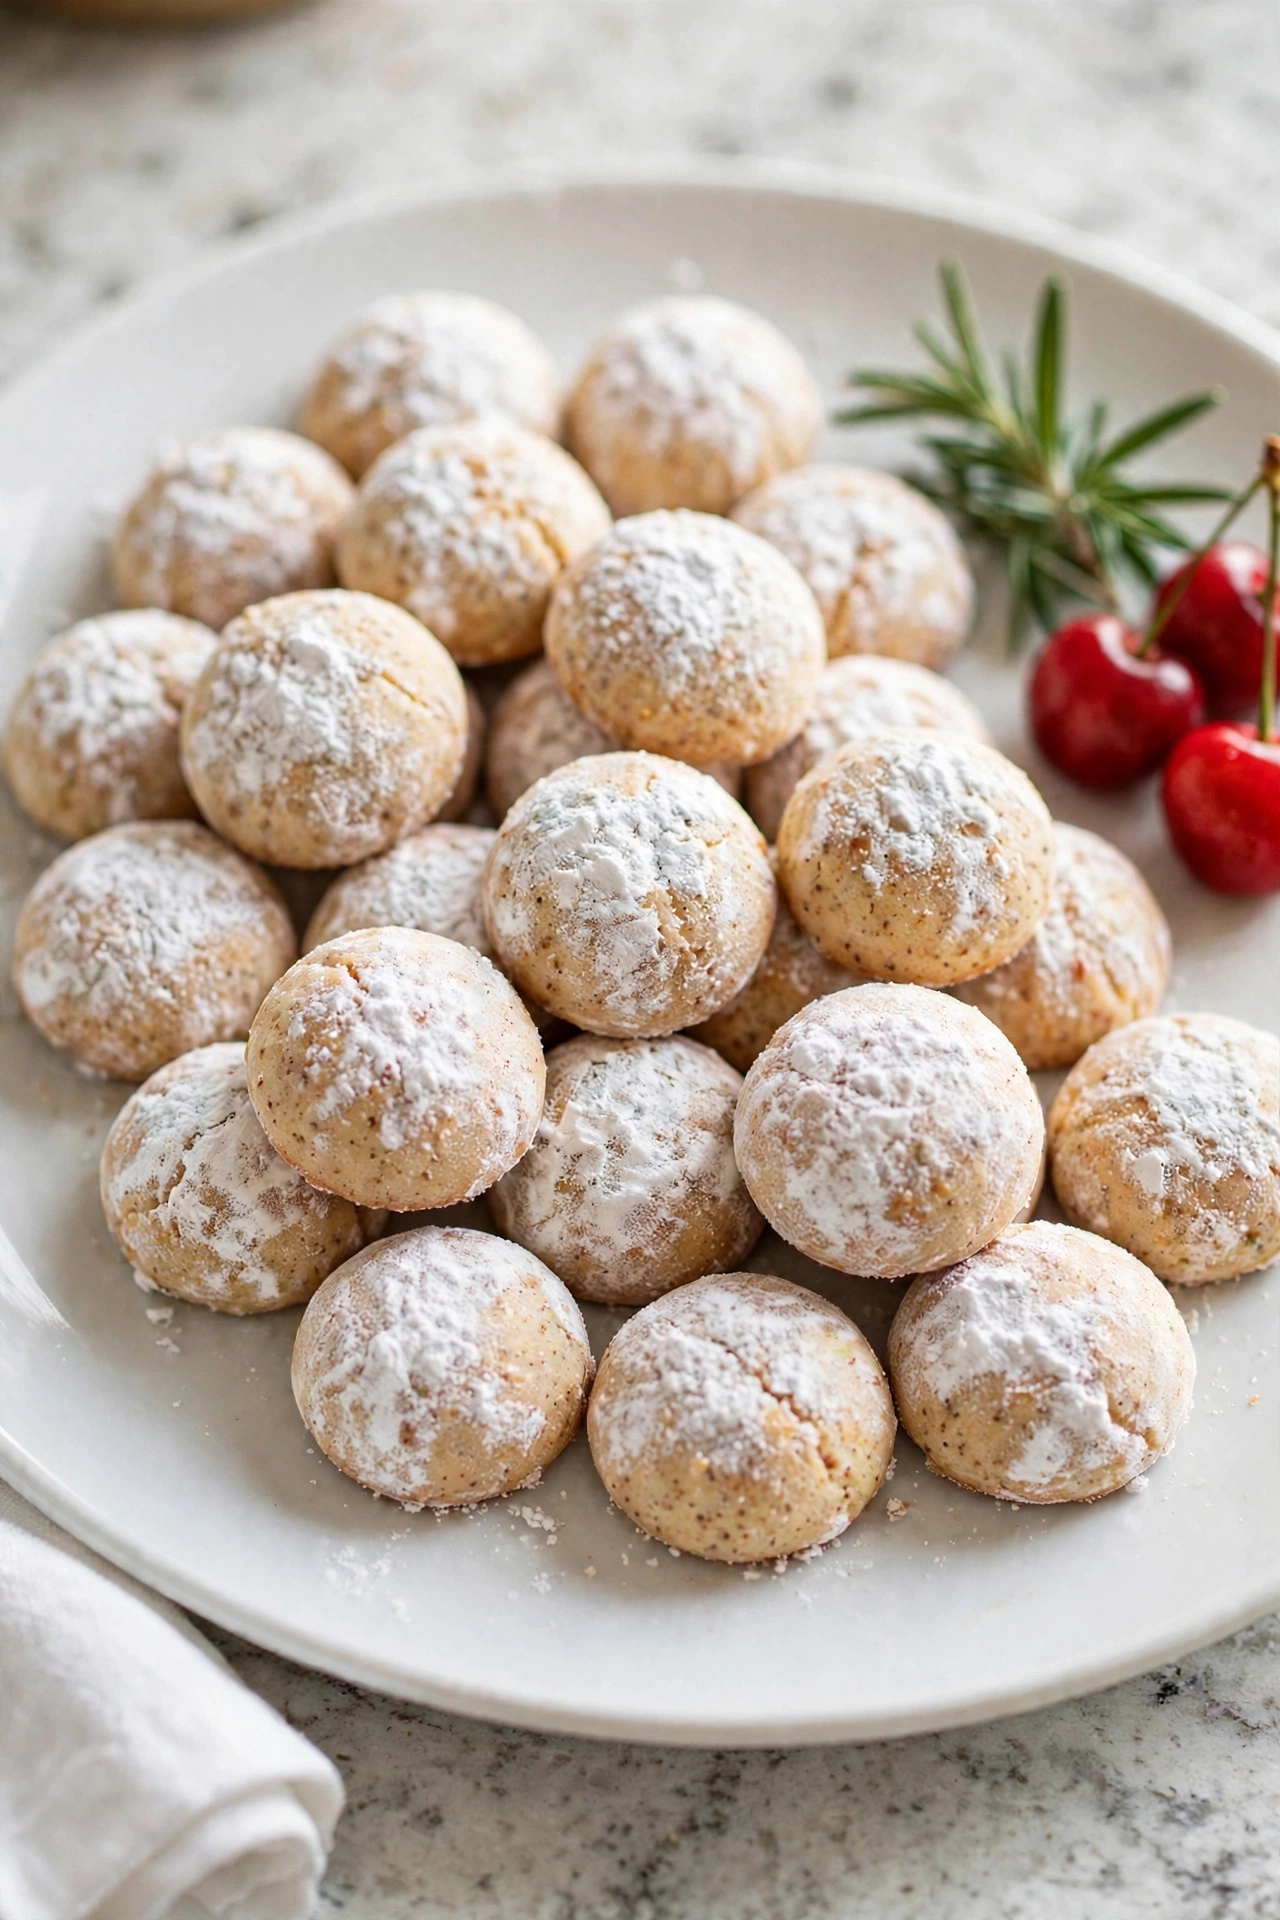
Pfeffernüsse are tiny German spice cookies with a big, warm flavor — cinnamon, cloves, nutmeg, and a little pinch of pepper that gives them their name and their gentle bite. They are rolled in powdered sugar until they look like little snowballs, and they keep for weeks, which is why German families bake them early in December. The flavor gets better every day they sit in the tin.
Prep Time: 25 minutes | Cook Time: 12 minutes | Servings: 36
Ingredients
- 2 1/4 cups all-purpose flour
- 1/2 teaspoon baking soda
- 1 teaspoon ground cinnamon
- 1/2 teaspoon ground cloves
- 1/2 teaspoon ground nutmeg
- 1/4 teaspoon ground white or black pepper
- 1/4 teaspoon salt
- 1/2 cup unsalted butter, softened
- 3/4 cup brown sugar, firmly packed
- 1/4 cup molasses
- 1 large egg
- 1 cup powdered sugar, for coating
Instructions
- Mix the dry ingredients and spices by whisking the flour, baking soda, cinnamon, cloves, nutmeg, pepper, and salt in a medium bowl. Do not be shy with the pepper — it is gentle warmth, not real heat.
- Cream the butter and brown sugar in a large bowl for about 2 minutes, until light and smooth. The brown sugar gives these little cookies a deep, cozy sweetness.
- Add the molasses and egg and beat until the mixture is dark, thick, and glossy. Scrape the sides of the bowl so the spices will mix in evenly later.
- Make and chill the dough by stirring in the dry ingredients on low until a firm dough forms, then covering and chilling it for at least 1 hour. Cold dough is much easier to roll into neat little balls.
- Roll small balls of about 1 tablespoon of dough each — pfeffernüsse are meant to be small, about the size of a walnut. Place them on parchment-lined baking sheets, about 1 1/2 inches apart.
- Bake the cookies at 350°F (175°C) for 11 to 13 minutes, until they are puffed, firm on top, and lightly crackled. They will harden a little more as they cool, which is the traditional texture.
- Roll in powdered sugar while the cookies are still warm by tossing them gently in a bowl of powdered sugar until well coated. The warmth helps the sugar stick in a thick, snowy layer.
- Coat again and store once the cookies are cool, with a second light dusting of powdered sugar if you like. Keep them in a sealed tin for at least a few days before serving — the spice flavor softens and blends beautifully.
Snowball Cookies
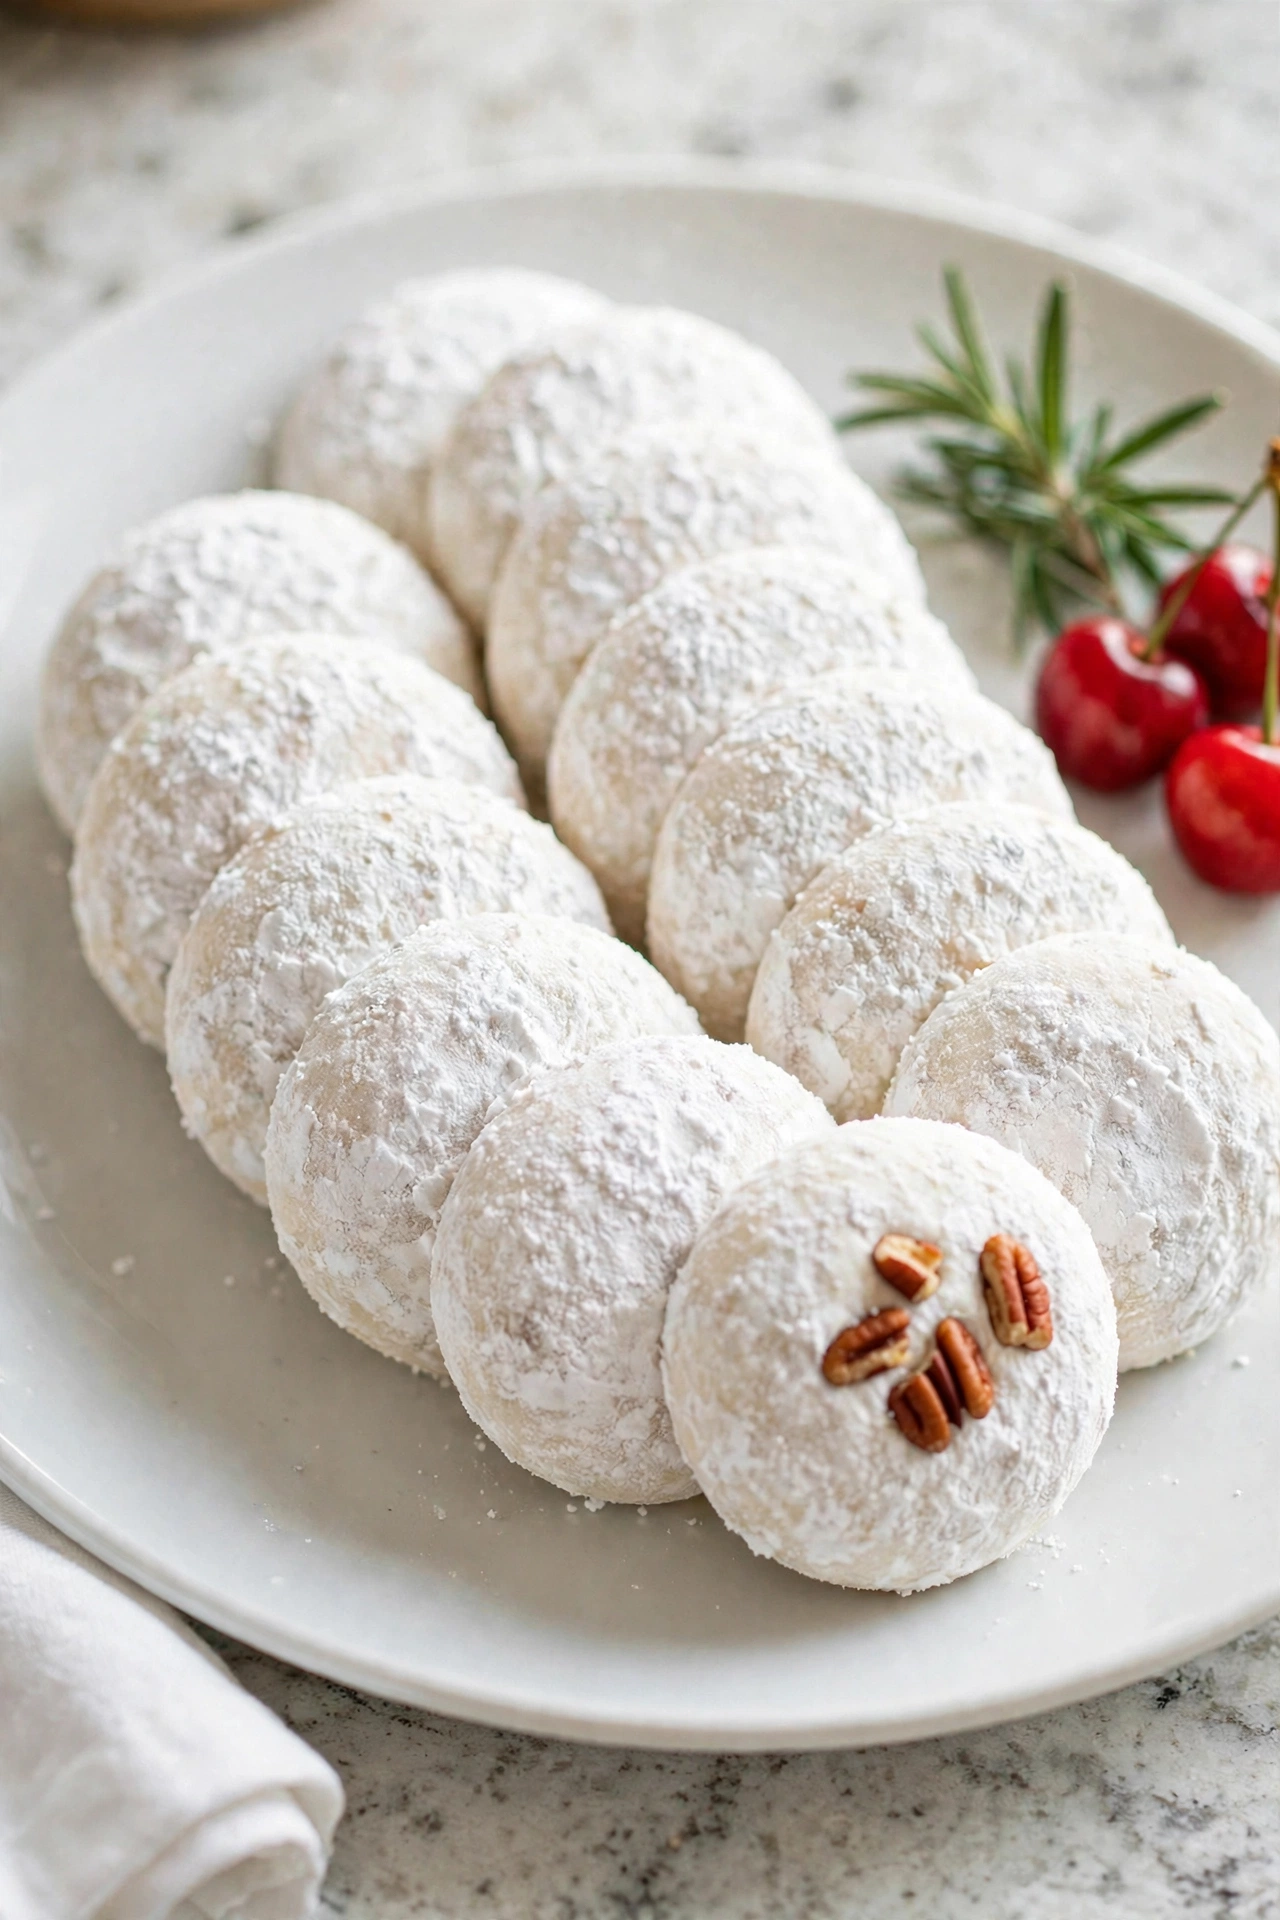
Snowball cookies — also called Russian tea cakes or Mexican wedding cookies — are little buttery balls full of chopped pecans, rolled twice in powdered sugar until they look like fresh snowballs. They melt in your mouth and leave your fingers sweet and powdery. No Christmas tray at my house is complete without a snowy pile of these.
Prep Time: 20 minutes | Cook Time: 15 minutes | Servings: 30
Ingredients
- 1 cup unsalted butter, softened
- 1/2 cup powdered sugar, plus 1 cup more for rolling
- 1 teaspoon vanilla extract
- 1/2 teaspoon almond extract (optional)
- 1 teaspoon orange zest (optional)
- 2 1/4 cups all-purpose flour
- 1 cup pecans, finely chopped
- 1/4 teaspoon salt
Instructions
- Cream the butter and sugar in a large bowl until smooth and soft, about 1 to 2 minutes. Use the 1/2 cup of powdered sugar here, and save the rest for rolling later.
- Add the vanilla and the almond extract and orange zest if you are using them, and mix until the dough smells sweet and fragrant. These little extras make the simple cookies taste special.
- Add the flour, pecans, and salt and mix on low just until a soft dough forms and the nuts are spread evenly through it. The dough will be a little crumbly, but it should press together easily in your hand.
- Chill the dough for 30 to 45 minutes in the fridge. Cold dough rolls into smooth balls without sticking to your hands and keeps its round snowball shape in the oven.
- Roll the balls by scooping about 1 tablespoon of dough and rolling it smooth between your palms. Place them on parchment-lined baking sheets, about 1 1/2 inches apart — they will not spread much.
- Bake the cookies at 350°F (175°C) for 14 to 16 minutes, until they are set and the bottoms are just barely golden. The tops should stay pale and white.
- Roll in sugar while warm by gently rolling each cookie in powdered sugar about 5 minutes out of the oven, then placing them on a wire rack. This first coat will melt in a little and help the second coat stick.
- Roll again when cool in more powdered sugar until they are thickly covered and look like real snowballs. This second roll is what gives them their pretty, snowy finish for the tray.
Candy Cane Cookies
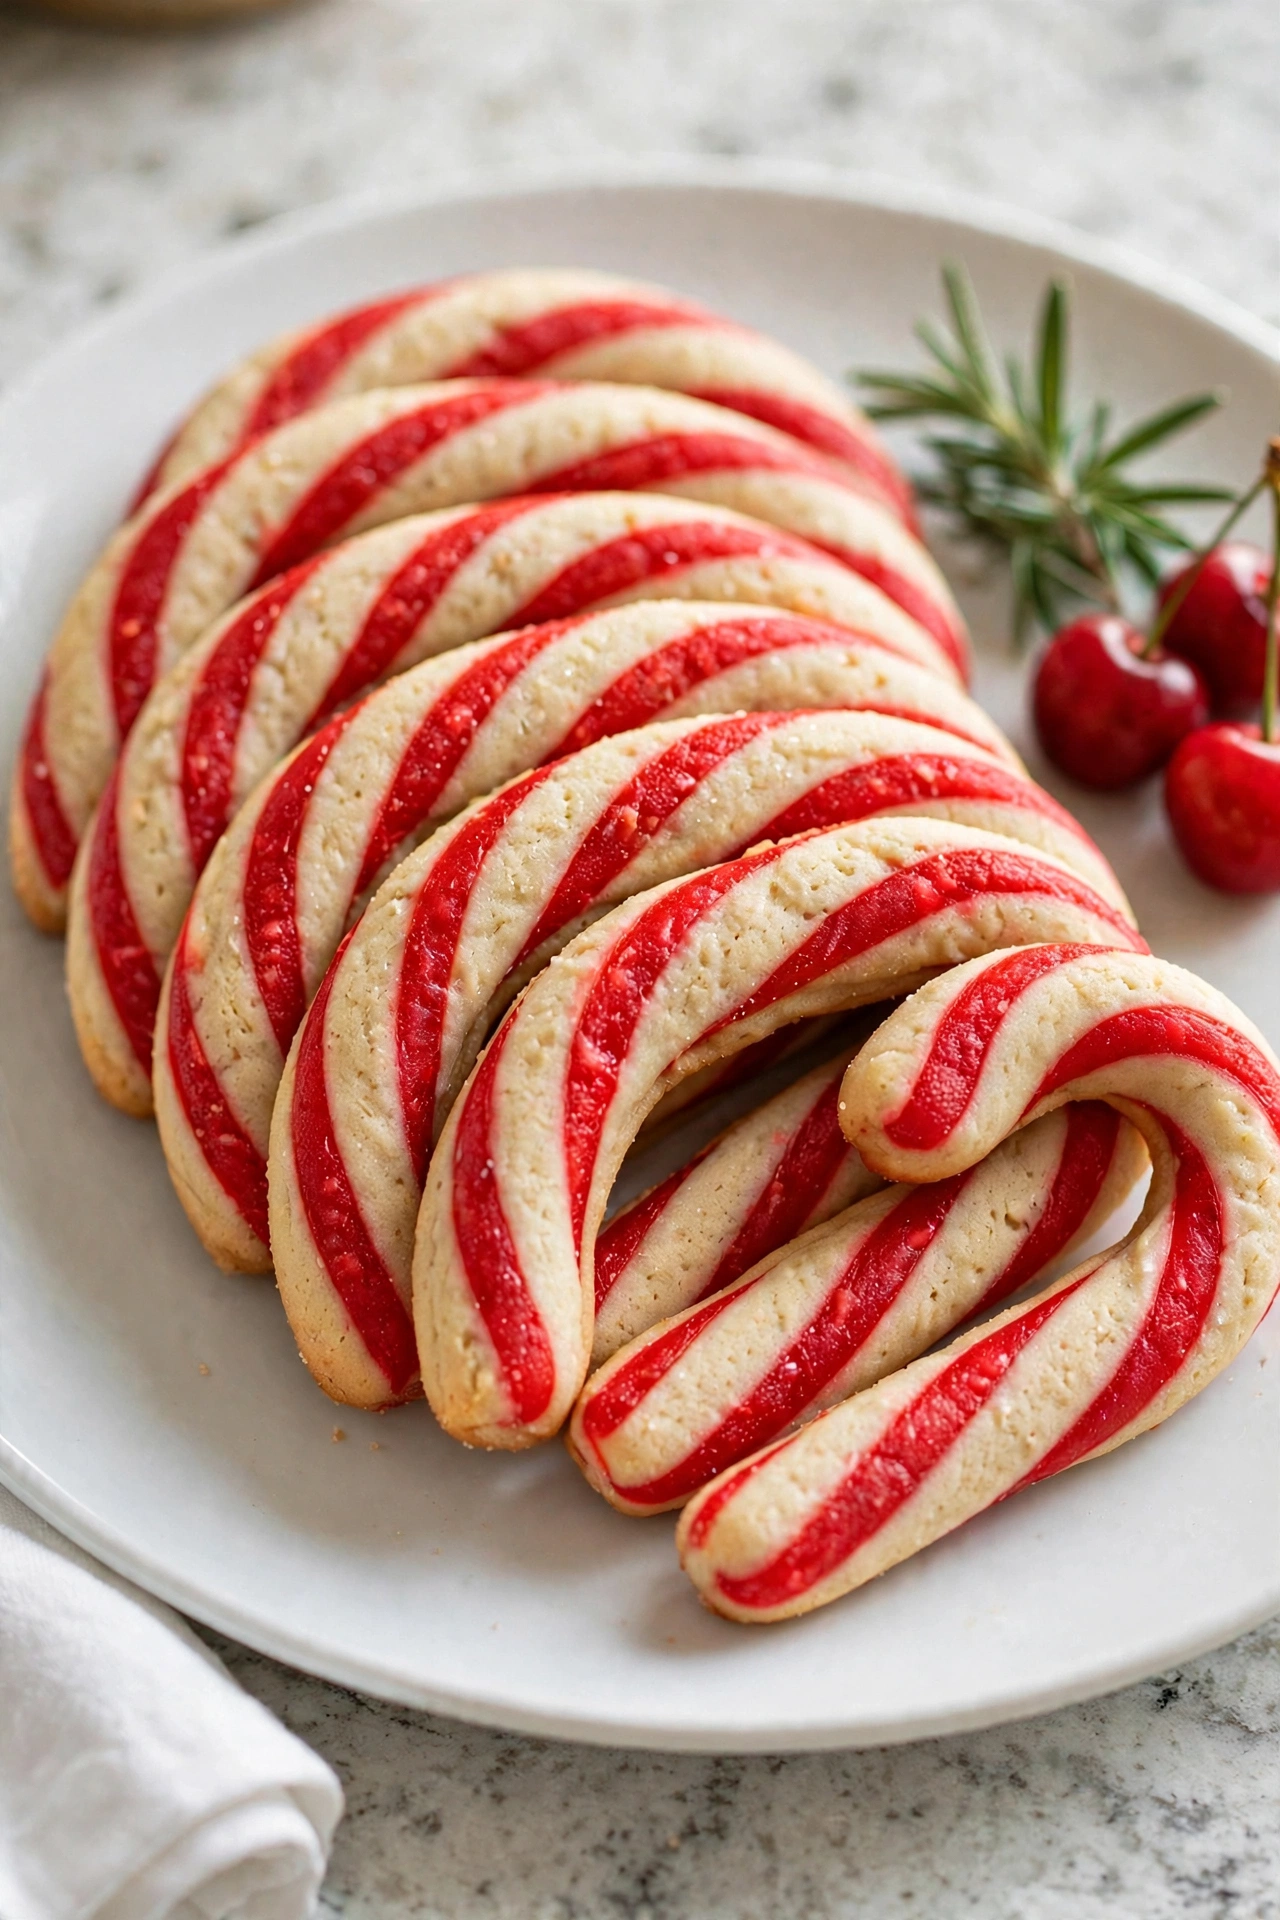
These red-and-white twisted cookies are pure Christmas fun — two ropes of dough, one plain and one red, twisted together and bent into little candy canes. They taste like buttery sugar cookies with a hint of almond, and a sprinkle of crushed candy cane on top makes them sparkle. Kids love helping with the twisting, so expect a few funny shapes and a lot of giggles.
Prep Time: 35 minutes | Cook Time: 10 minutes | Servings: 24
Ingredients
- 1 cup unsalted butter, softened
- 1 cup powdered sugar
- 1 large egg
- 1 teaspoon vanilla extract
- 1/2 teaspoon almond extract
- 2 1/2 cups all-purpose flour
- 1/2 teaspoon salt
- Red gel food coloring
- 1/2 cup finely crushed candy canes, for sprinkling
Instructions
- Cream the butter and sugar in a large bowl until smooth and light, about 2 minutes. Powdered sugar keeps these cookies tender and gives them a fine, delicate crumb.
- Add the egg and extracts and beat until well combined and glossy. The almond extract gives the cookies that classic candy cane cookie flavor.
- Make the dough by mixing in the flour and salt on low speed until a soft dough forms. Press it together with your hands until it is smooth and holds together well.
- Divide and color the dough into two equal parts. Knead red food coloring into one half until it is an even, bright red, and leave the other half plain, then wrap both and chill for 30 minutes so the ropes roll without sticking.
- Roll the ropes by taking about 1 teaspoon of each color, rolling each into a rope about 4 inches long on a lightly floured surface. Work with small amounts and keep the rest of the dough in the fridge.
- Twist and shape by laying one red and one white rope side by side, pressing them gently together, and twisting them around each other. Place each twist on a parchment-lined sheet and bend the top into a candy cane hook.
- Bake the cookies at 350°F (175°C) for 9 to 11 minutes, until they are set but still pale, with no browning. Browning would dull the pretty red-and-white colors, so watch them closely near the end.
- Sprinkle and cool by showering the warm cookies right away with the finely crushed candy canes, then letting them cool completely on the pan. They are fragile while warm, so move them gently once they are firm.
Chewy Molasses Cookies
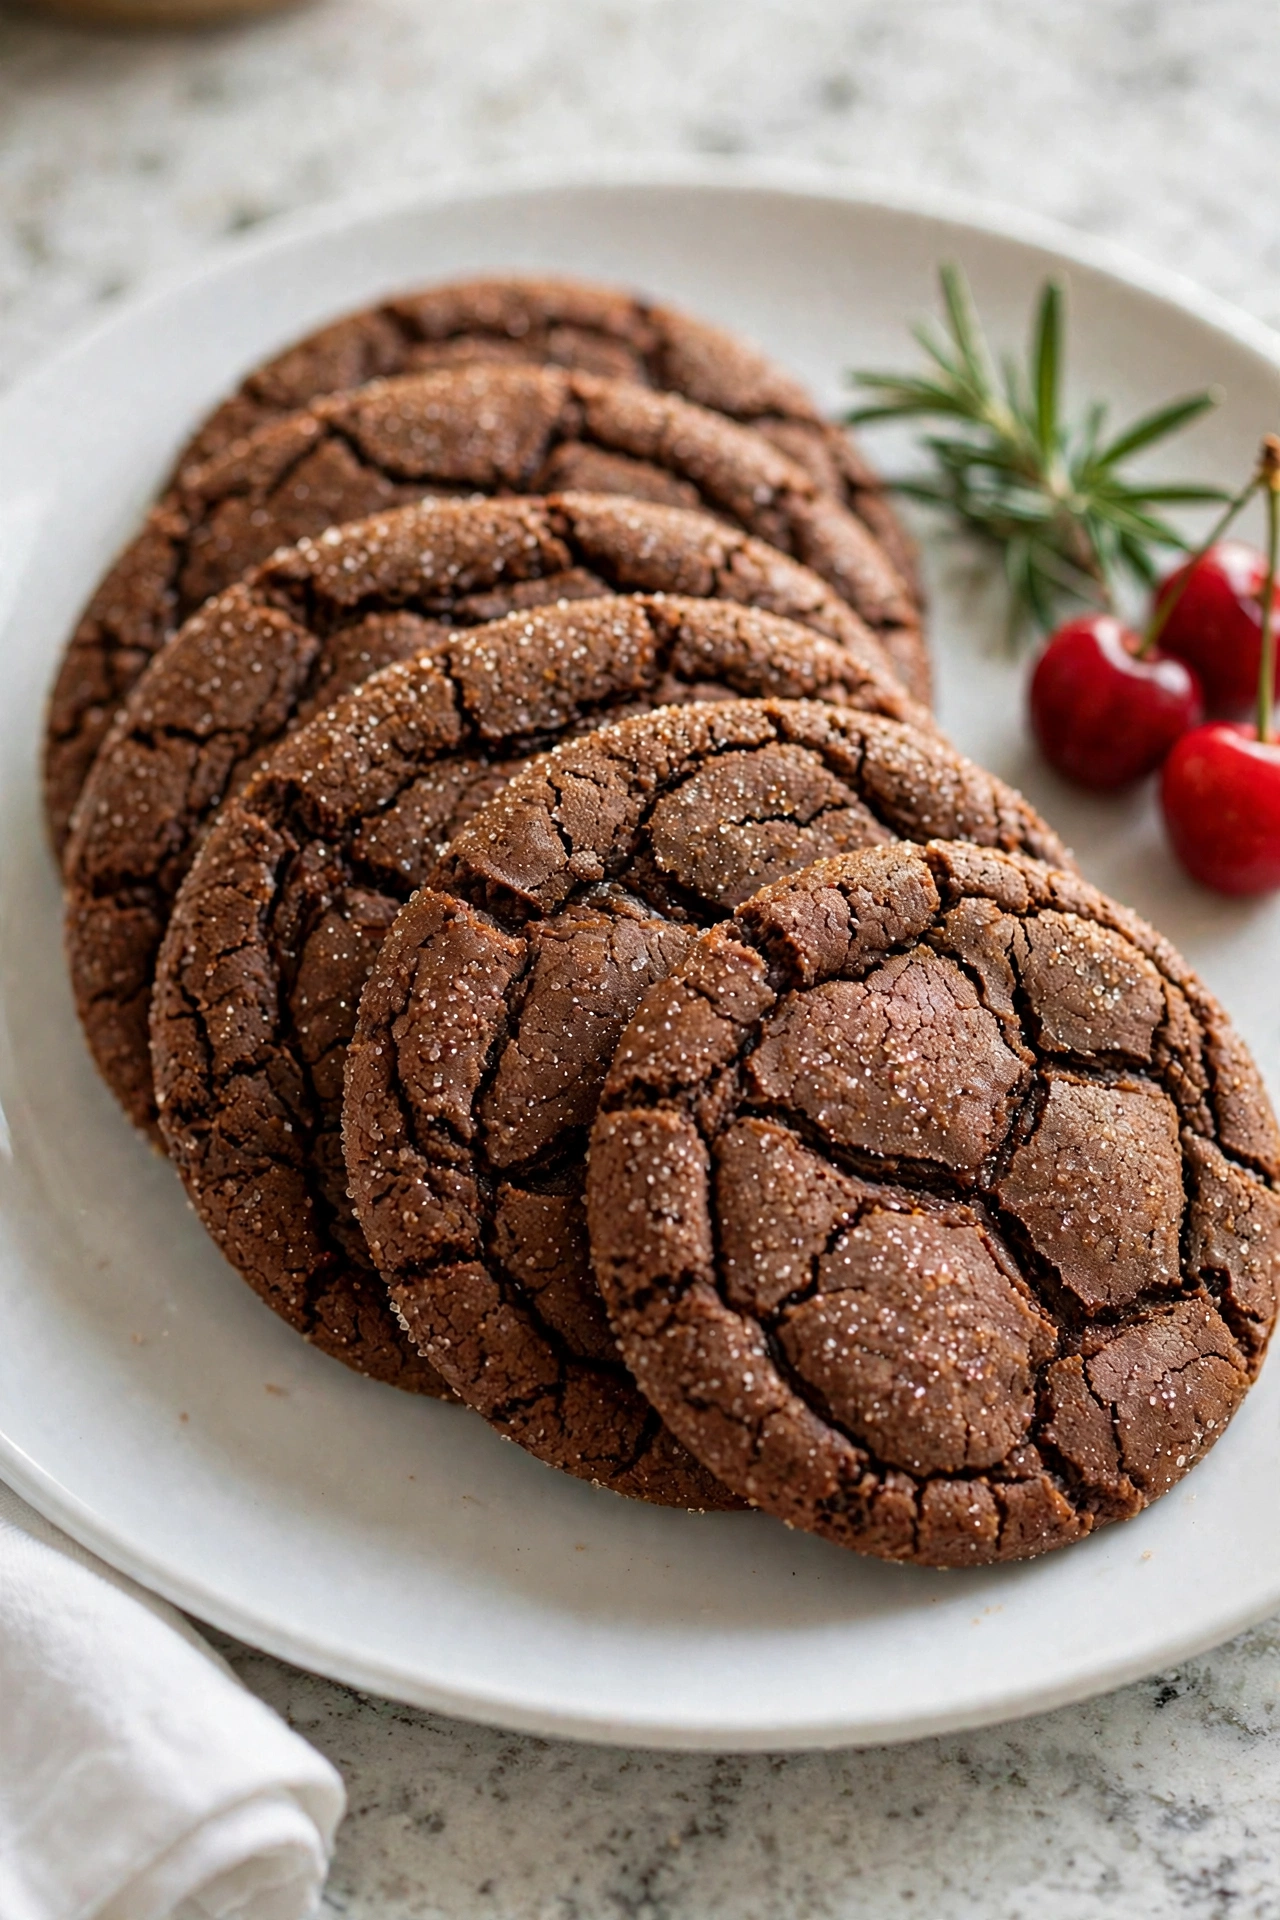
If you love soft, chewy cookies with crackly sugary tops, these molasses cookies are for you. They have all the warm spice of gingerbread in a thick, tender cookie that stays chewy for days. Rolling the dough in sugar before baking gives them a little sparkle and the prettiest cracks when they come out of the oven.
Prep Time: 20 minutes | Cook Time: 10 minutes | Servings: 24
Ingredients
- 2 1/4 cups all-purpose flour
- 2 teaspoons baking soda
- 1 1/2 teaspoons ground ginger
- 1 teaspoon ground cinnamon
- 1/4 teaspoon ground cloves
- 1/4 teaspoon salt
- 3/4 cup unsalted butter, melted
- 1 cup brown sugar, firmly packed
- 1 large egg
- 1/4 cup molasses
- 1/3 cup granulated sugar, for rolling
Instructions
- Mix the dry ingredients by whisking the flour, baking soda, ginger, cinnamon, cloves, and salt in a medium bowl. Set it aside while you mix the wet ingredients.
- Whisk the butter and brown sugar in a large bowl until smooth, thick, and glossy. Melted butter is the secret here — it is what makes these cookies extra chewy instead of cakey.
- Add the egg and molasses and whisk until the mixture is dark, smooth, and well blended. The batter will smell warm and spicy already.
- Make the dough by stirring the dry ingredients into the wet mixture with a spoon or spatula until a soft dough forms. Mix just until the flour disappears so the cookies stay tender.
- Chill the dough for at least 30 minutes in the fridge. Melted-butter dough is too soft to roll right away, and chilling also helps the cookies bake up thick.
- Roll in sugar by scooping about 1 1/2 tablespoons of dough, rolling it into a smooth ball, and rolling it in the granulated sugar until well coated. Place the balls 2 inches apart on parchment-lined baking sheets.
- Bake the cookies at 350°F (175°C) for 9 to 11 minutes, until the tops are puffed and crackled and the edges are set. The centers should still look soft — they will sink a little as they cool, which makes them chewy.
- Cool and serve on the pan for 5 minutes, then move to a wire rack. They stay chewy for days in a sealed container, if your family lets them last that long.
Spritz Cookies
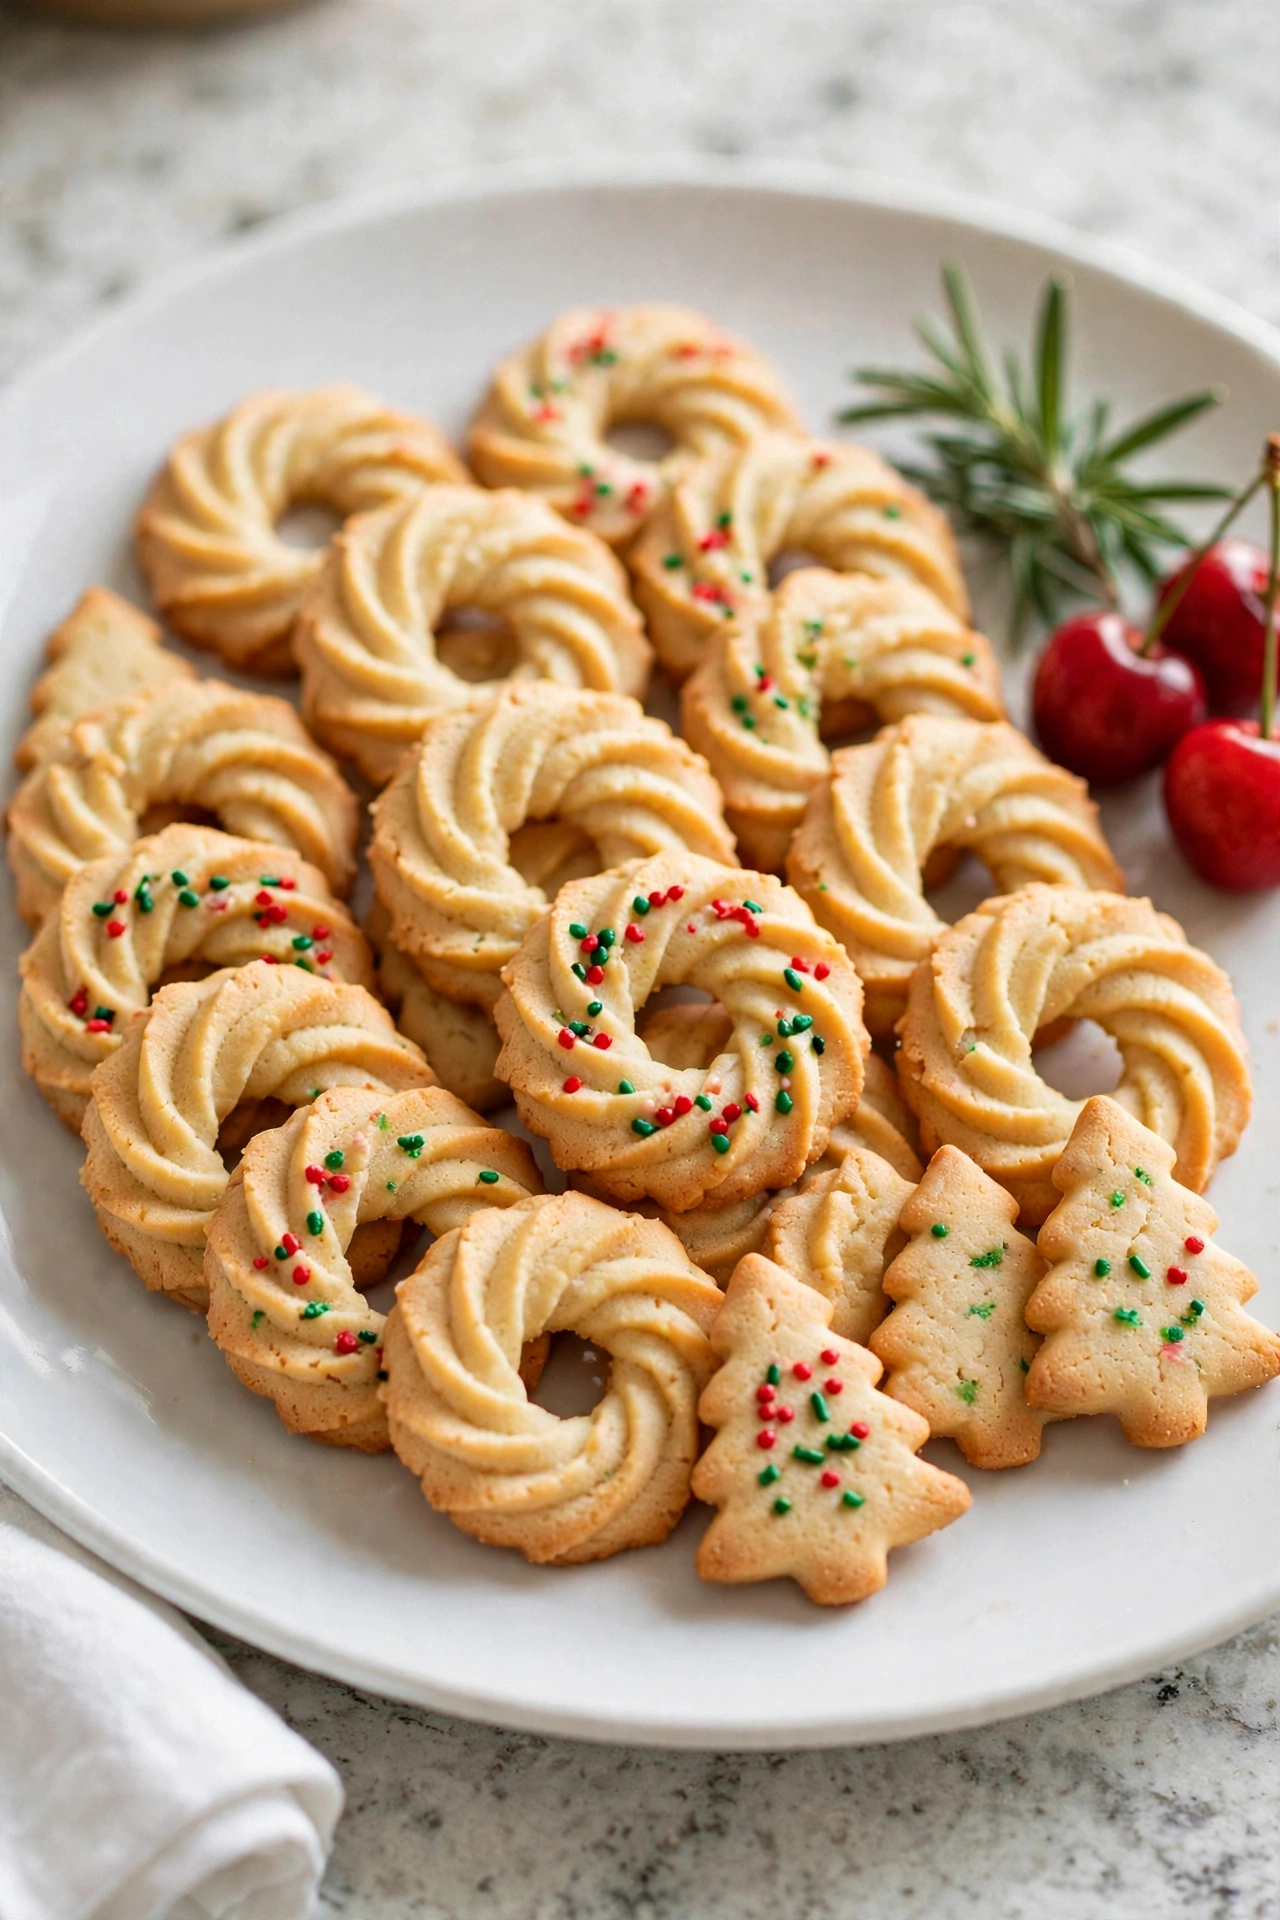
Spritz cookies are the dainty little butter cookies pressed through a cookie press into trees, wreaths, and flowers. They are light, crisp, and just sweet enough, and a sprinkle of colored sugar makes them shine on the tray. Once you learn the press, a whole batch takes only minutes — the trick is soft dough and a cold, bare pan.
Prep Time: 25 minutes | Cook Time: 8 minutes | Servings: 36
Ingredients
- 1 cup unsalted butter, softened
- 2/3 cup granulated sugar
- 1 large egg yolk
- 1 teaspoon vanilla extract
- 1/2 teaspoon almond extract
- 2 1/4 cups all-purpose flour
- 1/4 teaspoon salt
- Gel food coloring (optional)
- Colored sugar and sprinkles, for decorating
Instructions
- Cream the butter and sugar in a large bowl for about 2 minutes, until very light and fluffy. A well-creamed base is important for spritz, because the dough has to be soft enough to press.
- Add the yolk and extracts and beat until smooth and glossy. If you want colored cookies, beat a few drops of gel food coloring in now, while the butter mixture is easy to tint evenly.
- Add the flour and salt and mix on low just until a soft, smooth dough forms. The dough should be soft and pliable like play dough — do not chill it, or it will be too stiff for the press.
- Load the press by filling your cookie press with dough, following the maker’s directions, and choosing a Christmas disk like a tree, wreath, or star. Press out one or two test cookies to get the feel of it.
- Press the cookies onto a cold, ungreased, unlined baking sheet, holding the press flat against the pan and clicking once per cookie. The dough sticks best to a bare cold pan, so chill the sheet for a few minutes if your kitchen is warm.
- Decorate before baking by sprinkling the pressed cookies with colored sugar or sprinkles while they are still soft. This is the easy way — the decorations bake right on and stay put.
- Bake the cookies at 375°F (190°C) for 7 to 9 minutes, until they are set and the edges are just barely golden. They bake fast, so stay close to the oven for the first tray.
- Cool and serve on the pan for 2 minutes, then move them gently to a wire rack. They are crisp, light, and perfect in gift tins, where they keep well for up to two weeks.