Halloween Witch Hat Cookies
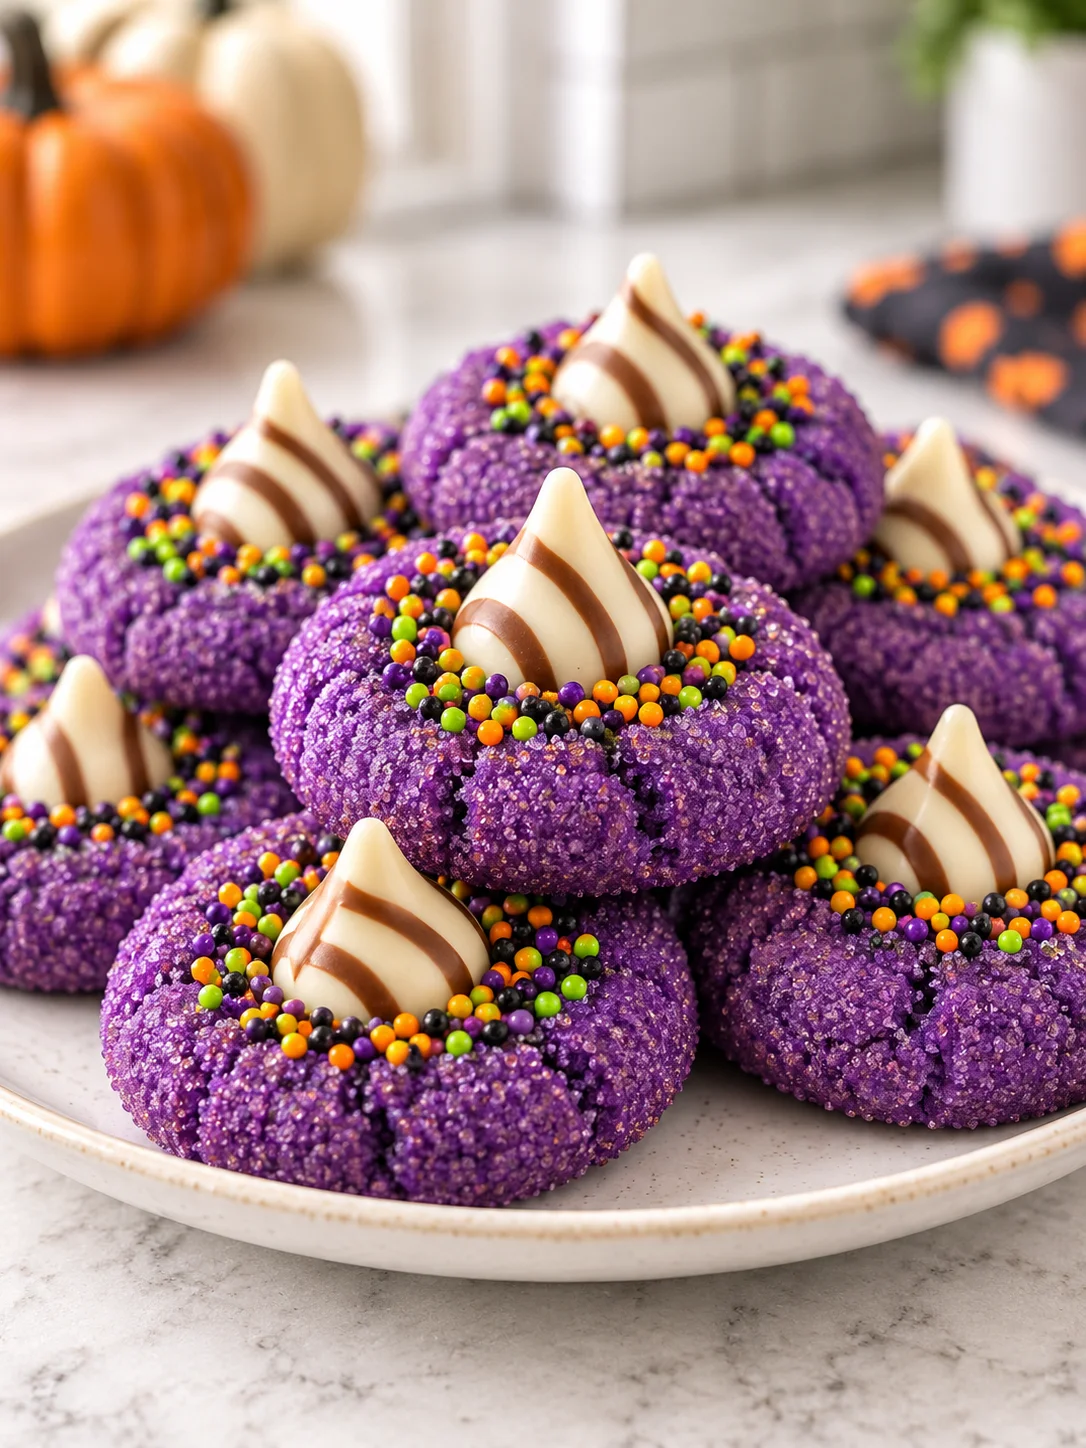
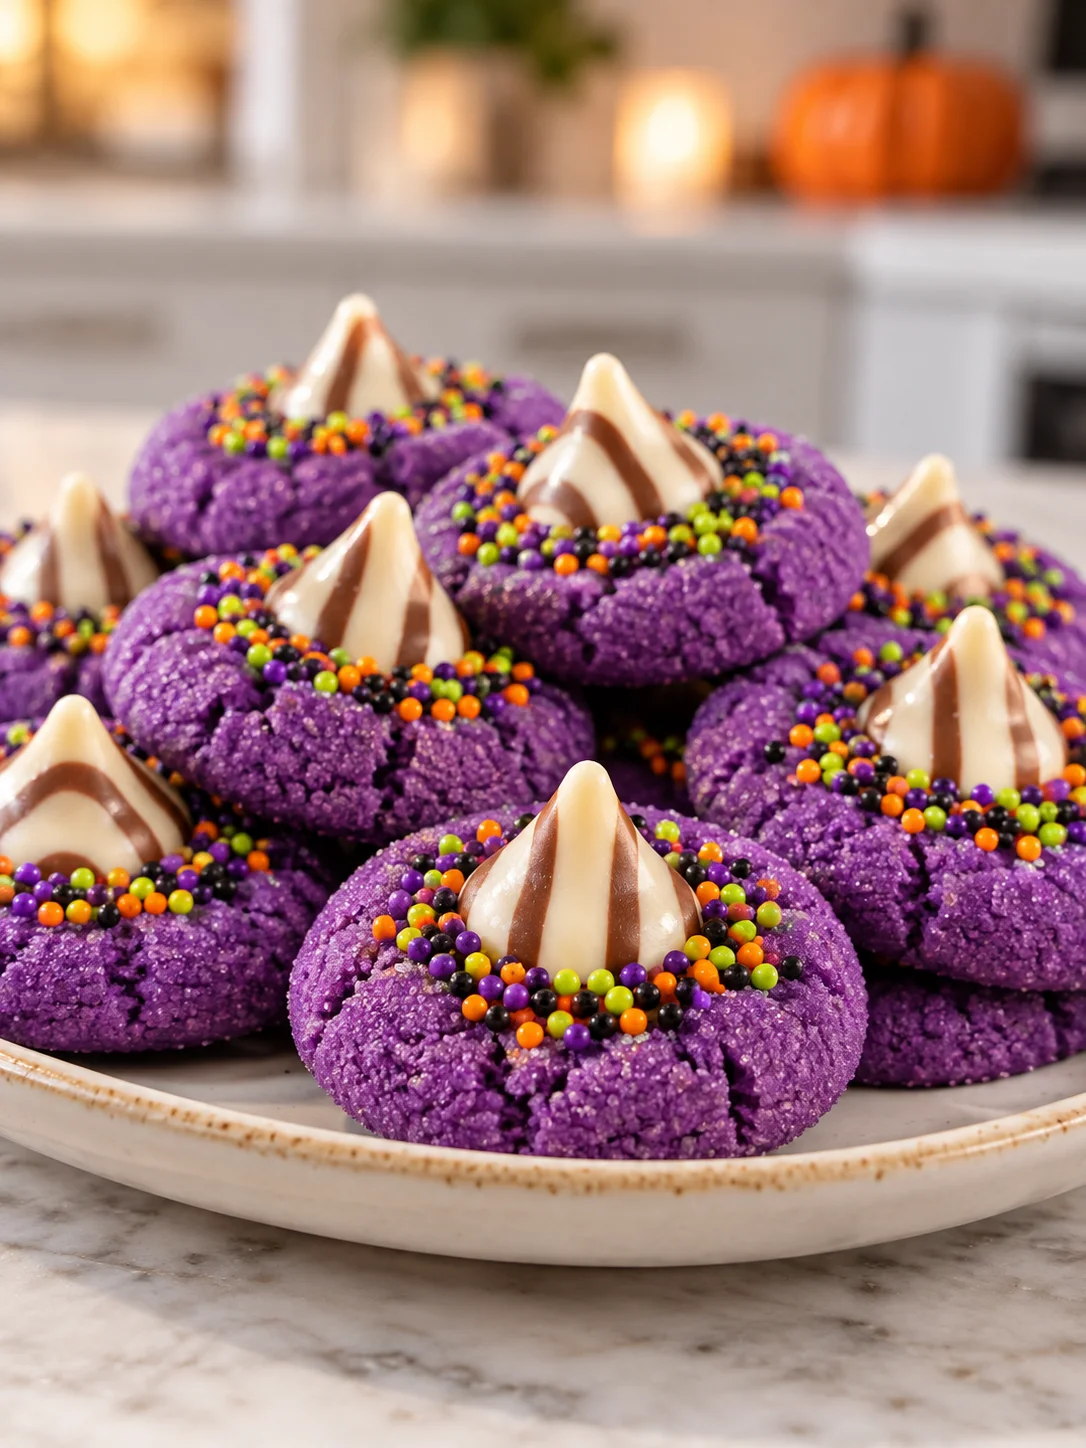
These Halloween Witch Hat Cookies are soft, buttery, and full of playful color. Each purple sugar cookie is topped with a striped chocolate kiss and a bright ring of Halloween sprinkles, creating a sweet little witch hat that looks impressive without needing difficult decorating skills.
I love recipes that bring a party table to life but still feel easy enough for a relaxed afternoon of baking. These cookies use a simple sugar-cookie dough, purple gel coloring, chocolate kisses, and sprinkles. Children can help roll the dough and decorate the edges while an adult handles the hot baking sheets.
The finished cookies have lightly crisp edges and soft centers. The chocolate kiss becomes slightly glossy from the warm cookie, while the colorful nonpareils add a tiny crunch. They are perfect for Halloween parties, school treats, movie nights, or a festive dessert tray.
What Are Halloween Witch Hat Cookies?
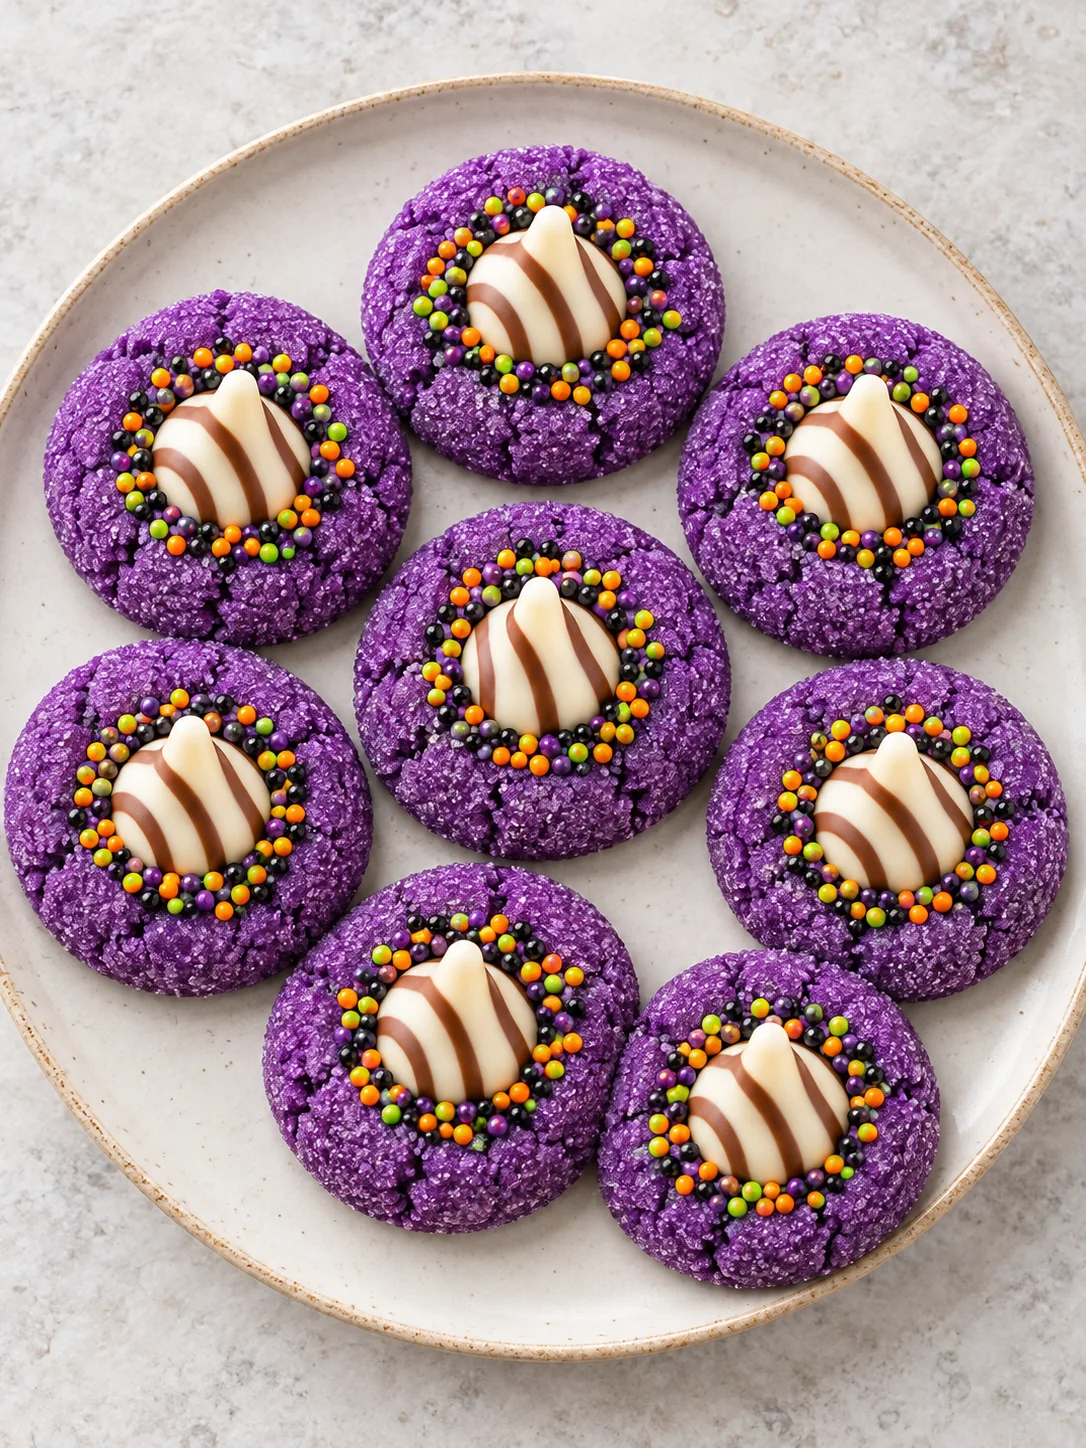
Halloween Witch Hat Cookies are colorful sugar-cookie blossoms decorated to resemble tiny witch hats. The purple cookie forms the wide brim, the striped chocolate kiss creates the pointed crown, and a ring of Halloween sprinkles looks like a bright hatband.
This recipe is inspired by classic blossom cookies, but it does not use peanut butter. The dough has a simple vanilla flavor that works well with white and milk chocolate. Purple gel food coloring gives the cookies their dramatic Halloween look without making the dough too wet.
Why You’ll Love This Recipe
- Easy to shape: The dough is rolled into simple balls, so no cookie cutters are needed.
- Perfect for parties: The bold purple color and chocolate hats stand out on a Halloween dessert table.
- Soft and buttery: The cookies stay tender in the center with lightly crisp edges.
- Fun for children: Young helpers can roll the dough in sprinkles and unwrap the chocolate kisses.
- Make-ahead friendly: The dough and baked cookies can both be prepared in advance.
- No complicated icing: The chocolate candy and sprinkles do all the decorating.
Recipe at a Glance
- Course: Dessert
- Cuisine: American
- Difficulty: Easy
- Servings: 24 cookies
- Prep time: 20 minutes
- Chill time: 30 minutes
- Baking time: 10 minutes per batch
- Total time: About 1 hour
- Calories: Approximately 145 per cookie
Ingredients
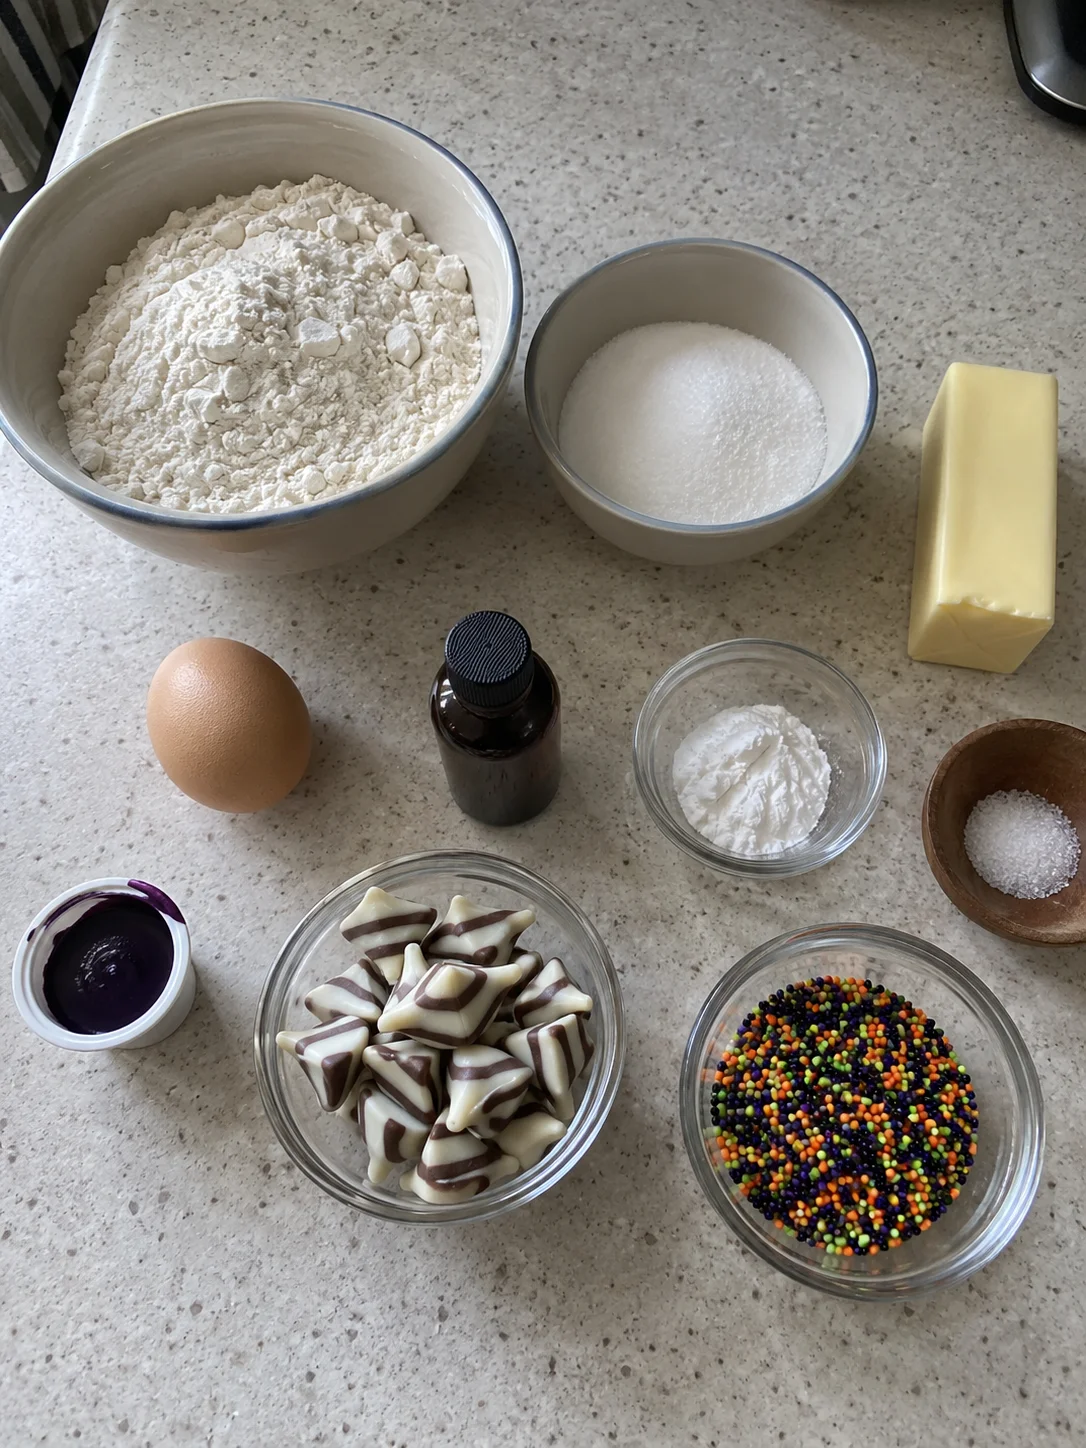
- 2 cups all-purpose flour
- 1 teaspoon baking powder
- ½ teaspoon fine salt
- ¾ cup unsalted butter, softened
- ¾ cup granulated sugar
- 1 large egg, at room temperature
- 2 teaspoons vanilla extract
- Purple gel food coloring, as needed
- ½ cup orange, green, purple, and black Halloween nonpareil sprinkles
- 24 striped white-and-milk-chocolate kisses, unwrapped
Ingredient Notes
All-purpose flour: Measure the flour by spooning it into the measuring cup and leveling the top. Scooping directly from the bag can pack in too much flour and make the cookies dry.
Unsalted butter: The butter should be soft enough to press with a finger but not melted or greasy. Properly softened butter traps air when mixed with sugar and helps create tender cookies.
Purple gel food coloring: Gel coloring gives a strong purple shade without adding much liquid. Begin with a small amount and add more until the dough is slightly deeper than the color you want after baking.
Chocolate kisses: Striped white-and-milk-chocolate kisses create the clearest witch-hat look. Unwrap them before the cookies enter the oven so you can add them quickly.
Halloween sprinkles: Small nonpareils make a colorful hatband around the chocolate. Jimmies can also work, but their longer shape creates a softer crunch.
Kitchen Equipment
- Large mixing bowl
- Medium mixing bowl
- Electric hand mixer or stand mixer
- Measuring cups and spoons
- Rubber spatula
- Small cookie scoop
- Two large baking sheets
- Parchment paper
- Wire cooling rack
How to Make Halloween Witch Hat Cookies
Step 1: Mix the dry ingredients
Whisk the flour, baking powder, and salt in a medium bowl. Mixing these ingredients separately helps the baking powder and salt spread evenly through the cookie dough.
Step 2: Cream the butter and sugar
Place the softened butter and granulated sugar in a large bowl. Beat for 2–3 minutes, until the mixture looks pale, light, and fluffy. Scrape the sides and bottom of the bowl halfway through.
Step 3: Add the egg and vanilla
Beat in the egg and vanilla extract until smooth. The mixture may look slightly separated at first, but it will become creamy after a few seconds of mixing.
Step 4: Color the dough
Add a small amount of purple gel coloring and mix on low speed. Add more a little at a time until the dough has a rich purple color. Remember that the color may soften slightly while baking.
Step 5: Finish the dough
Add the dry mixture in two portions and mix on low only until no streaks of flour remain. Do not keep beating after the dough comes together. Overmixing can make the cookies firm instead of soft.
Step 6: Chill
Cover the bowl and refrigerate the dough for 30 minutes. Chilling makes it easier to shape and helps the cookies stay thick in the oven.
Step 7: Prepare the oven
Preheat the oven to 350°F (175°C). Line two large baking sheets with parchment paper. Place the sprinkles in a shallow bowl and keep the unwrapped chocolate kisses nearby.
Step 8: Shape and decorate
Scoop about one tablespoon of dough for each cookie and roll it into a smooth ball. Press the top and sides lightly into the sprinkles, leaving a small clear area in the center for the chocolate. Arrange the balls about two inches apart on the prepared sheets.
Step 9: Bake
Bake one sheet at a time for 9–11 minutes. The edges should look set, but the centers should still appear soft and slightly puffed. Avoid waiting for the purple cookies to brown.
Step 10: Add the witch hats
Remove the baking sheet from the oven and immediately press one striped chocolate kiss into the center of each cookie. Press gently, just far enough to hold the candy in place. Let the cookies cool on the sheet for 10 minutes before moving them to a wire rack.
Tips for the Best Witch Hat Cookies
Use gel coloring
Liquid coloring can thin the dough and may require a large amount to create a dark purple shade. Gel coloring is stronger, cleaner, and easier to control.
Do not skip chilling
Warm dough spreads quickly. A short chill keeps the cookies thick enough to support the chocolate hats and gives them a softer center.
Unwrap the chocolates early
The kisses need to be pressed into the cookies while they are still hot. Preparing them before baking prevents the cookies from cooling while you open wrappers.
Keep the sprinkles near the edge
Rolling only the upper sides of each dough ball creates a neat ring around the chocolate. If the entire ball is covered, the witch-hat shape may look less clear.
Do not overbake
The centers should look slightly soft when the cookies leave the oven. They continue cooking from the heat of the baking sheet and become firmer as they cool.
Let the chocolate set
The kisses become soft when placed on hot cookies. Leave the cookies undisturbed until the chocolate becomes firm again, especially before stacking or packing them.
Bake a test cookie
If you are unsure about the dough temperature, bake one cookie first. If it spreads too much, chill the remaining dough for another 15 minutes.
Easy Variations
Green witch hats
Use green gel coloring instead of purple for a bright monster-inspired version. Orange and black sprinkles look especially bold against the green dough.
Chocolate cookie base
Replace ¼ cup of flour with unsweetened cocoa powder. The darker cookie creates a dramatic Halloween look and adds a richer chocolate flavor.
Orange pumpkin hats
Color the dough orange and use green and black sprinkles. The pointed candy still looks like a witch hat, but the cookie also fits a pumpkin-themed dessert table.
Different chocolate centers
Use solid milk-chocolate or dark-chocolate kisses if striped candies are not available. The hat will be darker but still easy to recognize.
Coarse sugar coating
Replace the nonpareils with purple or black sanding sugar for a sparkling finish. Add a small ring of sprinkles around the candy immediately after baking if desired.
Mini cookies
Use two teaspoons of dough per cookie and smaller chocolate candies. Begin checking them after 7 minutes because small cookies bake more quickly.
What to Serve with Halloween Witch Hat Cookies
Serve these cookies with hot chocolate, cold milk, apple cider, or a simple vanilla milkshake. Their bright color also looks beautiful beside chocolate cupcakes, popcorn balls, and fresh fruit on a Halloween party table.
For a children’s movie night, place the cookies on a large platter with orange slices, grapes, pretzels, and small bowls of popcorn. For an adult gathering, pair them with coffee or chai so the warm spices in the drink balance the sweet vanilla cookies.
Make-Ahead Instructions
The dough can be prepared up to two days ahead. Cover it tightly and keep it refrigerated. Let very cold dough sit at room temperature for about 10 minutes before scooping so it is easier to shape.
You can also freeze shaped, undecorated dough balls for up to two months. Freeze them on a tray first, then transfer them to a freezer bag. Thaw overnight in the refrigerator, coat with sprinkles, and bake as directed.
How to Store
Keep completely cooled cookies in an airtight container at room temperature for up to four days. Place parchment paper between layers and wait until the chocolate centers are fully firm before stacking.
Freeze baked cookies for up to two months in a rigid freezer-safe container. Thaw them in a single layer at room temperature so condensation does not collect on the chocolate.
Frequently Asked Questions
Why did my cookies spread too much?
The butter may have been too warm, the dough may not have chilled long enough, or the flour may have been measured too lightly. Chill the remaining dough before baking the next tray.
Can I use liquid food coloring?
Yes, but gel coloring gives a deeper shade with less moisture. If using liquid coloring, add it gradually and stop before the dough becomes sticky.
Can I make the cookies without food coloring?
Yes. The cookies will have a pale vanilla color but the chocolate hats and Halloween sprinkles will still make them festive.
When should I add the chocolate kisses?
Add them immediately after the cookies leave the oven. The warm center helps the candy stay in place without melting completely.
Why did the chocolate lose its shape?
The cookies may have been extremely hot or the room may be warm. Move the tray to a cool place and leave the candies untouched until they firm up.
Can I use a boxed cookie mix?
A sugar-cookie mix can work when you need a shortcut. Prepare it as directed, add purple gel coloring, chill if the dough feels soft, and follow the decorating method here.
Can children help make these cookies?
Yes. Children can unwrap the chocolate, roll chilled dough, and add sprinkles. An adult should handle the oven and press candies into the hot cookies.
How do I keep the purple color bright?
Use gel coloring and avoid overbaking. Remove the cookies as soon as the edges are set because browning can dull the color.
Can I double the recipe?
Yes. Double every ingredient and mix the dough in a large bowl. Keep unused dough refrigerated while each tray bakes.
Are Halloween Witch Hat Cookies nut-free?
The dough contains no nuts, but candy and sprinkle brands may be processed near nuts. Check every package carefully if you are baking for someone with an allergy.
Final Thoughts
Halloween Witch Hat Cookies are an easy way to make a holiday dessert feel special. The soft purple cookies, striped chocolate centers, and colorful sprinkles create a fun treat without complicated piping or decorating.
Prepare the chocolates before baking, keep the dough cold, and remove the cookies while the centers are still soft. Those simple steps will give you thick, tender cookies with neat little witch hats every time.