Chocolate Covered Strawberries
I love making chocolate covered strawberries because juicy fruit and rich chocolate need very little fuss to feel special. They are lovely for Valentine’s Day, anniversaries, dinner parties, or a small dessert after an ordinary meal. The red berries and simple chocolate coating do most of the decorating for you.
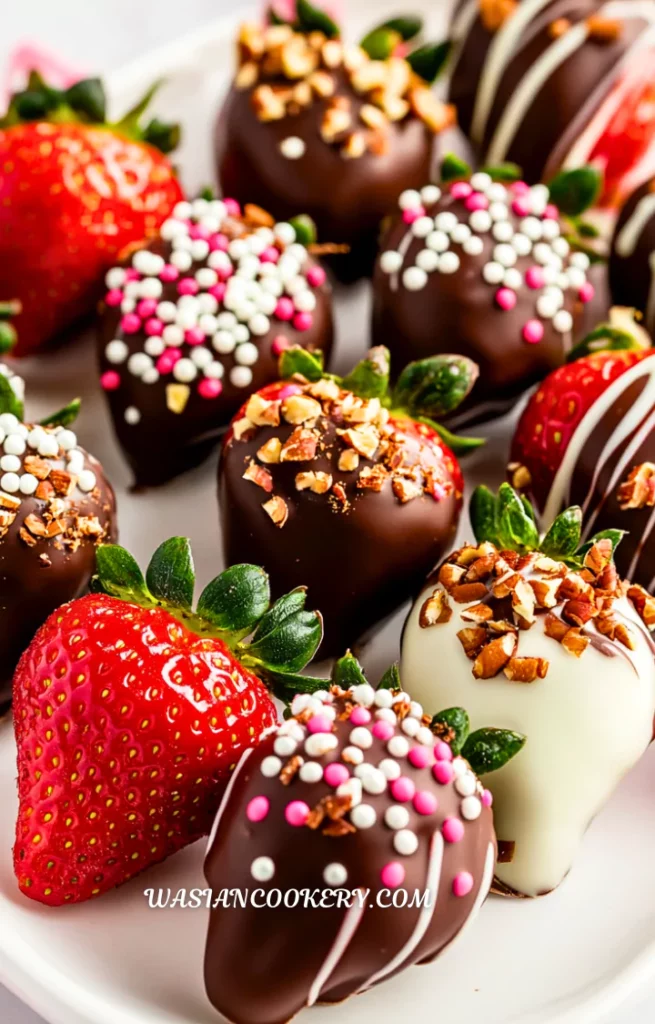
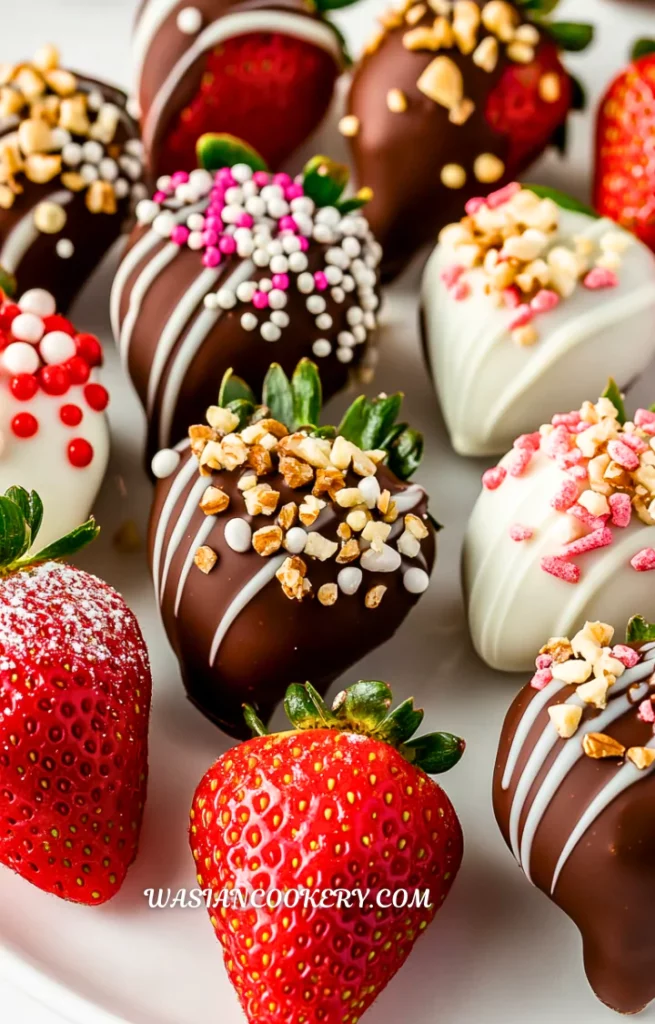
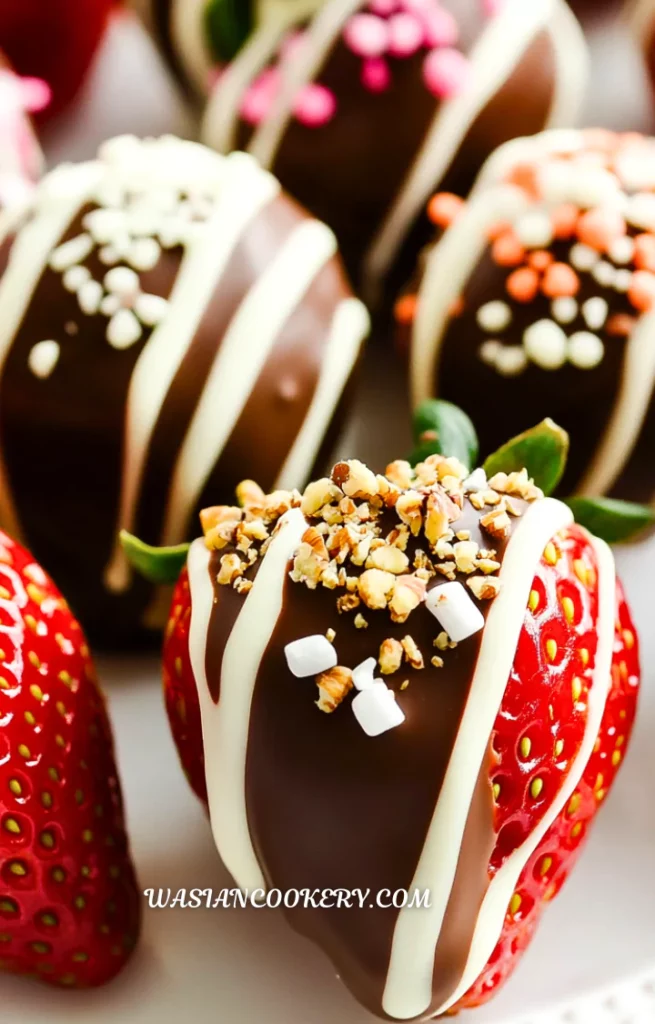
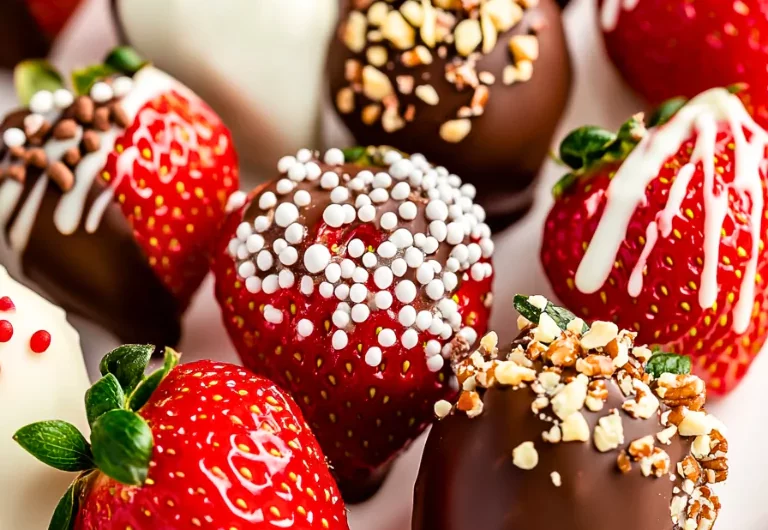
This recipe uses fresh strawberries and semi-sweet chocolate, with optional coconut oil or butter for a softer coating. A contrasting chocolate drizzle, crushed nuts, coconut, or colorful sprinkles adds an easy finishing touch. You can keep the whole tray simple or decorate a few berries in different ways.
The key is to dry the fruit thoroughly and melt the chocolate gently. Plan for about 55 minutes with refrigerated setting, including extra drying time, or about 70 minutes if the coating sets in a cool room. The hands-on work is short, but those quiet drying and setting stages matter.
Why This Dish Is Great
- A small ingredient list gives you a dessert with a pleasing mix of fresh fruit and rich chocolate.
- There is no oven to preheat, so this is useful when the oven is busy with dinner.
- The leafy tops make natural handles and give the finished berries a pretty contrast.
- Optional toppings let you make a mixed platter from one batch without changing the basic method.
- You can prepare the tray a little ahead and keep it chilled until serving time.
- The recipe scales around the berries you have, with the coating thickness deciding how far the chocolate goes.
What Are the Best Strawberries to Use?
Choose firm, ripe strawberries with fresh green tops and no damp, soft, or moldy patches. Medium berries are easy to hold and eat, and similarly sized fruit looks tidy on a platter. Very large berries work too, but a pint will contain fewer pieces and each berry uses more chocolate. Taste one first if possible; chocolate cannot give bland fruit the flavor of a ripe berry.
Keep the tops attached while rinsing and dipping. Cutting them off exposes the juicy inside and gives moisture another route into the coating. Frozen berries are not a good choice for this version because they release liquid as they thaw. Start with fresh berries, dry them carefully, and use a clean, dry tray.
Ingredients
- 1 pint fresh strawberries (about 15-20 strawberries), washed and dried thoroughly
- 1 cup semi-sweet chocolate chips or chopped chocolate
- 1 tablespoon coconut oil or butter (optional, for smooth melting)
- 1/2 cup white chocolate or dark chocolate (optional, for drizzle)
- Sprinkles, crushed nuts, or shredded coconut (optional, for decoration)
Choose chocolate that you enjoy eating. Chopped baking chocolate often melts smoothly, while chips can stay thicker because they are designed to hold their shape. The optional tablespoon of coconut oil or butter belongs to the whole batch, not each bowl. It can soften the finished coating, so it is not a promise of the firm snap or shine of tempered chocolate.
Kitchen Equipment You Will Need
As an Amazon Associate I earn from qualifying purchases.
- Paper towels
- Kitchen towel
- Baking sheet
- Parchment paper
- Microwave-safe bowls
- Silicone spatula
- Measuring cups
- Measuring spoons
- Double boiler
- Fork
- Small spoon
- Serving platter
- Shallow food storage container
- Chef’s knife
- Cutting board
How To Make Chocolate Covered Strawberries
Step 1
Rinse the strawberries under cool running water with their leafy tops attached. Pat every berry dry with paper towels, including the area under the leaves, then spread them on a clean dry towel for another 15 minutes. Check that no droplets remain before dipping. Line a baking sheet with parchment paper and set out any toppings while the berries dry.
Step 2
Put the semi-sweet chocolate in a completely dry microwave-safe bowl. If using the optional 1 tablespoon coconut oil or butter, add it now; do not use both. Microwave at half power in 30-second bursts, stirring after each, until only a few small pieces remain. Stir off the heat until smooth. Allow about 5 minutes for heating and stirring, not 5 minutes of continuous microwaving. Alternatively, use a dry double boiler over gently steaming water, keeping water and steam out of the chocolate.
Step 3
Hold a dry strawberry by its leafy top and dip it into the melted chocolate. Turn gently to coat most of the fruit while leaving a little red showing near the leaves. Lift it over the bowl and let the excess chocolate drip back. If the top is fragile, support the berry with a fork rather than pulling hard on the leaves.
Step 4
Set the berry on the lined sheet with a little space around it. Repeat with the remaining strawberries. Scatter sprinkles, finely crushed nuts, or shredded coconut over each freshly dipped berry before its coating firms. Avoid moving berries repeatedly once they are on the paper, which can smear their bases.
Step 5
For the optional drizzle, melt the listed 1/2 cup white or dark chocolate in a separate dry microwave-safe bowl using short half-power bursts and frequent stirring. Use shorter bursts as it softens. Drizzle fine lines over the berries with a small spoon. This optional melting and decorating is included in the planned preparation and heating time.
Step 6
Refrigerate the tray for about 15 minutes, until the coating feels firm and releases cleanly from the paper. If using the room-temperature setting option, allow about 30 minutes in a cool room and check for firmness; a warm kitchen may require refrigeration. The planned 55-minute total includes 20 minutes active preparation, 15 minutes extra berry drying, 5 minutes melting, and 15 minutes chilling. Room-temperature setting takes about 70 minutes total, and thick coatings may need longer.
Step 7
Transfer the firm berries to a serving platter or a shallow covered container. Serve soon after chilling, or keep refrigerated at 40°F or below and enjoy within 1–2 days for best quality. This makes about 15–20 dipped berries, depending on their size; the card uses the original estimate of 15. The untempered coating may soften in a warm room, especially with the optional fat.
Notes
- Dry the leaves as well as the berries. Water hiding near the stem can run into the melted chocolate when you turn the fruit.
- Use a small, fairly deep bowl so the chocolate is deep enough for dipping without needing extra chocolate.
- Stir between microwave bursts even when the pieces still look solid. Stirring reveals how much has already melted.
- Stop heating before the final small pieces disappear and let the retained warmth finish the job.
- Never splash water into thick chocolate. If it becomes scorched or grainy, start again with a clean, dry bowl for a smooth coating.
- Have toppings within reach before dipping. Sprinkles and nuts attach best while the surface is still wet.
- Lift the berries only after the coating has firmed. A little extra setting time is better than leaving half the coating on the paper.
Ingredients You Can Add
- White chocolate makes pale lines that show clearly over the semi-sweet base.
- Dark chocolate gives a less sweet drizzle with a deeper chocolate flavor.
- Finely crushed almonds bring a gentle crunch without bulky pieces falling off.
- Chopped pistachios add green color and a little nutty texture.
- Shredded coconut gives the coating a soft, snowy finish.
- Small sprinkles add color for a birthday or holiday without changing the dipping method.
What To Serve with Chocolate Covered Strawberries
My favorite way to serve these is on a simple platter with room between each berry. For a fuller dessert board, add small squares of Honey Bun Brownies. A few rich baked bites make a nice contrast to the cool, juicy fruit.
For a fruit-filled dessert table, set out White Chocolate Raspberry Cookies beside the berries. Their soft baked texture gives guests another choice. Keep the strawberries on their own plate so moisture from the fruit does not soften the cookies during storage.
A small scoop of Strawberry Shortcake Ice Cream also fits beautifully. Add the berry at the last moment so the plate stays neat. Coffee, tea, or sparkling water works well when you want an easy finish without another dessert to prepare.
Variations and Swaps
- Plain finish: Skip all toppings and let the contrast between red fruit and chocolate stand on its own.
- White drizzle: Use the optional white chocolate for narrow lines rather than a second heavy coating.
- Dark drizzle: Choose the optional dark chocolate when you want a deeper flavor with the semi-sweet base.
- Mixed decorations: Leave some berries plain and decorate the others with the toppings already listed.
- Holiday colors: Choose sprinkles that suit the occasion and scatter them over the wet coating.
- Nut-free platter: Use sprinkles or coconut and check all ingredient labels when preparing food for someone with an allergy.
- No added fat: Omit the optional coconut oil or butter and melt the chocolate carefully on its own.
- Two-tone dip: Once the first coating is firm, use the optional contrasting chocolate for a small angled dip. The same half cup may not cover every berry, and allow another setting period before serving.
How To Store
Once the coating is firm, place the berries in a shallow covered container in one layer and refrigerate at 40°F or below. Line the bottom with parchment to help them release. They are at their best the day they are made; use within 1–2 days while the fruit is fresh. Avoid stacking, which can press the berries and mark the coating.
Freezing is not recommended for this fresh-fruit version because thawing makes the berries soft and wet. A little condensation can appear when cold berries enter a warm room, so take out only what you plan to serve. Keep them out of direct sunlight and return leftovers to the refrigerator promptly rather than leaving a platter out all afternoon.

FAQ
Why is the chocolate sliding off?
The fruit may still be wet, or the coating may be too warm and thin. Dry around the leaves and let overheated chocolate cool slightly while stirring. Dip one berry first and check how it coats before continuing.
Can I use frozen strawberries?
Use fresh berries here. Thawed strawberries release water and lose the firm texture that makes dipping easy. Save frozen fruit for a dessert where its released juice can be incorporated into the recipe.
Why is my chocolate thick or grainy?
A little moisture or too much heat can spoil the smooth texture. Keep the bowl and utensils dry, stir frequently, and avoid overheating. Do not try to thin the dipping bowl by adding water.
Will coconut oil make the chocolate shiny?
It may make melting and dipping easier, but it also softens the coating. This simple method does not temper the chocolate, so a perfectly glossy, crisp shell is not guaranteed. Keep the finished berries cool.
How many berries does this make?
A pint usually gives about 15–20 berries in the original recipe estimate. Berry size and coating thickness change the count. The card keeps the original 15-strawberry estimate rather than promising a fixed number from every pint.
Can I make them the night before?
Yes, dry the fruit carefully, let the coating set, and refrigerate in a covered single layer. Enjoy them the next day for the freshest texture. Add them to a dessert board shortly before guests are ready to eat.
Short Description
Fresh strawberries dipped in semi-sweet chocolate, with optional drizzle and toppings, make a simple dessert for celebrations or an everyday treat.
Chocolate Covered Strawberries
Course: DessertCuisine: AmericanDifficulty: Easy15
strawberries20
minutes5
minutes55
minutesFresh strawberries dipped in semi-sweet chocolate, with optional drizzle and toppings, make a simple dessert for celebrations or an everyday treat.
Ingredients
1 pint fresh strawberries (about 15-20 strawberries), washed and dried thoroughly
1 cup semi-sweet chocolate chips or chopped chocolate
1 tablespoon coconut oil or butter (optional, for smooth melting)
1/2 cup white chocolate or dark chocolate (optional, for drizzle)
Sprinkles, crushed nuts, or shredded coconut (optional, for decoration)
Directions
- Rinse the strawberries under cool running water with their leafy tops attached. Pat every berry dry with paper towels, including the area under the leaves, then spread them on a clean dry towel for another 15 minutes. Check that no droplets remain before dipping. Line a baking sheet with parchment paper and set out any toppings while the berries dry.
- Put the semi-sweet chocolate in a completely dry microwave-safe bowl. If using the optional 1 tablespoon coconut oil or butter, add it now; do not use both. Microwave at half power in 30-second bursts, stirring after each, until only a few small pieces remain. Stir off the heat until smooth. Allow about 5 minutes for heating and stirring, not 5 minutes of continuous microwaving. Alternatively, use a dry double boiler over gently steaming water, keeping water and steam out of the chocolate.
- Hold a dry strawberry by its leafy top and dip it into the melted chocolate. Turn gently to coat most of the fruit while leaving a little red showing near the leaves. Lift it over the bowl and let the excess chocolate drip back. If the top is fragile, support the berry with a fork rather than pulling hard on the leaves.
- Set the berry on the lined sheet with a little space around it. Repeat with the remaining strawberries. Scatter sprinkles, finely crushed nuts, or shredded coconut over each freshly dipped berry before its coating firms. Avoid moving berries repeatedly once they are on the paper, which can smear their bases.
- For the optional drizzle, melt the listed 1/2 cup white or dark chocolate in a separate dry microwave-safe bowl using short half-power bursts and frequent stirring. Use shorter bursts as it softens. Drizzle fine lines over the berries with a small spoon. This optional melting and decorating is included in the planned preparation and heating time.
- Refrigerate the tray for about 15 minutes, until the coating feels firm and releases cleanly from the paper. If using the room-temperature setting option, allow about 30 minutes in a cool room and check for firmness; a warm kitchen may require refrigeration. The planned 55-minute total includes 20 minutes active preparation, 15 minutes extra berry drying, 5 minutes melting, and 15 minutes chilling. Room-temperature setting takes about 70 minutes total, and thick coatings may need longer.
- Transfer the firm berries to a serving platter or a shallow covered container. Serve soon after chilling, or keep refrigerated at 40°F or below and enjoy within 1–2 days for best quality. This makes about 15–20 dipped berries, depending on their size; the card uses the original estimate of 15. The untempered coating may soften in a warm room, especially with the optional fat.