Easy Pickled Banana Peppers
I love the tangy crunch these pickled banana peppers bring to a sandwich. Garlic, mustard seeds, and black peppercorns give the rings plenty of flavor, while a little sugar rounds out the sharp vinegar.
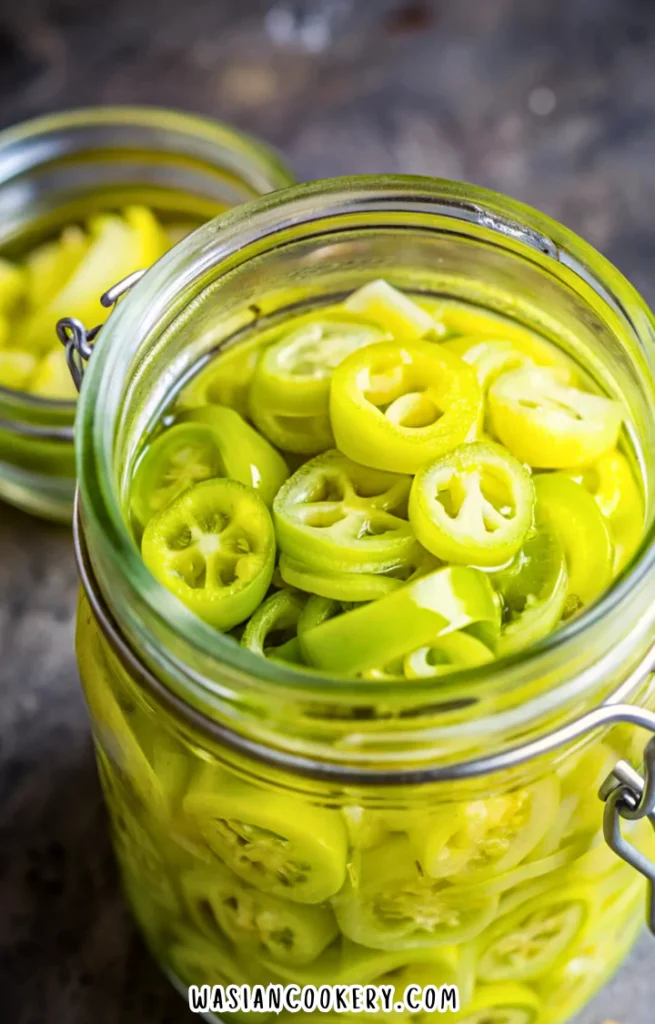
This is a refrigerator pickle recipe. Keep every jar cold, including jars that have not been opened, and plan to use the batch within 3–4 days of preparation. A sealed lid does not make the peppers suitable for pantry storage.
The hands-on work is simple: slice the peppers, heat the measured brine, and pack the jars carefully. An overnight rest in the refrigerator develops the flavor. You can enjoy the rings once chilled, but there is no room-temperature curing or fermentation step.
Why This Dish Is Great
- The rings add a bright, tangy contrast to rich sandwiches, burgers, and melted cheese.
- The ingredient list uses familiar pantry seasonings along with fresh banana peppers and garlic.
- Uniform slices are easy to scatter over food, so a small amount gives each bite flavor and crunch.
- The peppers can be prepared a day before the meal and kept chilled until serving.
- The same batch works as a topping, a chopped sandwich addition, or a small side on a lunch plate.
What Are the Best Banana Peppers?
Choose firm, glossy peppers without soft spots, cracks, or mold. Banana peppers are often mild and slightly sweet, but hot varieties also exist, so check the label or ask the grower. Color alone does not tell you the heat level. Younger yellow peppers give the familiar pale rings, while riper peppers can have more color and a sweeter flavor.
Wash the peppers under running water before cutting. Trim the stems, then slice rings of an even thickness so they have a similar bite. Remove loose seeds if you prefer a tidier jar. With hotter peppers, removing some pale inner ribs can reduce the heat, but it does not guarantee a mild result; wear gloves and avoid touching your face.
Ingredients
- 1 pound banana peppers, sliced into rings
- 2 cups white vinegar
- 1 cup water
- 2 tablespoons sugar
- 2 tablespoons salt
- 4 cloves garlic, sliced
- 1 teaspoon mustard seeds
- 1 teaspoon black peppercorns
- 1 teaspoon dried oregano (optional)
Use commercially bottled white vinegar labeled 5% acidity. Keep the 2 cups vinegar and 1 cup water exactly as listed, and do not add water to cover the peppers. Pickling salt dissolves cleanly and avoids the cloudiness that some table-salt additives can cause. The vinegar, salt, sugar, garlic, and spice quantities remain the same for this batch.
The yield is one batch. The number of jars and the final packed volume depend on ring thickness and how the peppers settle, so this recipe does not promise four full pint jars. Have several small heat-safe jars ready, and divide the peppers so the measured brine covers them without overfilling the containers.
Kitchen Equipment You Will Need
As an Amazon Associate I earn from qualifying purchases.
- Heat-safe canning jars with lids
- Deep pot
- Jar rack
- Jar lifter
- Stainless steel saucepan
- Measuring cups
- Measuring spoons
- Kitchen scale
- Sharp knife
- Cutting board
- Disposable food gloves
- Stirring spoon
- Heat-safe ladle
- Canning funnel
- Clean kitchen towels
- Small serving fork
- Refrigerator thermometer
- Small serving bowl
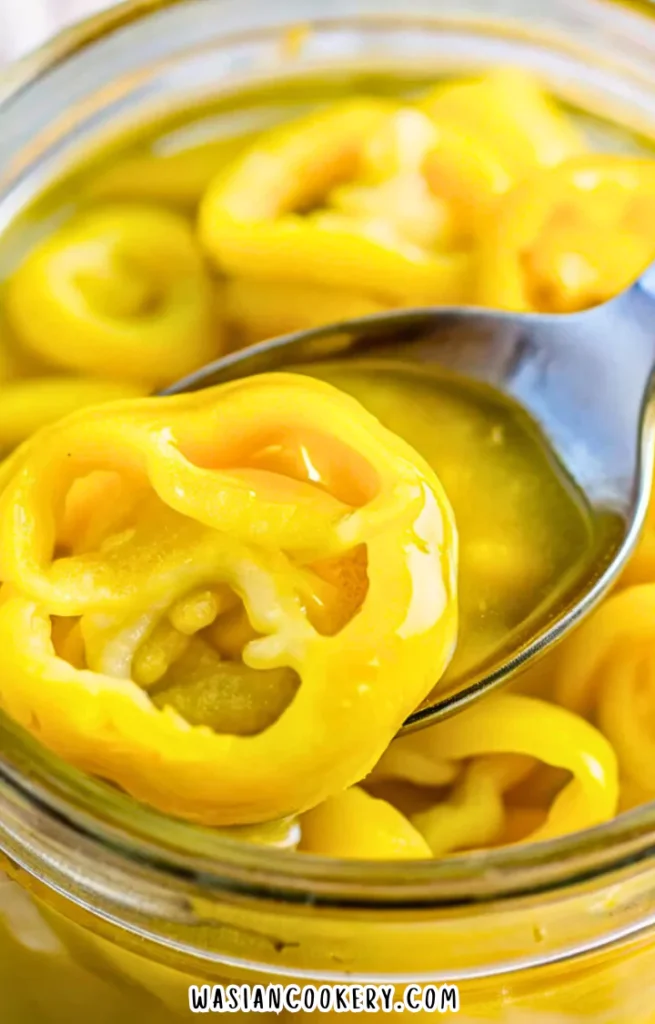
How To Make Pickled Banana Peppers
- Wash the peppers, trim away the stems, and cut into even rings about 1/4 inch thick. Remove loose seeds if desired. Slice the garlic. Wear gloves if handling hot peppers, and wash hands and work surfaces afterward.
- Wash the jars and rinse well. Place the empty heat-safe canning jars upright on a rack in a deep pot, fill them with hot water, and cover them with water by 1 inch. Boil for 10 minutes below 1,000 feet elevation, adding 1 minute for each additional 1,000 feet. Keep hot until filling. Prepare lids according to their manufacturer. This cleans the empty jars; it is not a canning process for the peppers.
- Meanwhile, combine the 2 cups white vinegar labeled 5% acidity, 1 cup water, sugar, and salt in a stainless steel saucepan. Bring to a boil, stirring until the sugar and salt have dissolved. Do not boil for a long time or reduce the brine.
- Add the sliced garlic, mustard seeds, peppercorns, and optional oregano. Simmer gently for about 2 minutes, then remove from the heat. Keep the brine hot while preparing to fill the jars.
- Lift and drain the hot jars carefully, placing them on a clean towel. Divide the pepper rings among them without crushing or packing too tightly. Ladle the hot brine over the peppers through a funnel, leaving about 1/2 inch of space below the rim and keeping the peppers covered.
- Use a clean small fork to release trapped air gently. If needed, rearrange the peppers between the jars so the existing brine covers them. Do not add plain water or make an improvised weaker brine. Wipe the rims clean.
- Cover the jars and allow the fiercest heat to subside briefly, about 20 minutes. Keep them on the towel and avoid sudden temperature changes that could break hot glass. Do not wait for a long countertop cooling period.
- Refrigerate promptly at 40°F or below, within 2 hours of preparation, or within 1 hour if the room is above 90°F. Leave space around the jars for cold air to circulate. Do not water-bath process this formula or store it in the pantry.
- Let the peppers chill thoroughly. For the fuller flavor used in the total-time estimate, leave them in the refrigerator for about 24 hours. This is refrigerated flavor development, not room-temperature curing or fermentation.
- Use a clean fork to lift out the amount needed, drain briefly, and return the jar to the refrigerator. Use the batch within 3–4 days of preparation. Discard any batch left at room temperature to cure, and do not taste it to check safety.
Allow about 20 minutes of active preparation, 20 minutes for heating and boiling while the jar and brine tasks overlap, a brief 20-minute cooling period, and 24 hours in the refrigerator for fuller flavor. The planned total is about 25 hours. Water-heating time and any elevation adjustment can add time. Keep the cooling period brief and refrigerate promptly even if the jars still feel warm.
Notes
- Start with fresh, firm peppers. Pickling cannot repair produce that is already soft or spoiled.
- Read the vinegar label rather than assuming every bottle has the same acidity. Homemade or unmarked vinegar is not appropriate here.
- Keep the measured brine unchanged. If it cannot cover the peppers, rearrange them in smaller containers rather than diluting it.
- Use stainless steel or another nonreactive saucepan. Avoid copper, brass, iron, and galvanized metal in contact with the acidic brine.
- Handle hot jars with a jar lifter and set them on a towel. Never pour hot brine into cold glass.
- Date the containers on the day of preparation. The overnight chilling period is part of the 3–4-day storage window.
- A lid can pull down as warm contents cool. That does not prove the contents are safe without refrigeration.
Ingredients You Can Add
Leave the stored batch unchanged. For a different flavor, add one of these to the portion on your plate immediately before eating.
- A pinch of red pepper flakes adds heat without changing the whole jar.
- Chopped fresh dill gives a bright, familiar pickle flavor.
- Chopped parsley adds a fresh green finish to a sandwich topping.
- A few cilantro leaves work well when the peppers are served with tacos.
- Thin jalapeño slices add more heat for people who enjoy spicy food.
- Finely sliced chives give a gentle onion flavor on a cheese sandwich.
What To Serve With Pickled Banana Peppers
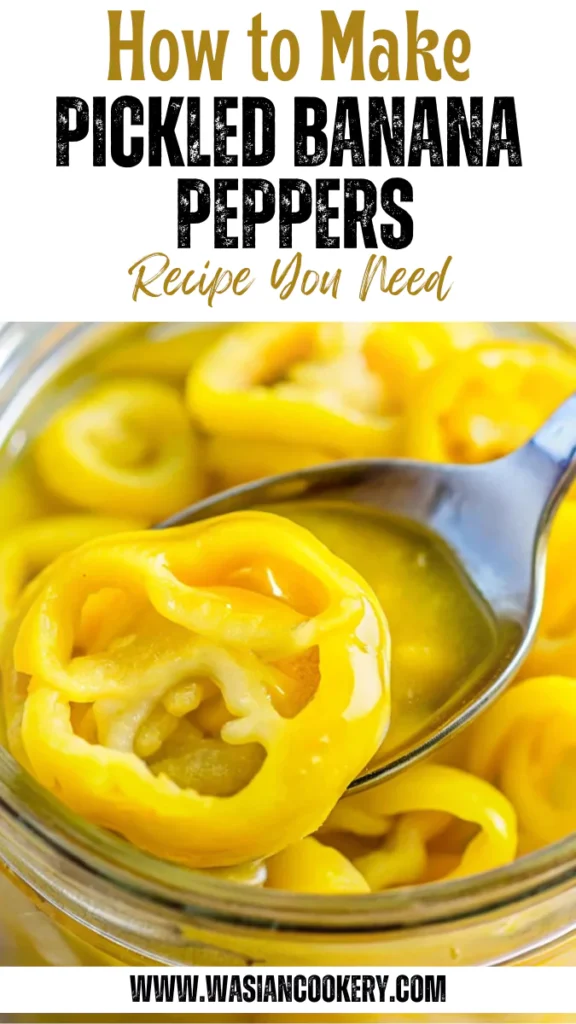
For me, these peppers are especially good on sandwiches and burgers. Add a few well-drained rings to a Jesse Kelly burger just before serving. Draining keeps the bun from soaking up too much liquid, while the peppers cut through the richness of the meat and cheese.
They also bring a lively topping to turkey burgers. Put a small bowl of rings on the table and let everyone add their own. Keep the rest of the batch refrigerated, and use a clean serving fork instead of reaching into the jar.
For a cold lunch, scatter chopped rings over pasta salad or a wrap. A separate bowl of spicy Korean cucumber salad makes another crisp side. Taste the rest of the meal before adding more salt because the peppers already bring a salty, tangy flavor.
Variations and Swaps
- Choose mild banana peppers when you want the flavor without much heat.
- Use a labeled hot banana pepper variety for more heat, keeping the same pepper weight and ring size.
- Leave tender seeds in for a rustic appearance or remove the loose seeds for neater rings.
- Use the optional oregano for an herby version, or leave it out as the ingredient list allows.
- Keep the rings whole for a burger topping.
- Chop a drained serving finely when adding it to a wrap or sandwich filling.
- Drain a serving more thoroughly for pizza so extra brine does not wet the crust.
- Serve a small chilled portion beside a cheese plate instead of mixing the peppers into the main dish. None of these choices changes the refrigeration requirement.
Storage
Keep all jars refrigerated at 40°F or below and use within 3–4 days from preparation. This is a conservative fresh-food storage limit, not a validated extended pickle shelf life. Do not store this recipe at room temperature, give it away as a shelf-stable preserve, or rely on a vacuum seal. Keep the peppers covered by their original brine during refrigerator storage.
Use a clean utensil each time and return the jar to the refrigerator promptly. Do not reuse brine that has held peppers for a new batch. Discard the entire contents if you see mold, unusual gas, sliminess, or other spoilage, but remember that the absence of those signs does not prove food is safe. If a batch was left out to cure, discard it without tasting.
FAQ
Can I can these peppers for the pantry?
No. This formula has no validated canning process. Heating the jars, filling them with hot brine, or using a water bath does not establish a safe shelf-stable product. Use a separate tested canning recipe for pantry pickles.
Do I need to wait a week before eating them?
No. Taste the peppers once thoroughly chilled, or give them about 24 hours in the refrigerator for fuller flavor. Use them within the stated 3–4-day period measured from preparation.
What if there is not enough brine?
Use smaller containers or rearrange the rings so the measured brine covers them. Do not top up with water. If you still cannot cover a portion, keep those peppers separate for another use.
Can I reduce the vinegar because it tastes sharp?
Keep the measured vinegar and water unchanged. Serve fewer drained rings, or pair them with bread and cheese to balance the sharpness on your plate.
Why did the peppers soften?
Older peppers, very thin slices, or longer heat exposure can soften them. Start with crisp produce, cut even rings, and avoid simmering the peppers themselves. Refrigerate promptly after filling.
Does a sealed lid mean the jar can stay out?
No. A lid pulling down only shows a pressure change as the contents cool. It does not validate the recipe, the acidity throughout the peppers, or a processing method. Keep the jar refrigerated.
Short Description
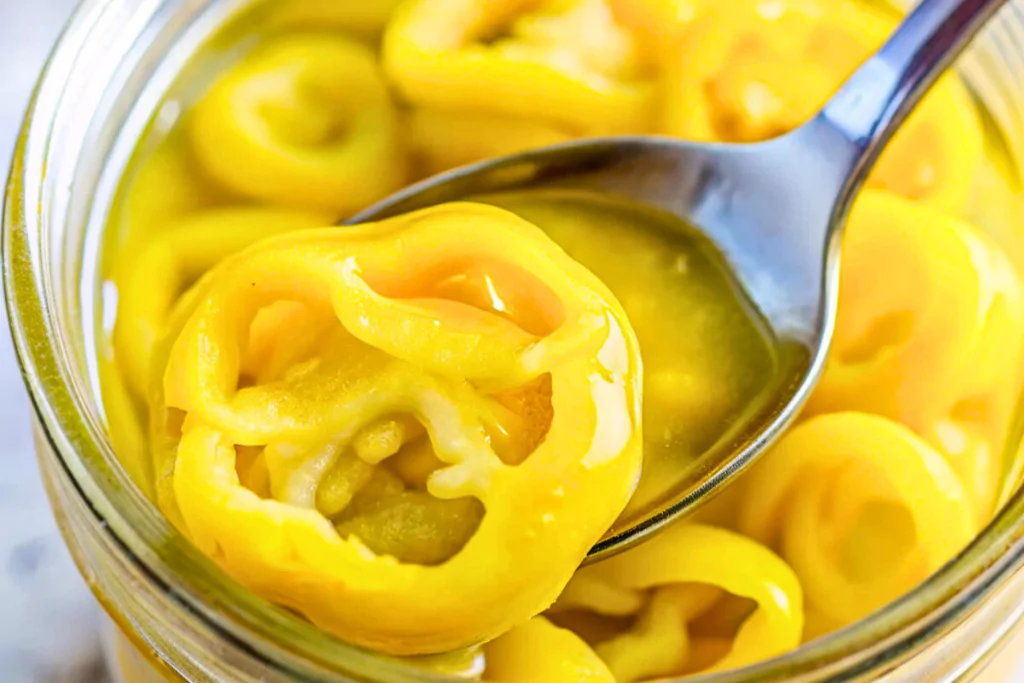
Tangy refrigerator banana pepper rings with garlic, mustard seeds, and peppercorns. Keep this one-batch recipe chilled, allow an overnight refrigerator rest for flavor, and use promptly as a sandwich or salad topping.
Easy Pickled Banana Peppers
Course: Sides, condimentCuisine: AmericanDifficulty: Easy1
batch20
minutes20
minutes25
hoursTangy refrigerator banana pepper rings with garlic and spices. Keep refrigerated at 40°F or below and use within 3–4 days; this is not a canning recipe.
Ingredients
1 pound banana peppers, sliced into rings
2 cups white vinegar
1 cup water
2 tablespoons sugar
2 tablespoons salt
4 cloves garlic, sliced
1 teaspoon mustard seeds
1 teaspoon black peppercorns
1 teaspoon dried oregano (optional)
Directions
- Wash the peppers, trim away the stems, and cut into even rings about 1/4 inch thick. Remove loose seeds if desired. Slice the garlic. Wear gloves if handling hot peppers, and wash hands and work surfaces afterward.
- Wash the jars and rinse well. Place the empty heat-safe canning jars upright on a rack in a deep pot, fill them with hot water, and cover them with water by 1 inch. Boil for 10 minutes below 1,000 feet elevation, adding 1 minute for each additional 1,000 feet. Keep hot until filling. Prepare lids according to their manufacturer. This cleans the empty jars; it is not a canning process for the peppers.
- Meanwhile, combine the 2 cups white vinegar labeled 5% acidity, 1 cup water, sugar, and salt in a stainless steel saucepan. Bring to a boil, stirring until the sugar and salt have dissolved. Do not boil for a long time or reduce the brine.
- Add the sliced garlic, mustard seeds, peppercorns, and optional oregano. Simmer gently for about 2 minutes, then remove from the heat. Keep the brine hot while preparing to fill the jars.
- Lift and drain the hot jars carefully, placing them on a clean towel. Divide the pepper rings among them without crushing or packing too tightly. Ladle the hot brine over the peppers through a funnel, leaving about 1/2 inch of space below the rim and keeping the peppers covered.
- Use a clean small fork to release trapped air gently. If needed, rearrange the peppers between the jars so the existing brine covers them. Do not add plain water or make an improvised weaker brine. Wipe the rims clean.
- Cover the jars and allow the fiercest heat to subside briefly, about 20 minutes. Keep them on the towel and avoid sudden temperature changes that could break hot glass. Do not wait for a long countertop cooling period.
- Refrigerate promptly at 40°F or below, within 2 hours of preparation, or within 1 hour if the room is above 90°F. Leave space around the jars for cold air to circulate. Do not water-bath process this formula or store it in the pantry.
- Let the peppers chill thoroughly. For the fuller flavor used in the total-time estimate, leave them in the refrigerator for about 24 hours. This is refrigerated flavor development, not room-temperature curing or fermentation.
- Use a clean fork to lift out the amount needed, drain briefly, and return the jar to the refrigerator. Use the batch within 3–4 days of preparation. Discard any batch left at room temperature to cure, and do not taste it to check safety.
Notes
- Refrigerator pickles only. Use 5% acidity white vinegar and preserve all listed ingredient quantities. No water-bath process or pantry storage is provided.
- Yield is one batch; jar count and packed volume vary with slicing and packing.
- The approximate 25-hour total includes 20 minutes preparation, 20 minutes heating, 20 minutes brief cooling, and 24 hours refrigerated flavor development. Elevation adjustments or slower heating add time.
- Refrigerate promptly at 40°F or below, within 2 hours of preparation, or 1 hour above 90°F. Use within 3–4 days from preparation. A sealed lid is not proof of shelf stability.