Monster Rice Krispie Treats
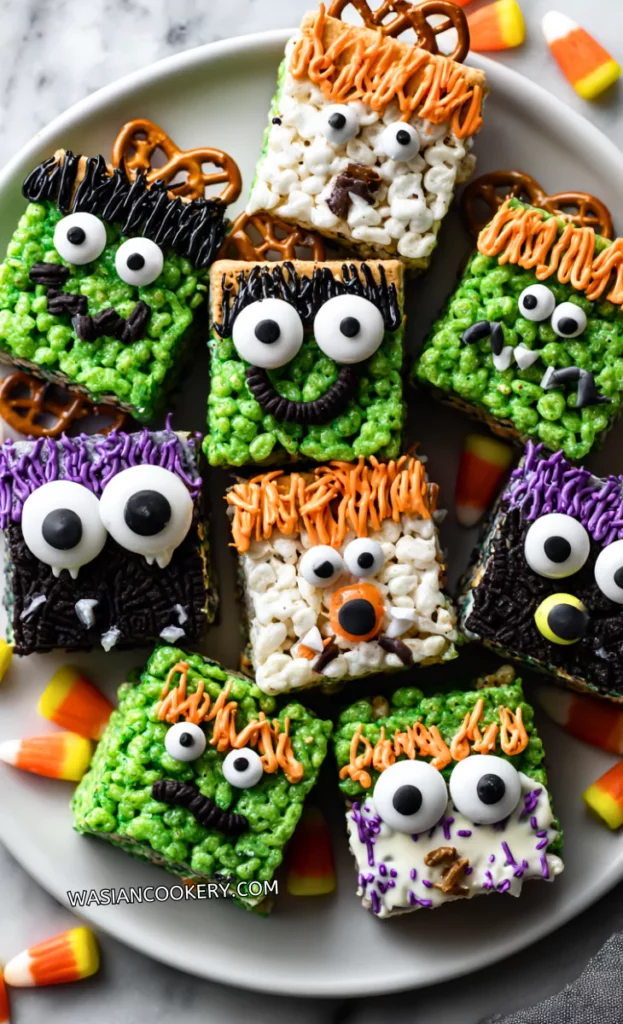
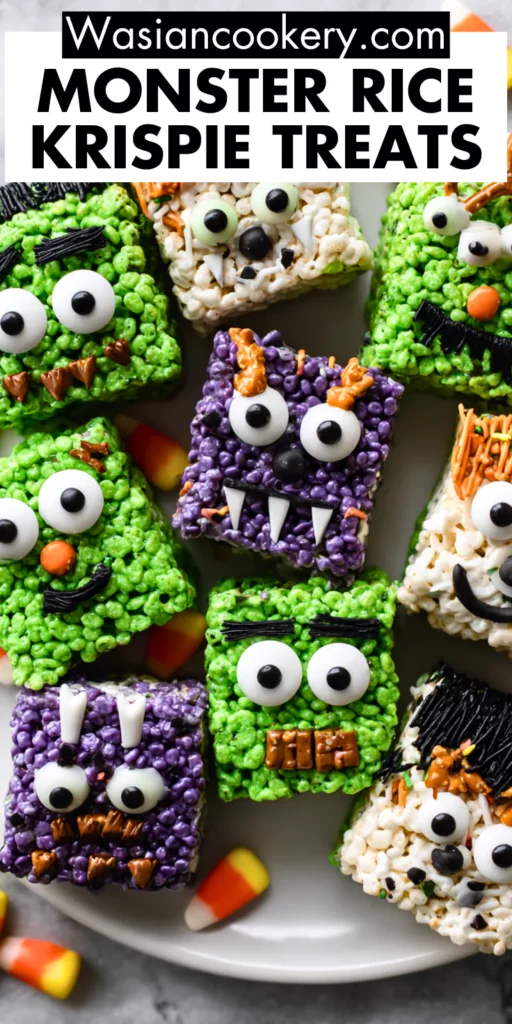
I love these Monster Rice Krispie Treats for their bright colors and silly faces. I started making them for my daughter’s preschool Halloween party and have kept the idea in my kitchen ever since. A tray of plain cereal treats becomes something playful with candy eyes and pretzel hair.
I use gel food coloring for bright shades and buy candy eyes in bulk. Each monster can look different, so there is no need for neat matching faces. A crooked smile or an extra eye fits right in.
The treats do not need an oven, but they do need melting, cooling, decorating, and setting time. Adults should handle the hot mixture and cutting, while children can help choose and place suitable decorations on cooled treats with supervision.
Why This Dish Is Great
- A simple base: Cereal, marshmallows, and butter make the familiar chewy center. Food coloring changes its appearance without a separate batter.
- No oven needed: A saucepan handles the base, and the coating melts in a microwave-safe bowl according to its package.
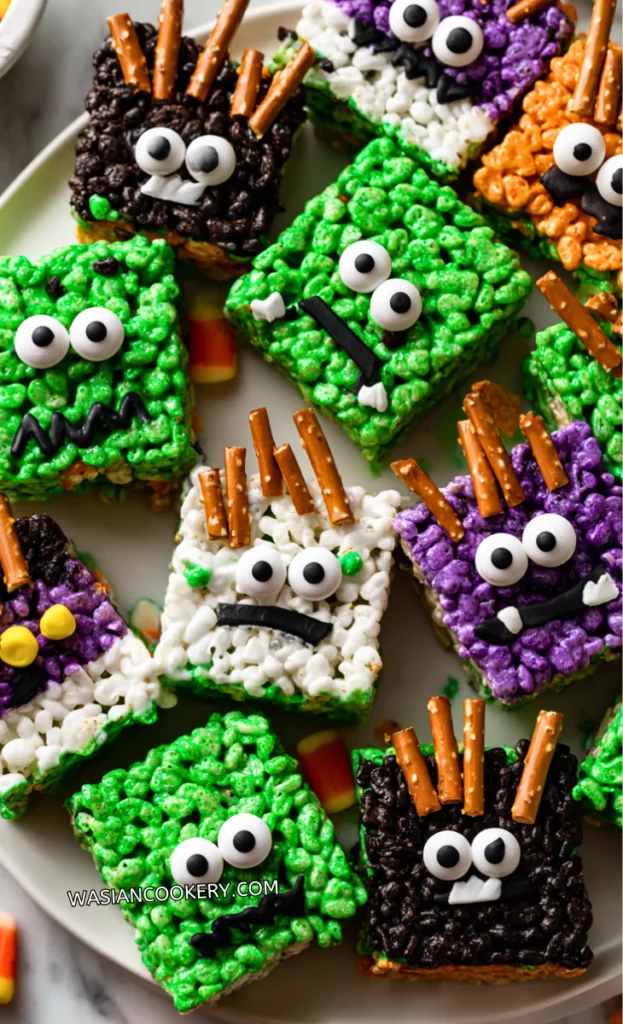
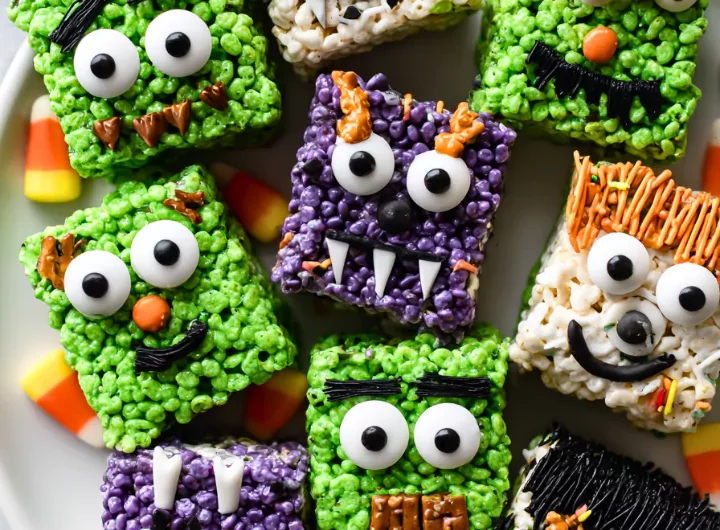
- Individual personalities: Candy eyes, pretzels, and a little gel make each rectangle look different. Uneven decorations suit the monster theme.
- Easy portions: Four rows by four columns make sixteen treats. Plain rectangles leave very little waste compared with cutout shapes.
- Useful preparation ahead: Make and cool the base before decorating. This gives you a clear work surface and keeps toppings away from the hot saucepan.
Choosing Marshmallows And Cereal
Use fresh, soft marshmallows and crisp cereal. Stale marshmallows take more effort to melt and can leave a firmer texture. Measure the cereal without crushing it, and have it beside the stove before heating the butter.
Choose 4 cups mini marshmallows or 40 large marshmallows, not both, and avoid jumbo marshmallows for the counted option. These amounts are not necessarily equal by weight: sizes and cup-to-weight conversions vary by brand, so the finished texture may differ between the two options. The method below uses the mini option.
Ingredients
- For the Base:
- 6 cups Rice Krispies cereal
- 4 cups mini marshmallows (or 40 large marshmallows)
- 3 tablespoons butter
- Green food coloring (or any monster colors)
- Non-stick cooking spray
- For Decorating:
- 1 cup white chocolate melting wafers
- Candy eyes (various sizes)
- Pretzel sticks (for monster hair)
- Mini chocolate chips
- Colored candy melts (orange, purple, black)
- Black decorating gel
- Gummy worms
- Candy corn
- Sprinkles
The 3 tablespoons butter belong in the marshmallow base; use the listed cooking spray for the pan and spatula. The full 1 cup white chocolate melting wafers is for light dipping, drizzling, and attaching decorations across sixteen treats. Choose among the unmeasured candies for faces rather than covering every treat with every topping.
Kitchen Equipment You Will Need
As an Amazon Associate I earn from qualifying purchases.
- Large saucepan
- 9×13-inch baking pan
- Silicone spatula
- Measuring cups
- Measuring spoons
- Microwave-safe bowls
- Small decorating bowls
- Chef knife
- Cutting board
- Parchment paper
- Serving tray
- Cookie cutters
- Mini muffin pan
- Airtight freezer containers
How To Make Monster Rice Krispie Treats
Allow about 1 hour 25 minutes: 30 minutes active preparation, cutting, and decorating; about 10 minutes total melting time; 30 minutes cooling; and 15 minutes setting. Intricate faces, extra colors, or a warm room can take longer. Cooling and setting are essential parts of the total.
Step 1:
Lightly spray a 9×13-inch pan with the listed non-stick cooking spray, or line it with parchment and lightly spray the paper. Measure the 6 cups cereal and your chosen marshmallow option before heating anything. Keep the decorating ingredients away from the stove until the base has cooled.
Step 2:
Melt all 3 tablespoons butter in a large saucepan over low heat. Add the 4 cups mini marshmallows, or the alternative of 40 large marshmallows, and stir until just smooth. Avoid boiling or browning. Allow roughly 5–7 minutes, depending on the pan and marshmallow size, then remove from the heat.
Step 3:
Stir in green food coloring or your chosen monster color. The listed 4–5 drops is a starting point for drop-style coloring; concentrated gels need less. Follow the coloring label and mix evenly before adding cereal.
Step 4:
Immediately fold in all 6 cups cereal with a sturdy silicone spatula until no large dry pockets remain. Scrape from the bottom and turn the mixture over itself without crushing the cereal.
Step 5:
Transfer to the prepared pan. Lightly spray the spatula away from the burner and use it to press the mixture gently into an even layer. Do not touch the hot marshmallow mixture with bare hands or pack it down hard.
Step 6:
Let the slab cool completely, about 30 minutes or longer if still warm. Lift it onto a cutting board if using parchment. Cut into four rows and four columns for 16 rectangles, or use cookie cutters for the optional shaped version with a different yield.
Step 7:
Put the full 1 cup white chocolate melting wafers into a dry microwave-safe bowl and melt according to the package, stirring between short intervals. Melt any colored candy melts separately according to their label. Allow about 3–5 minutes for melting and stirring; more colors add time.
Step 8:
Use the melted white wafers to lightly dip one end of each treat or drizzle over the tops, sharing the measured cup across the batch. Add candy eyes while the coating is wet. Attach pretzel-stick hair, mini chocolate-chip features, and candy-corn teeth as desired.
Step 9:
Use the colored candy melts for patches or hair, black decorating gel for mouths or eyebrows, gummy worms for arms, and sprinkles for spots. Work on a few treats at a time so the coating stays tacky while attaching the decorations.
Step 10:
Place the treats on a parchment-lined tray and let the coating set for about 15 minutes, or longer until firm enough to handle. Check the decorating-gel label because some gels stay soft. Serve or pack individually only when the coatings are set.
Notes
- Prepare first: Measure the cereal and line the pan before melting. Once the marshmallows are ready, the mixture starts firming quickly.
- Use low heat: Stop heating when the marshmallows become smooth. Continuing to cook the mixture can make the finished treats harder.
- Press lightly: Spread into the corners with the sprayed spatula. Heavy pressure compresses the cereal and removes the light texture.
- Wait for cooling: A warm slab bends and tears when cut. Give it longer if the middle still feels warm after the estimated half hour.
- Keep bowls dry: Water can make melted coating thick and grainy. Dry the bowls and tools before measuring the wafers.
- Decorate in groups: Coat a few rectangles, add their eyes, then move on. This keeps the coating from setting before the decorations stick.
- Match decorations to guests: Read candy labels and check party food rules. Avoid hard or chewy decorations that are unsuitable for very young children.
Ingredients You Can Add
- Cocoa: Use the measured chocolate variation below for a darker base beneath pale candy eyes.
- Peanut butter: The measured peanut-butter variation below changes the flavor and softness. Check allergies before serving a shared tray.
- Vanilla or almond extract: A little can flavor the marshmallow mixture. Almond extract changes the flavor noticeably, so use a light hand.
- Edible glitter: Choose a product specifically labeled edible, with an ingredient list. Craft glitter does not belong on food.
- Coconut flakes: Sprinkle onto wet coating for fuzzy hair. Keep the amount small enough that the candy eyes remain visible.
- Mini M&Ms: Press into the soft coating for bright spots or buttons. They also work as simple features when candy eyes are unavailable.
What To Serve
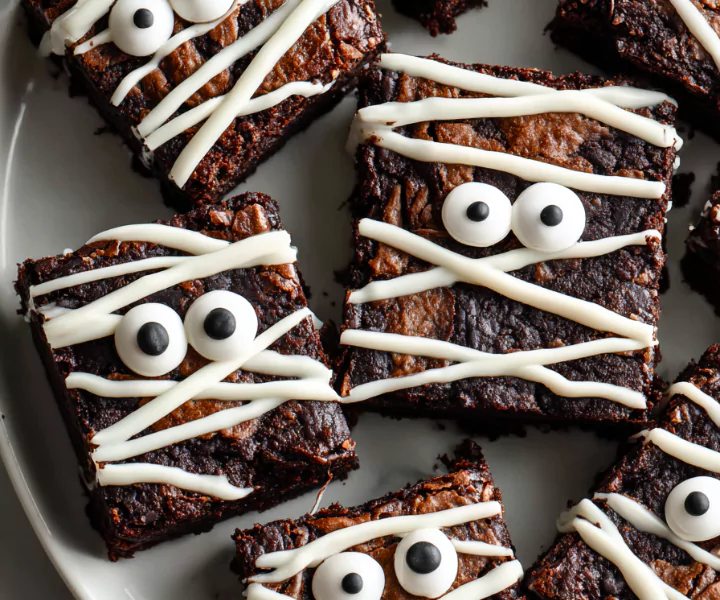
One of my favorite party setups pairs these monsters with cold milk, hot chocolate, or apple cider. Add Spooky Mummy Brownies for another Halloween shape, arranging the two treats on separate platters so the delicate faces stay clear.
For a matching colorful tray, serve Monster Eye Cookies alongside the cereal monsters. I also pack individual treats in clear bags for classroom parties; check the school’s food rules and include ingredient information when sharing.
A pitcher of Cracker Barrel peach tea gives adults a cold drink option. Water or milk works too. Keep drinks beside the dessert table rather than over the treats, where splashes can soften the cereal.
Recipe Variations And Swaps
- Chocolate monsters: Stir 2 tablespoons cocoa powder into the melted marshmallow mixture before adding cereal. Mix well to avoid dry pockets.
- Peanut Butter Beasts: Stir 1/2 cup peanut butter into the warm marshmallow mixture off heat before the cereal. Keep this batch clearly separate for guests avoiding peanuts.
- Fruity creatures: Replace the cereal with Fruity Pebbles using the same measured volume and skip food coloring if the cereal gives enough color.
- Gluten-free goblins: Use certified gluten-free crisp rice cereal and suitable decorations. Check pretzels, marshmallows, candy eyes, and coating labels as well.
- Vegan monsters: Use vegan marshmallows, plant-based butter, and dairy-free coating, then check every candy decoration. Melting and setting can differ between brands.
- Protein-powder variation: This option adds vanilla protein powder before cereal. It can make the mixture dry or stiff, so treat it as an optional experiment without a guaranteed result.
- Mini monster bites: Press gently into sprayed mini muffin wells. Expect about 36 small treats, depending on well size and fullness; cool before lifting out.
- Cookie-cutter creatures: Cut the cooled slab with lightly sprayed cutters. Save the scraps for snacks rather than repeatedly compressing them into dense shapes.
How To Store
Keep fully set treats in an airtight container at cool room temperature for up to 2 days. Follow any shorter storage instruction on a decoration label. Parchment between layers helps prevent sticking, though a single layer protects raised eyes and pretzel hair better. Keep the container away from heat and direct sunlight.
For longer storage, freeze undecorated treats in an airtight freezer container for up to 1 month, with parchment between layers. Let them thaw completely while covered, then check that the surface is dry before decorating. Refrigeration tends to make the cereal bars firmer, so a cool room suits short storage better.
FAQ
Why are my treats hard?
Overheating the marshmallows, using stale marshmallows, or pressing too firmly can make them hard. Melt gently and press only enough to spread the mixture evenly.
Can I use the microwave for the base?
Yes. Use a very large microwave-safe bowl and heat butter and marshmallows in short intervals, stirring between them until smooth. Timing varies; an adult should handle the hot bowl.
Why will the eyes not stick?
Add them while the coating is still wet. If it has set, attach each eye with a fresh dot of melted coating from the measured decorating portion.
Can I use more than one color?
Yes. Divide the melted marshmallow mixture and cereal into matching portions, then color and combine separately. Work quickly and allow extra preparation time.
Can I decorate them the next day?
Yes. Store the cooled plain slab airtight, then cut and decorate the next day. Allow the coating to set fully before packing.
Do I need all the listed decorations?
No. The unmeasured candies are choices for different faces. The measured white wafers provide coating and edible glue; a few eyes and a simple smile are enough.
Short Description
Monster Rice Krispie Treats turn a buttery marshmallow cereal base into colorful Halloween faces with white chocolate wafers, candy eyes, and playful decorations. Cool, decorate, and let the coating set before serving.
Monster Rice Krispie Treats Recipe
Course: Dessert, SnacksCuisine: AmericanDifficulty: Easy16
monster treats30
minutes10
minutes1
hour25
minutesMonster Rice Krispie Treats turn a buttery marshmallow cereal base into colorful Halloween faces with white chocolate wafers, candy eyes, and playful decorations. Cool, decorate, and let the coating set before serving.
Ingredients
- For the Base:
6 cups Rice Krispies cereal
4 cups mini marshmallows (or 40 large marshmallows)
3 tablespoons butter
Green food coloring (or any monster colors)
Non-stick cooking spray
- For Decorating:
1 cup white chocolate melting wafers
Candy eyes (various sizes)
Pretzel sticks (for monster hair)
Mini chocolate chips
Colored candy melts (orange, purple, black)
Black decorating gel
Gummy worms
Candy corn
Sprinkles
Directions
- Lightly spray a 9×13-inch pan with the listed non-stick cooking spray, or line it with parchment and lightly spray the paper. Measure the 6 cups cereal and your chosen marshmallow option before heating anything. Keep the decorating ingredients away from the stove until the base has cooled.
- Melt all 3 tablespoons butter in a large saucepan over low heat. Add the 4 cups mini marshmallows, or the alternative of 40 large marshmallows, and stir until just smooth. Avoid boiling or browning. Allow roughly 5–7 minutes, depending on the pan and marshmallow size, then remove from the heat.
- Stir in green food coloring or your chosen monster color. The listed 4–5 drops is a starting point for drop-style coloring; concentrated gels need less. Follow the coloring label and mix evenly before adding cereal.
- Immediately fold in all 6 cups cereal with a sturdy silicone spatula until no large dry pockets remain. Scrape from the bottom and turn the mixture over itself without crushing the cereal.
- Transfer to the prepared pan. Lightly spray the spatula away from the burner and use it to press the mixture gently into an even layer. Do not touch the hot marshmallow mixture with bare hands or pack it down hard.
- Let the slab cool completely, about 30 minutes or longer if still warm. Lift it onto a cutting board if using parchment. Cut into four rows and four columns for 16 rectangles, or use cookie cutters for the optional shaped version with a different yield.
- Put the full 1 cup white chocolate melting wafers into a dry microwave-safe bowl and melt according to the package, stirring between short intervals. Melt any colored candy melts separately according to their label. Allow about 3–5 minutes for melting and stirring; more colors add time.
- Use the melted white wafers to lightly dip one end of each treat or drizzle over the tops, sharing the measured cup across the batch. Add candy eyes while the coating is wet. Attach pretzel-stick hair, mini chocolate-chip features, and candy-corn teeth as desired.
- Use the colored candy melts for patches or hair, black decorating gel for mouths or eyebrows, gummy worms for arms, and sprinkles for spots. Work on a few treats at a time so the coating stays tacky while attaching the decorations.
- Place the treats on a parchment-lined tray and let the coating set for about 15 minutes, or longer until firm enough to handle. Check the decorating-gel label because some gels stay soft. Serve or pack individually only when the coatings are set.
Notes
- Makes 16 rectangles when a 9×13-inch slab is cut 4 by 4. Allow 85 minutes: 30 active preparation, cutting, and decorating; 10 melting; 30 cooling; 15 setting. Extra colors, intricate decorating, or a warm room add time.
- Choose 4 cups mini marshmallows or 40 large marshmallows, not both. These amounts may differ in weight and finished texture because marshmallow sizes vary by brand. All 3 tablespoons butter goes in the base, and all 6 cups cereal is folded in off heat.
- Share the measured 1 cup white melting wafers across all 16 treats for light dipping, drizzling, and attaching candies. Use colored candy melts and assorted unmeasured decorations as desired.
- Melt gently and press with a sprayed spatula; hot marshmallow can burn. Adults handle heating and cutting. Let the base cool completely before decorating.
- Store airtight at cool room temperature for up to 2 days, subject to any shorter decoration-label directions. Freeze undecorated treats for up to 1 month and thaw fully before decorating.